Alarms
Create alarms and monitor from threshold rules
Overview
The Alarms service enables users to create alarms triggered by threshold conditions defined in the Rules Engine. When a rule is triggered, the system generates an alarm with relevant information for monitoring and response.
The alarm object includes the following fields:
| Option | Description | Required |
|---|---|---|
id | Unique identifier of the alarm | ❌ |
rule_id | ID of the rule that triggered the alarm | ✅ (added by system) |
domain_id | ID of the domain this alarm belongs to | ✅ (added by system) |
channel_id | ID of the channel related to the alarm | ✅ (added by system) |
client_id | ID of the client associated with the alarm | ✅ (added by system) |
subtopic | Subtopic of the message that triggered the alarm | ❌ |
status | Current status of the alarm (e.g., active, cleared) | ❌ |
measurement | Name of the measurement involved in the alarm condition | ✅ |
value | Value that triggered the alarm | ✅ |
unit | Unit of the measurement value | ❌ |
threshold | Threshold value set in the rule that triggered the alarm | ✅ |
cause | Explanation of why the alarm was triggered | ✅ |
severity | Severity level of the alarm (e.g., 1 = low, 5 = critical) | ✅ |
assignee_id | ID of the user assigned to resolve the alarm | ❌ |
created_at | Timestamp when the alarm was created | ❌ |
updated_at | Timestamp when the alarm was last updated | ❌ |
updated_by | ID of the user who last updated the alarm | ❌ |
assigned_at | Timestamp when the alarm was assigned | ❌ |
assigned_by | ID of the user who assigned the alarm | ❌ |
acknowledged_at | Timestamp when the alarm was acknowledged | ❌ |
acknowledged_by | ID of the user who acknowledged the alarm | ❌ |
resolved_at | Timestamp when the alarm was resolved | ❌ |
resolved_by | ID of the user who resolved the alarm | ❌ |
metadata | Additional metadata related to the alarm | ❌ |
Use Cases
Common scenarios where alarms provide value in IoT systems:
- Temperature Monitoring: Alert when sensors report values outside safe thresholds in server rooms, greenhouses, or refrigerators
- Power Consumption: Trigger alerts when energy usage exceeds limits to prevent overload or equipment damage
- Air Quality: Detect hazardous gas levels (CO₂, smoke) in smart buildings
- Water Leak Detection: Alert when sensors detect unexpected moisture in facilities or homes
- Machine Monitoring: Generate alerts based on vibration or noise thresholds for preventive maintenance
- Security Events: Detect unauthorized access or motion in restricted areas
Create Alarm
To create an alarm, define an alarm rule in the Rules Engine:
-
Navigate to the Rules page and create a new rule
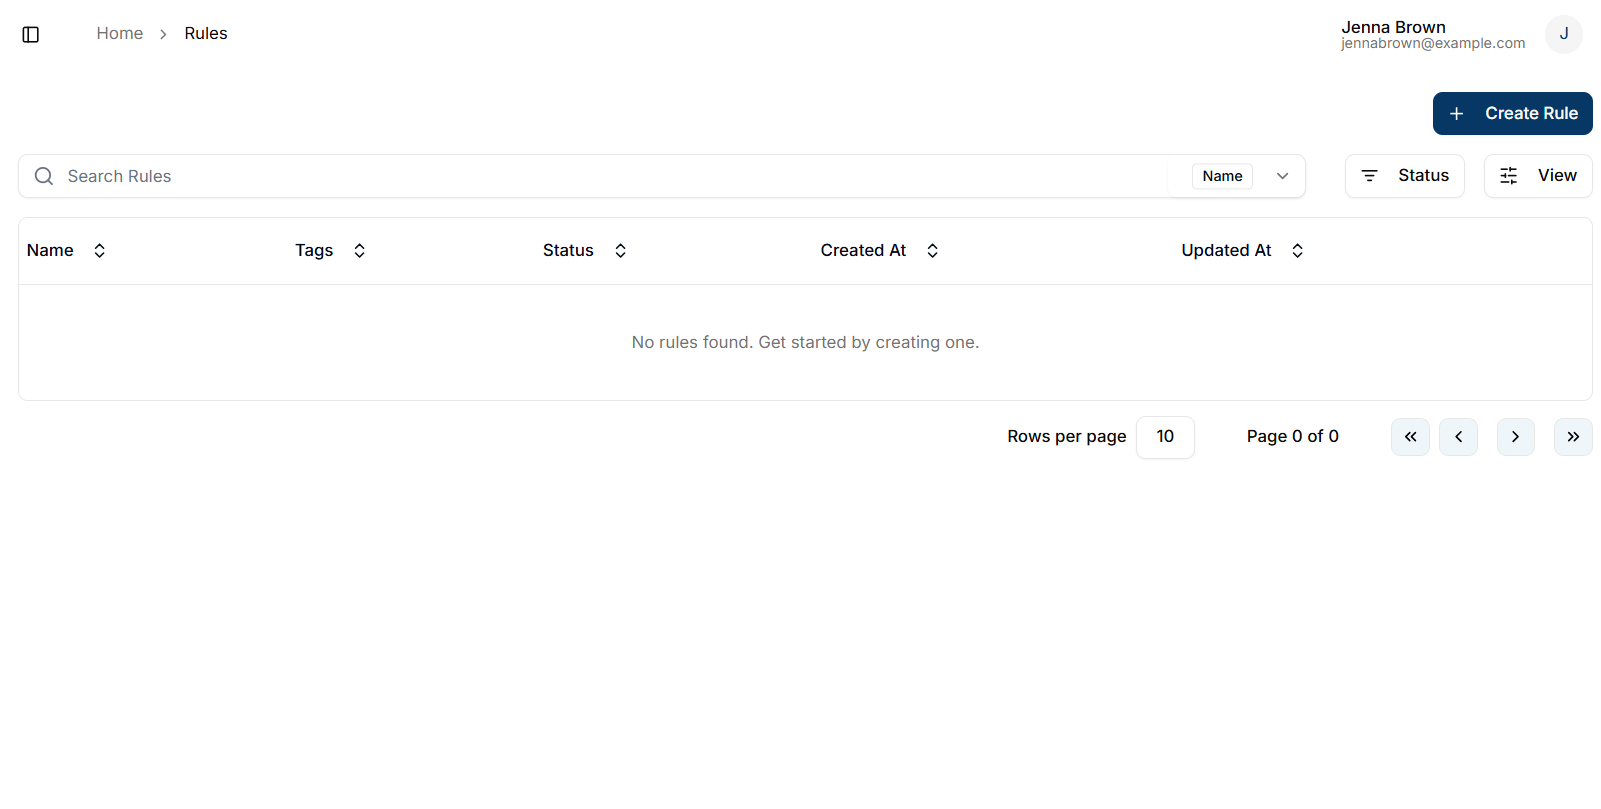
-
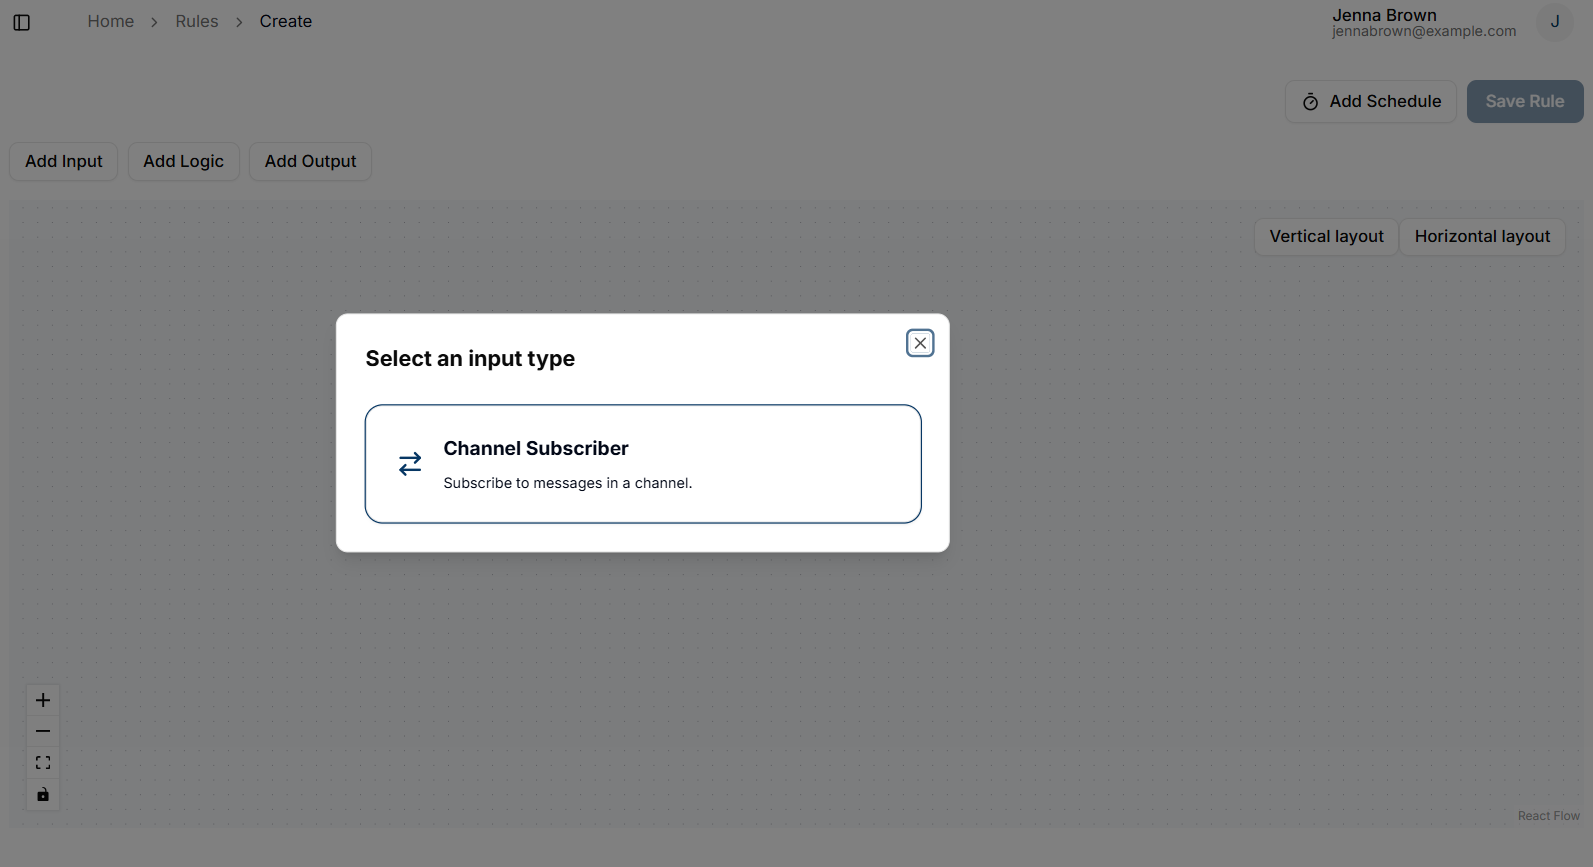
Click + Create Rule to open the rule editor
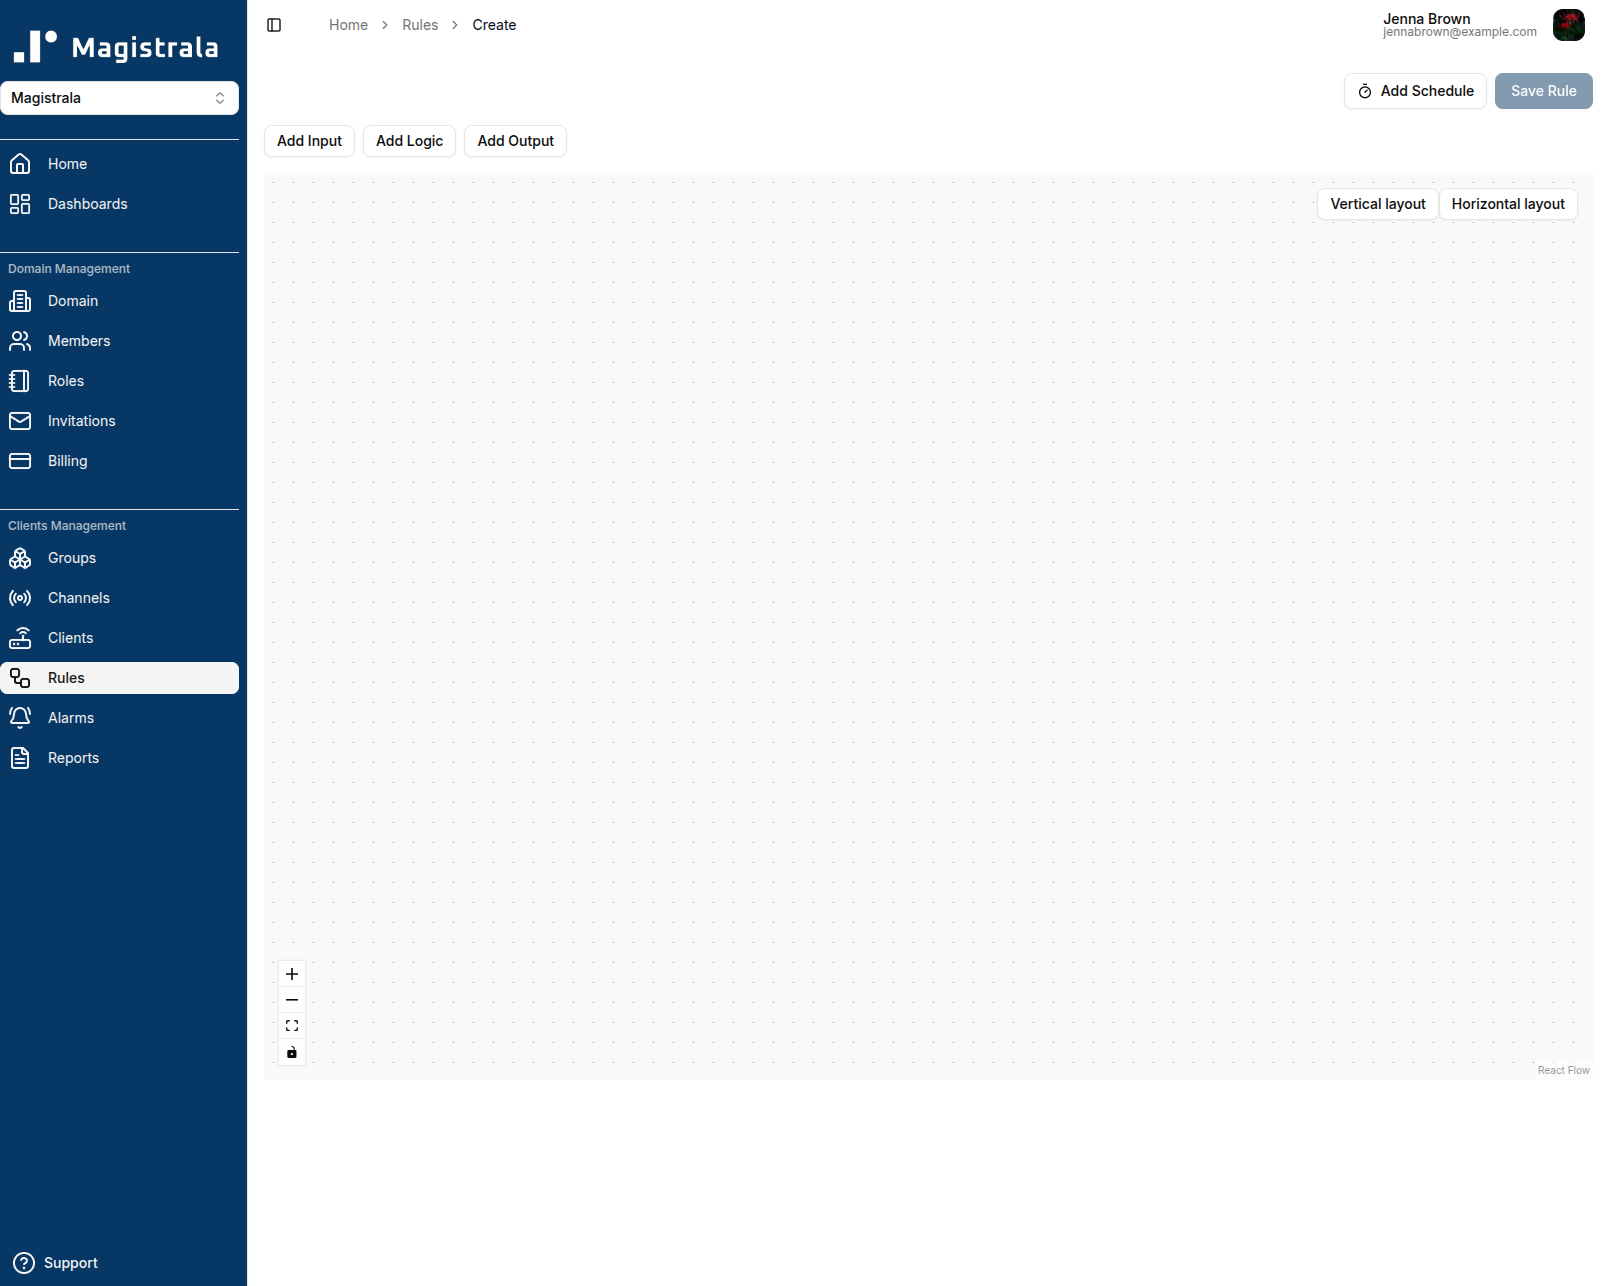
-
Add an Input node with channel and topic configuration
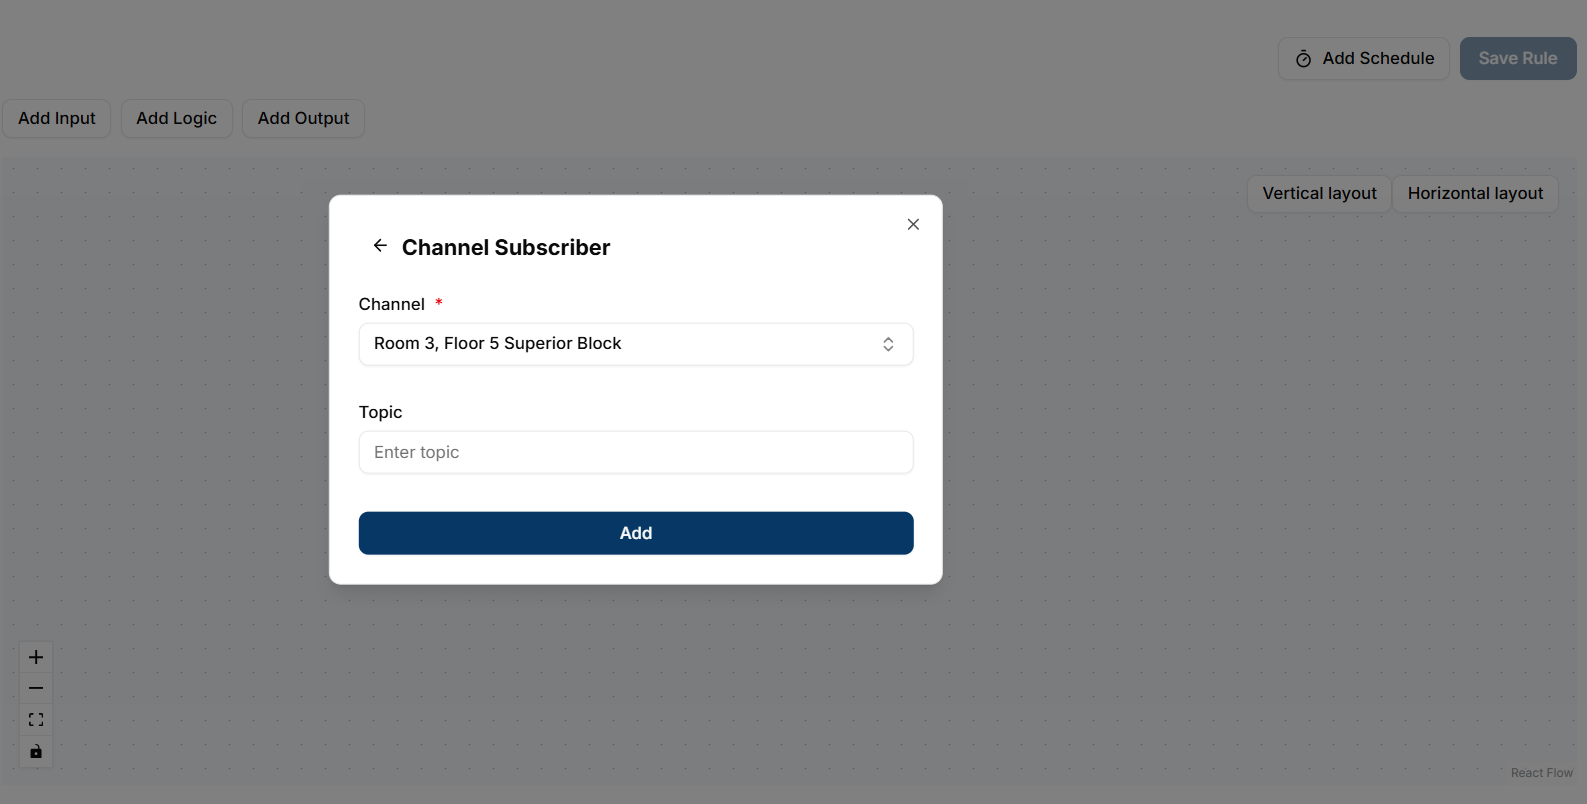
-
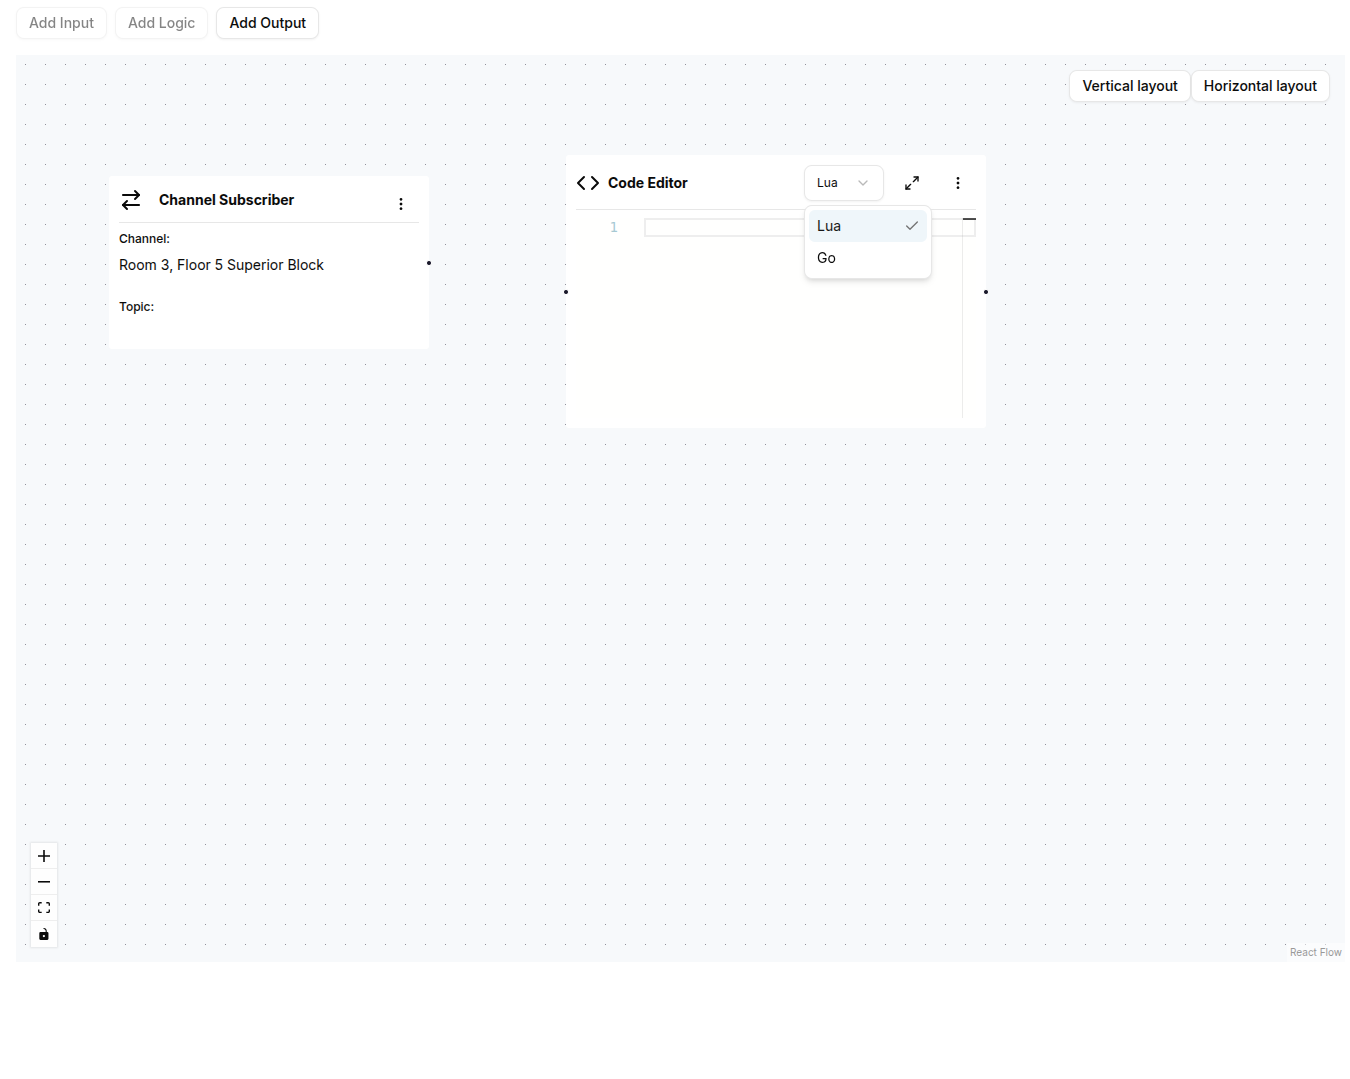
Add an Editor block for rule logic

-
Add the Alarm node as output
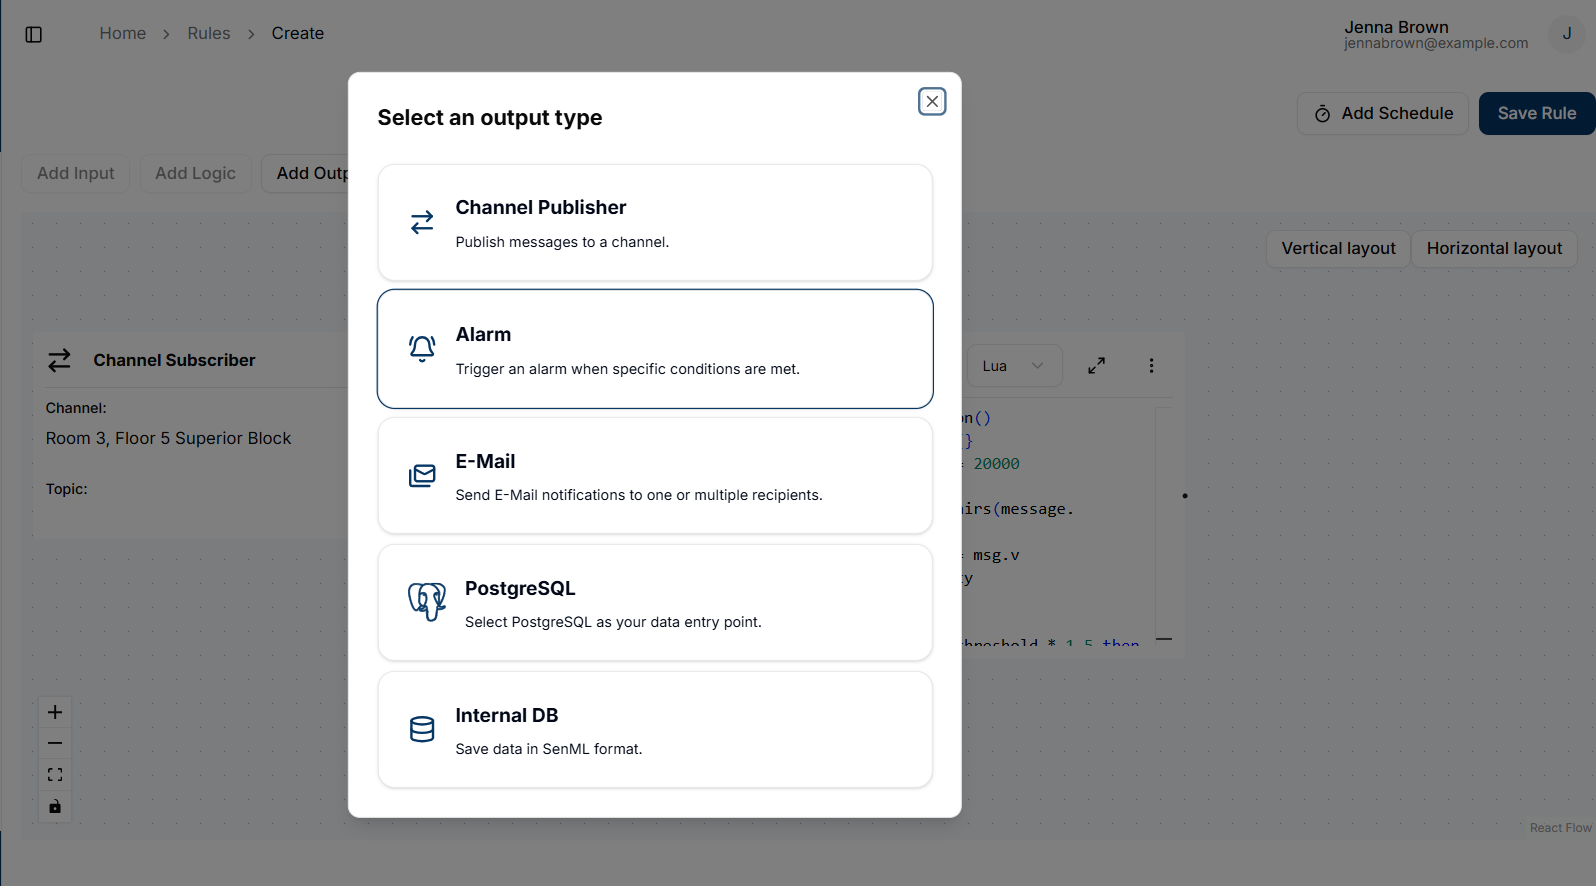
-
Save the rule by clicking Save Rule and provide a name
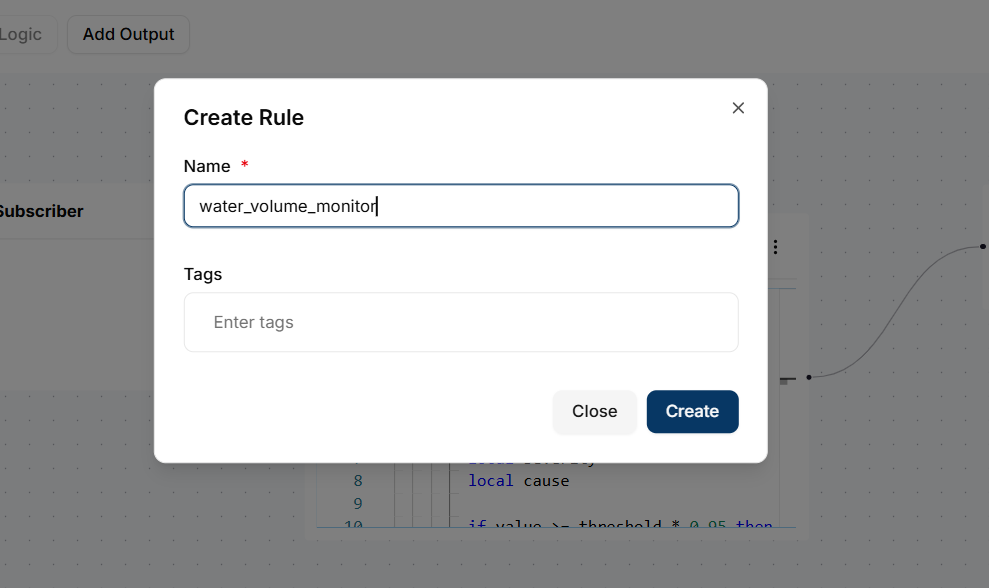
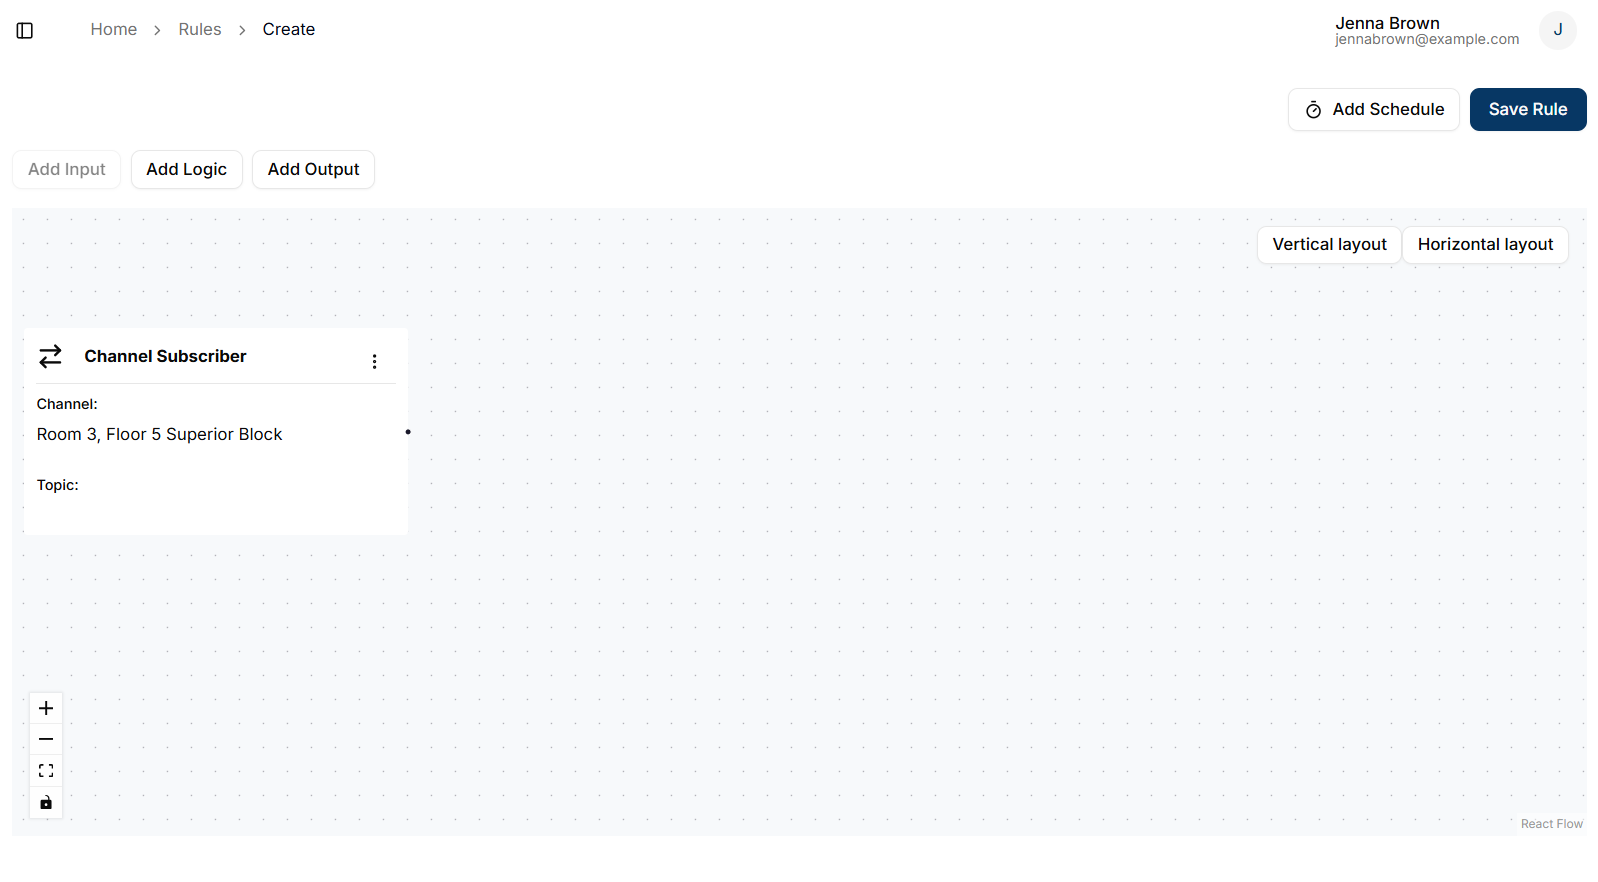
-
View the completed rule
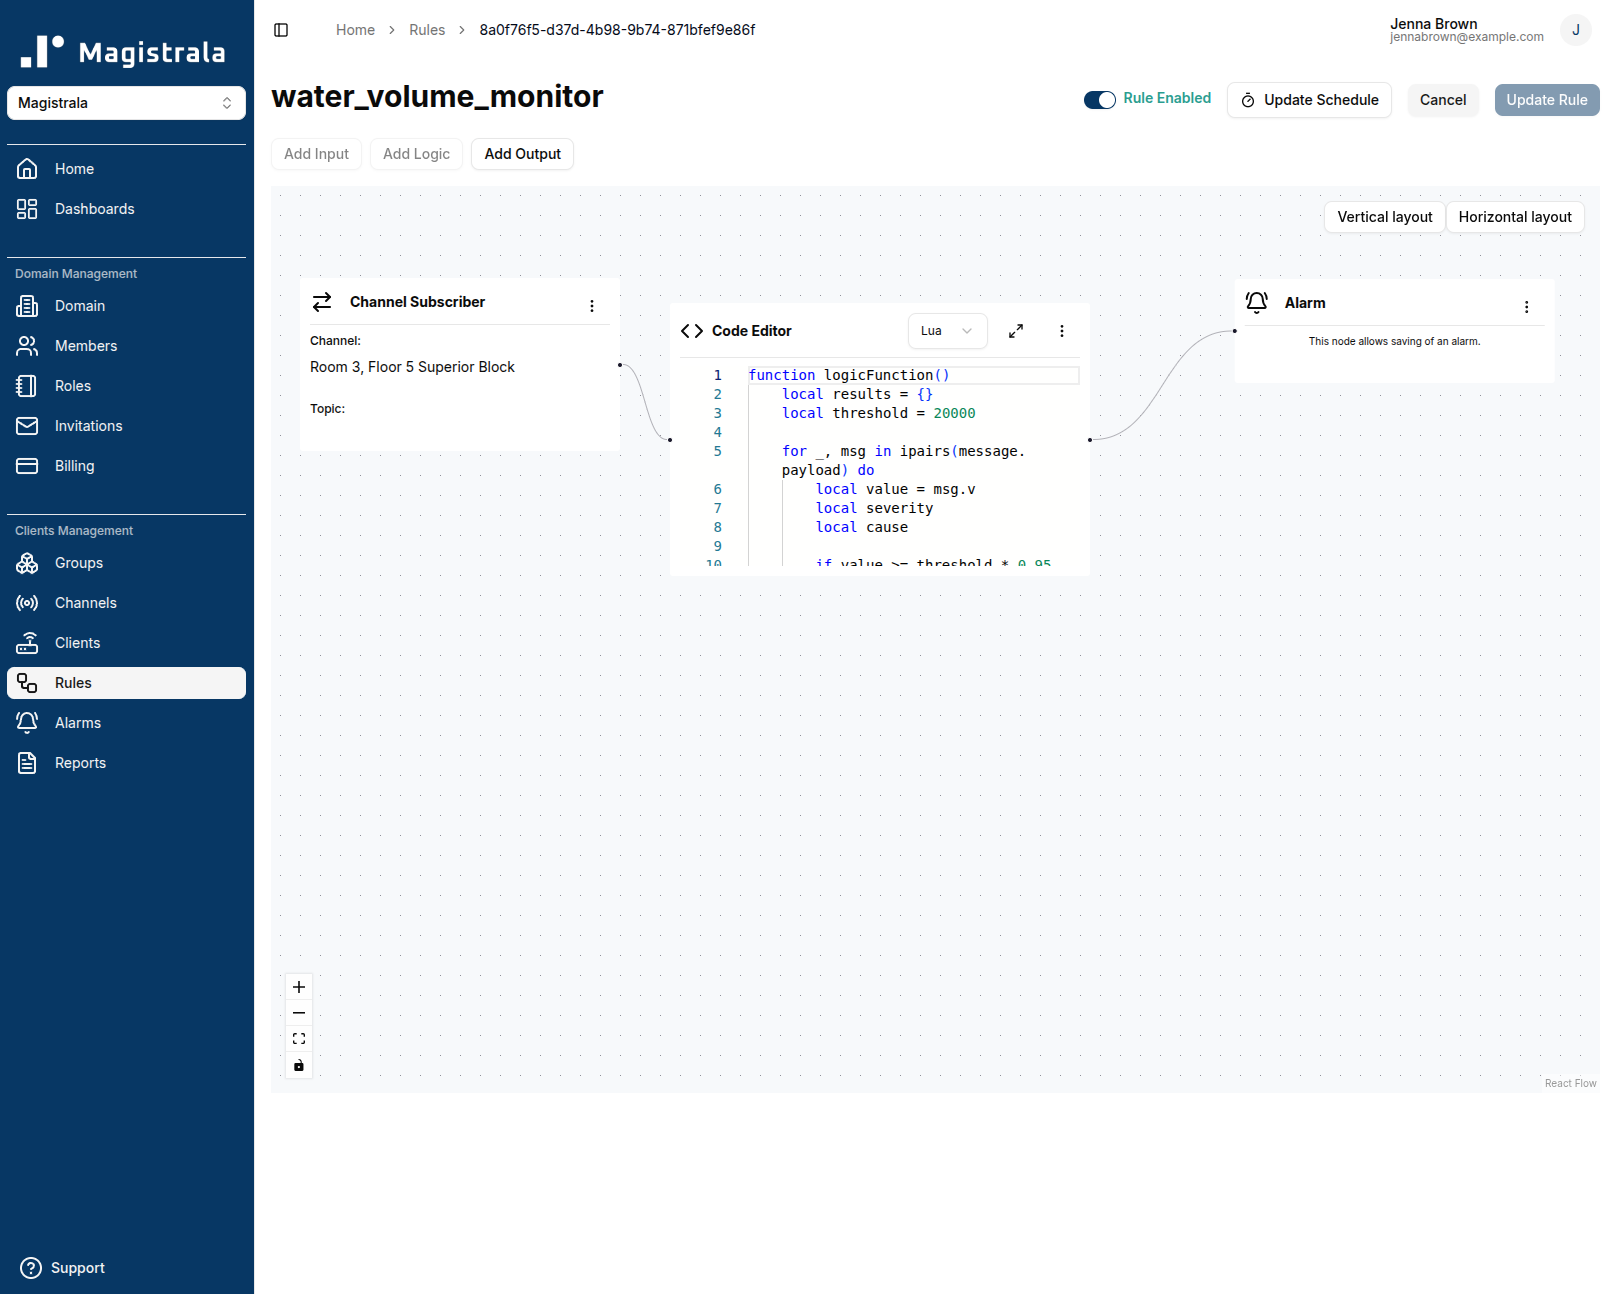
Below are examples of Lua and Go scripts for checking water level thresholds:
function logicFunction()
    local results = {}
    local threshold = 2000

    for _, msg in ipairs(message.payload) do
        local value = msg.v
        local severity
        local cause

        if value >= threshold * 1.5 then
            severity = 5
            cause = "Critical level exceeded"
        elseif value >= threshold * 1.2 then
            severity = 4
            cause = "High level detected"
        elseif value >= threshold then
            severity = 3
            cause = "Threshold reached"
        end

        table.insert(results, {
            measurement = msg.n,
            value = tostring(value),
            threshold = tostring(threshold),
            cause = cause,
            unit = msg.unit,
            severity = severity,
        })
    end

    return results
end
return logicFunction()package main
import (
m "messaging"
"fmt"
"strconv"
)
type alarm struct {
Measurement string
Value string
Threshold string
Cause string
Unit string
Severity uint8
}
func logicFunction() any {
results := []alarm{}
threshold := 2000.0
pld, ok := m.message.Payload.([]any)
if !ok {
panic("invalid payload")
}
for _, m := range pld {
if m == nil {
continue
}
msg, ok := m.(map[string]any)
if !ok {
panic("not map")
}
value := msg["v"].(float64)
unit := msg["u"].(string)
msmnt := msg["n"].(string)
var severity uint8
var cause string
switch {
case value >= threshold*1.5:
severity = 5
cause = "Critical level exceeded"
case value >= threshold*1.2:
severity = 4
cause = "High level detected"
case value >= threshold:
severity = 3
cause = "Threshold reached"
}
result := alarm{
Measurement: msmnt,
Value: strconv.FormatFloat(value, 'f', -1, 64),
Threshold: strconv.FormatFloat(threshold, 'f', -1, 64),
Cause: cause,
Unit: unit,
Severity: severity,
}
results = append(results, result)
}
fmt.Println("returning", len(results))
return results
}:::info
Severity values range from 1 to 5, with 1 being the lowest and 5 the highest.
:::
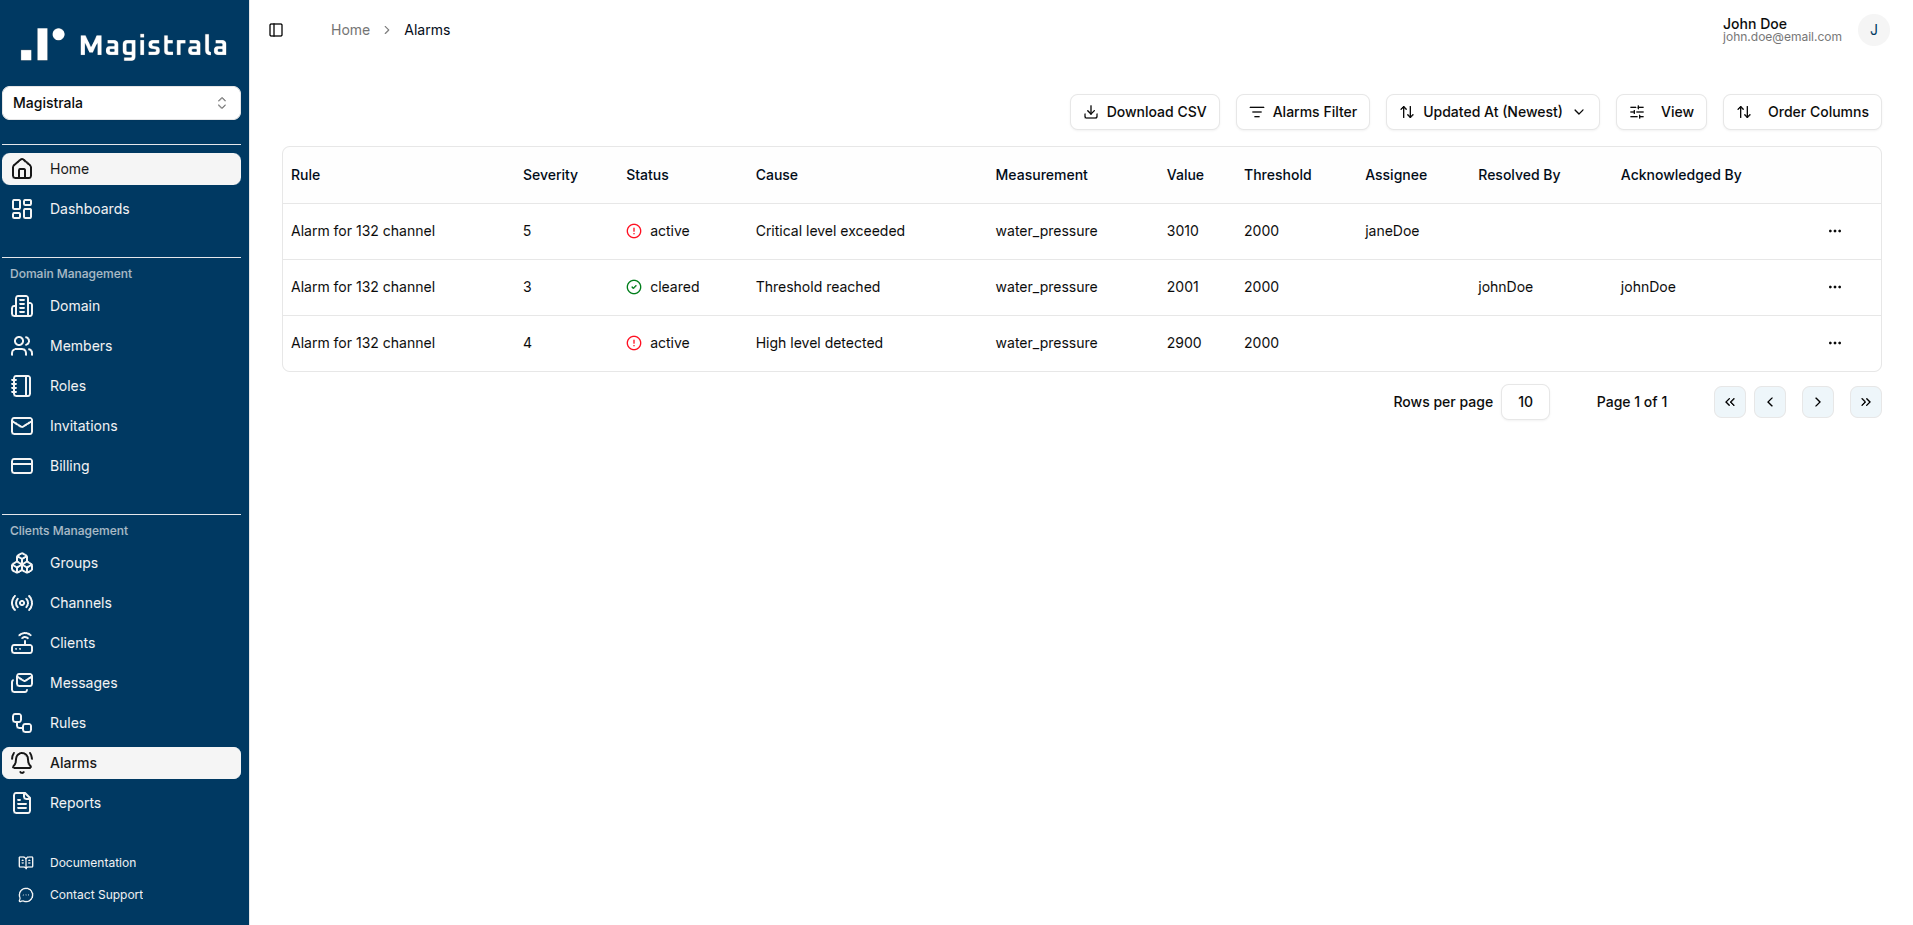
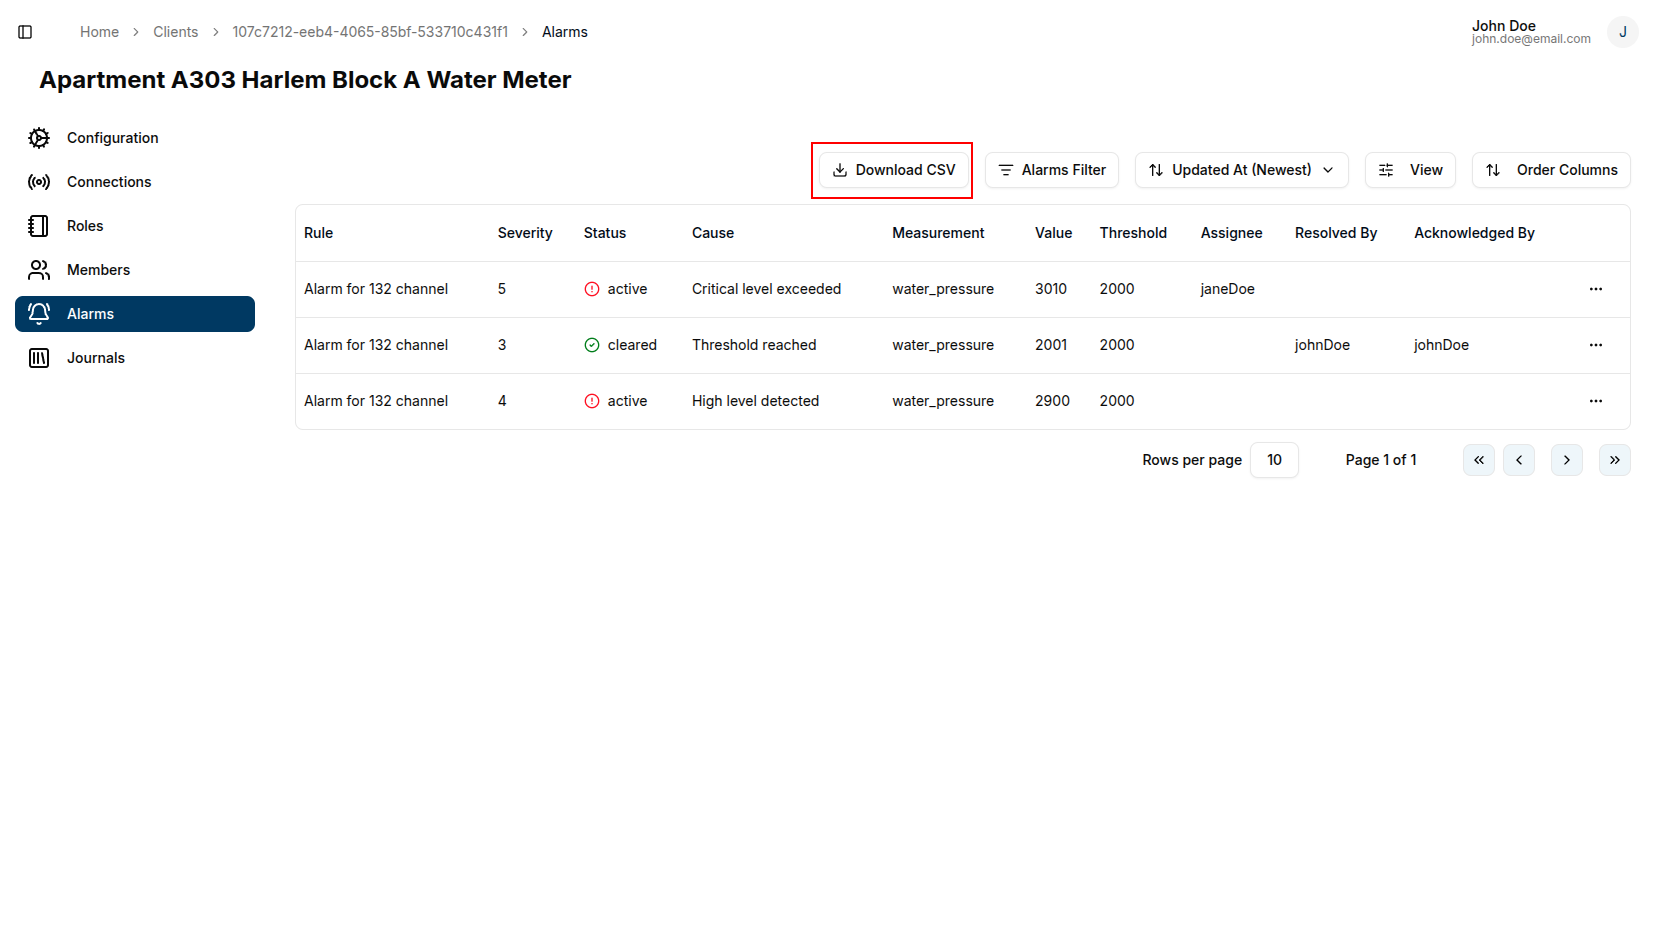
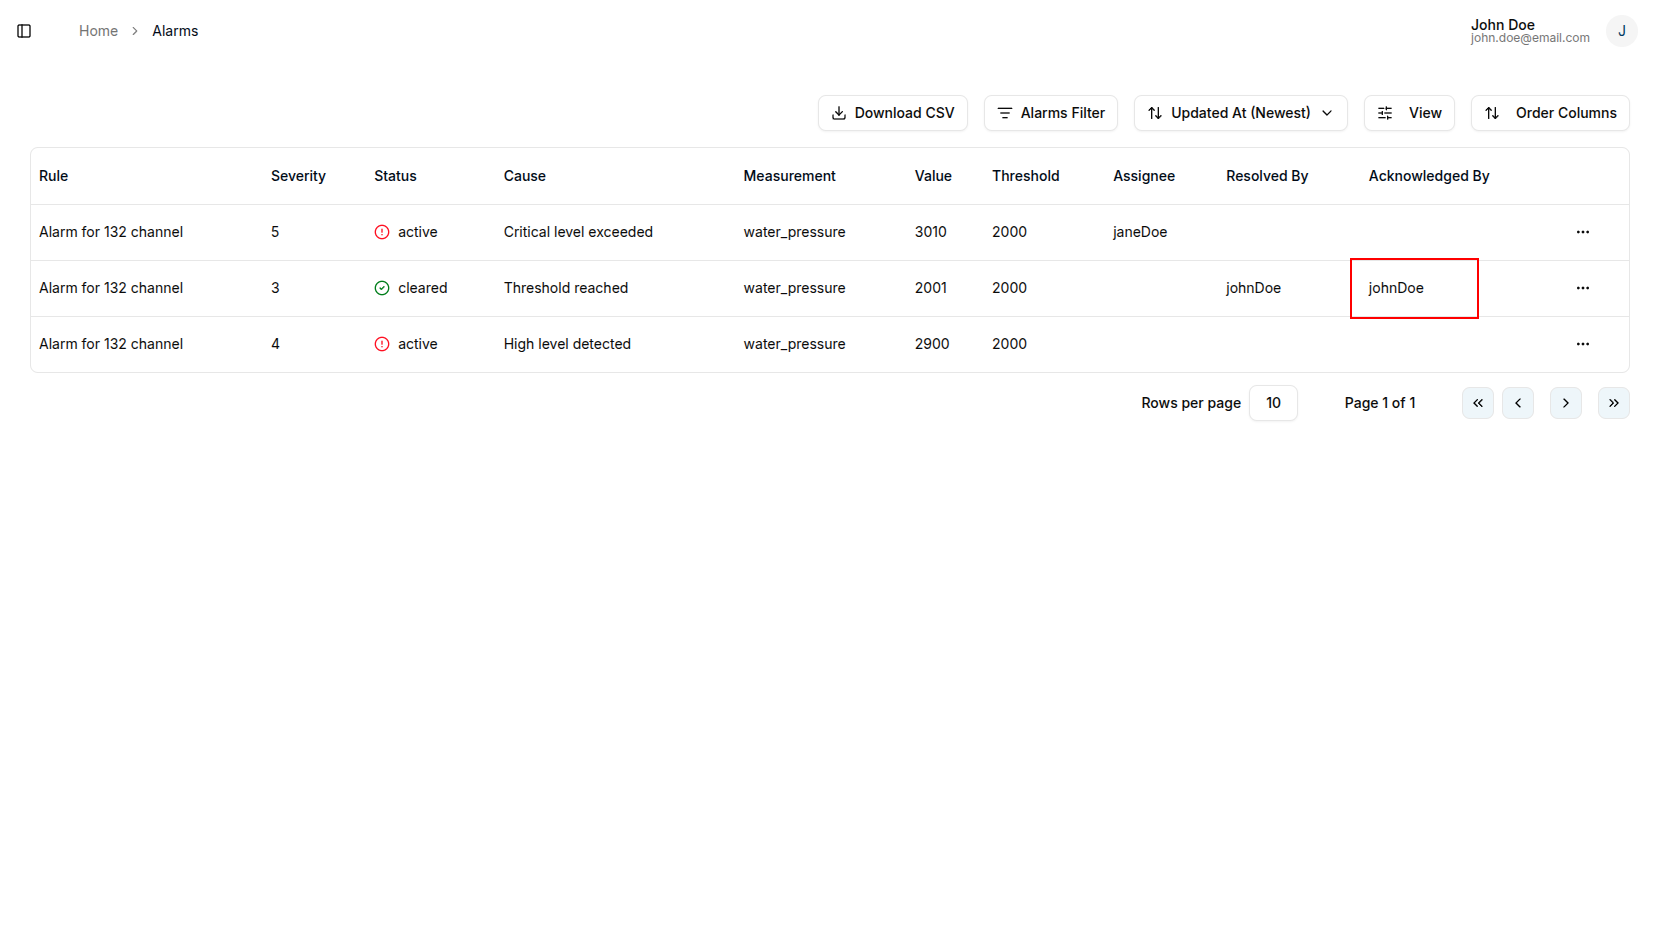
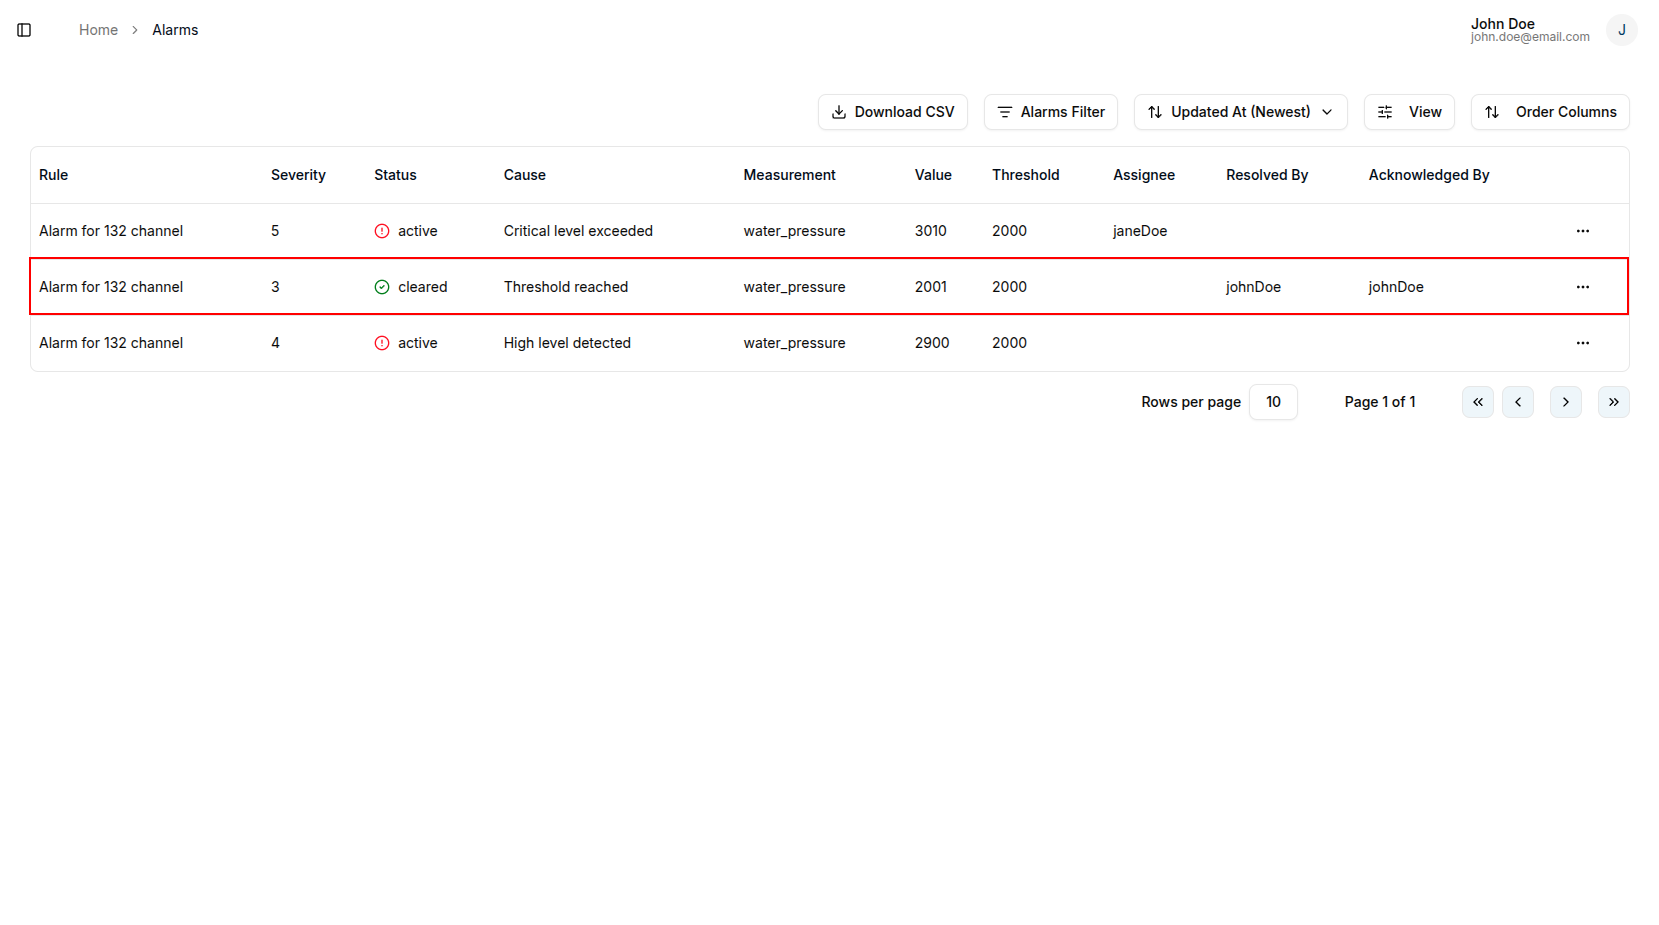
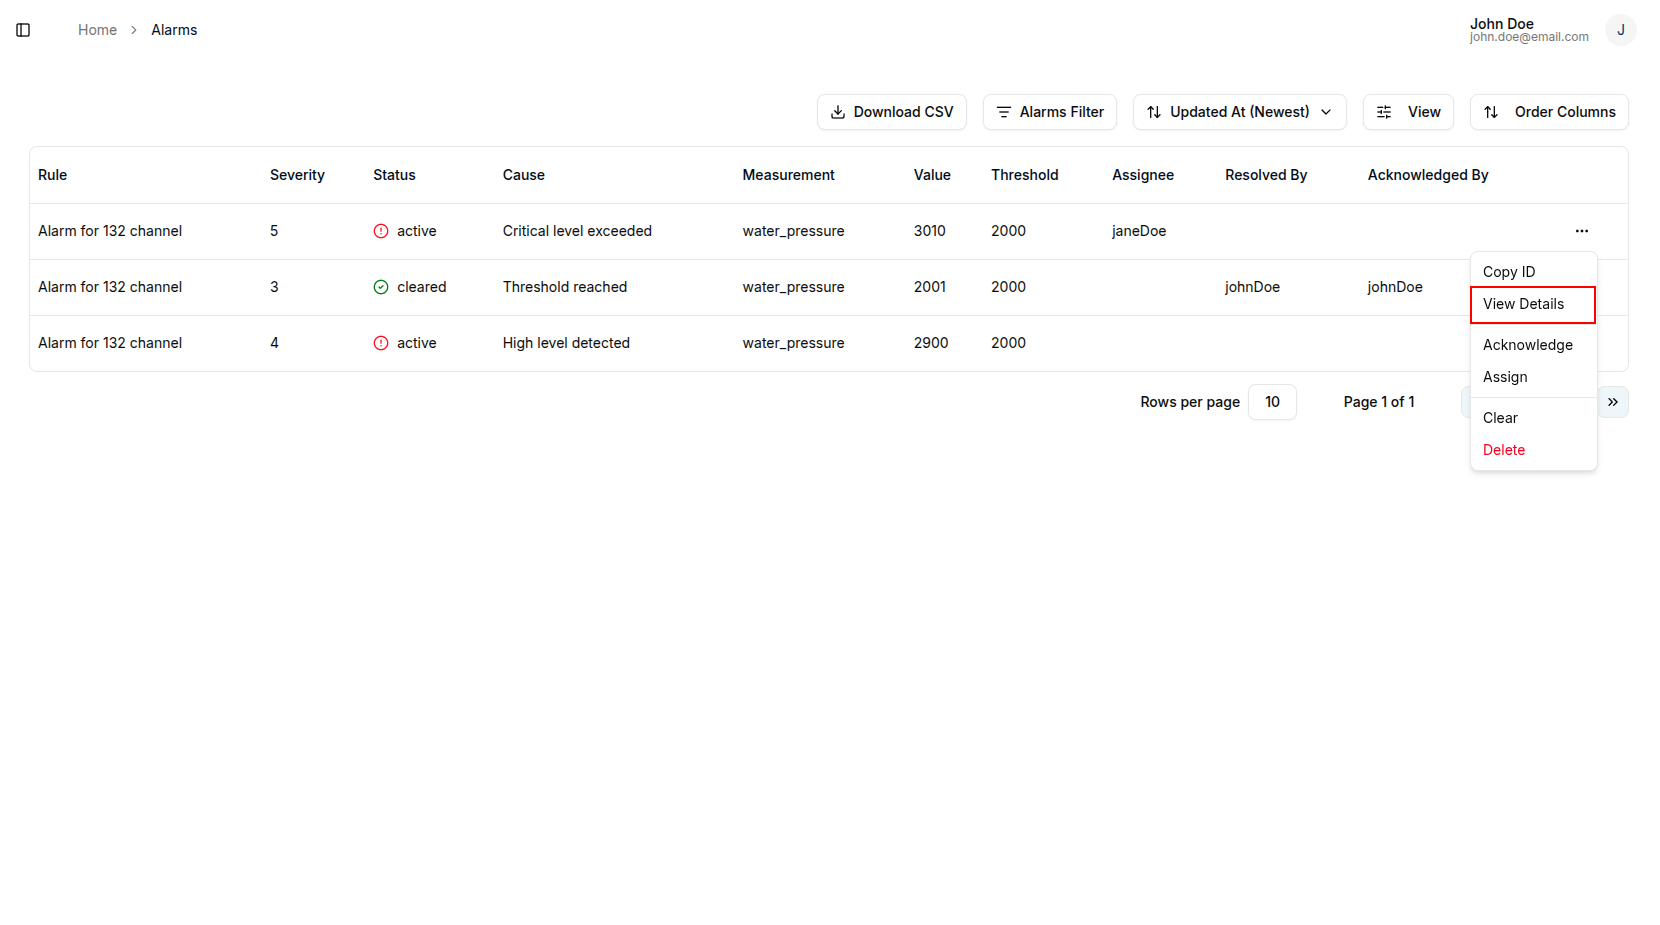
View Alarms
To view existing alarms, navigate to the Alarms page via the sidebar. This page displays all generated alarms with their current status and details.
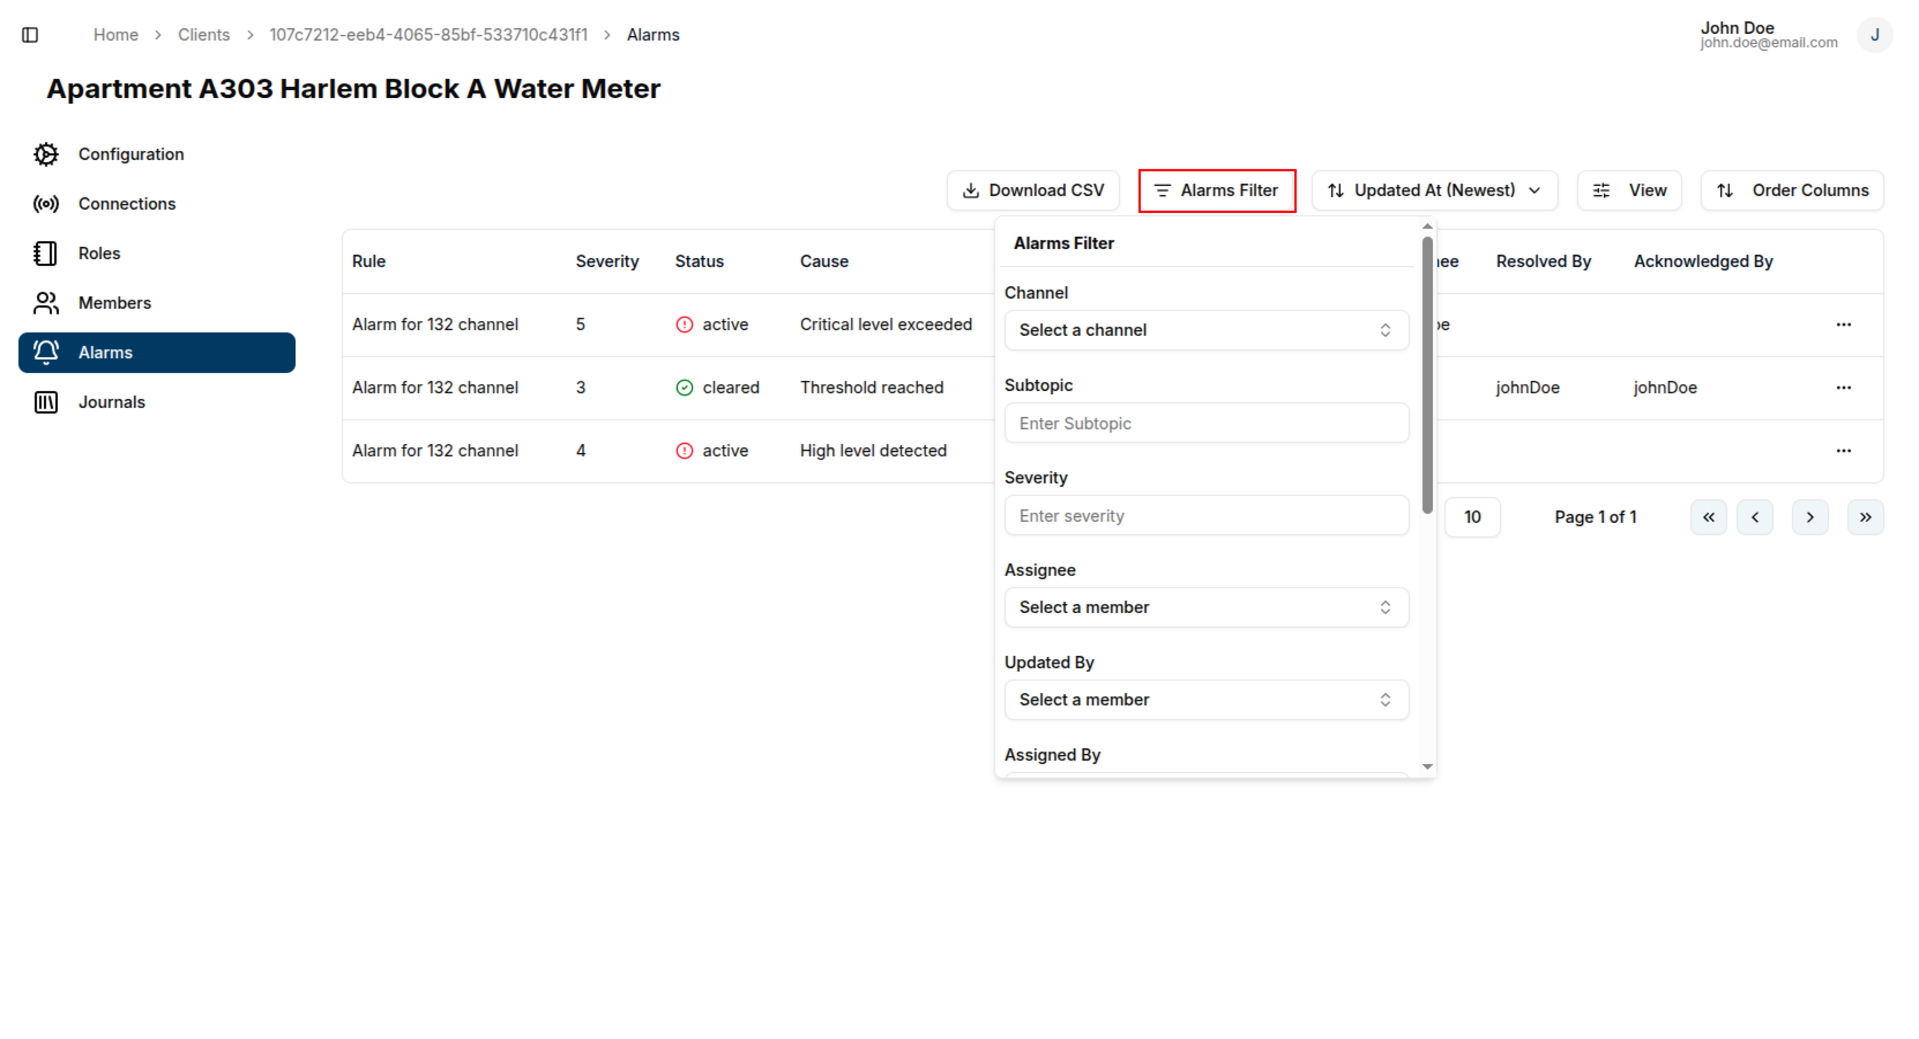
Filter Alarms
Use filters to narrow down the alarm list based on specific criteria:
- Click the Filter button on the alarms page
- Select from available filter options:
- Channel: Filter by communication channel
- Subtopic: Filter by message subtopic
- Severity: Filter by alarm severity level
- Assignee: Filter by assigned team member
- Updated By: Filter by who last modified the alarm
- Assigned By: Filter by who assigned the alarm
- Acknowledged By: Filter by who acknowledged the alarm
- Resolved By: Filter by who resolved the alarm
- Created From: Filter by alarm creation start date
- Created To: Filter by alarm creation end date (must be after "Created From")
- Apply filters to update the alarm list
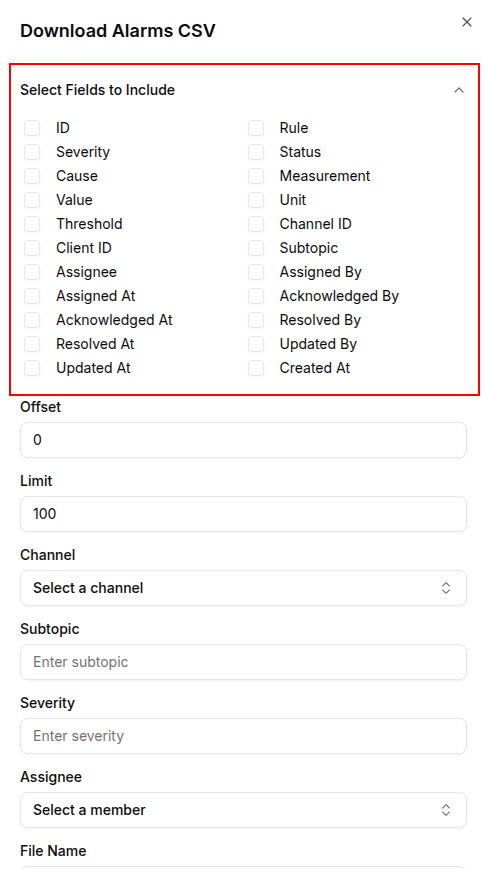
Download Alarms CSV
Export alarm data to CSV format for analysis or reporting:
- Click the Download CSV button on the alarms page
- Configure export settings:
Field Selection
Choose which fields to include in the CSV:
ID, Severity, Cause, Value, Threshold, Client ID, Assignee, Assigned At, Acknowledged At, Resolved At, Updated At, Rule, Status, Measurement, Unit, Channel ID, Subtopic, Assigned By, Acknowledged By, Resolved By, Updated By, Created At
Basic Settings
- Offset: Starting record number
- Limit: Maximum number of records
- Channel: Filter by specific channel
- Subtopic: Filter by subtopic
- Severity: Filter by severity level
- Assignee: Filter by assigned user
- File Name: Custom name for the CSV file
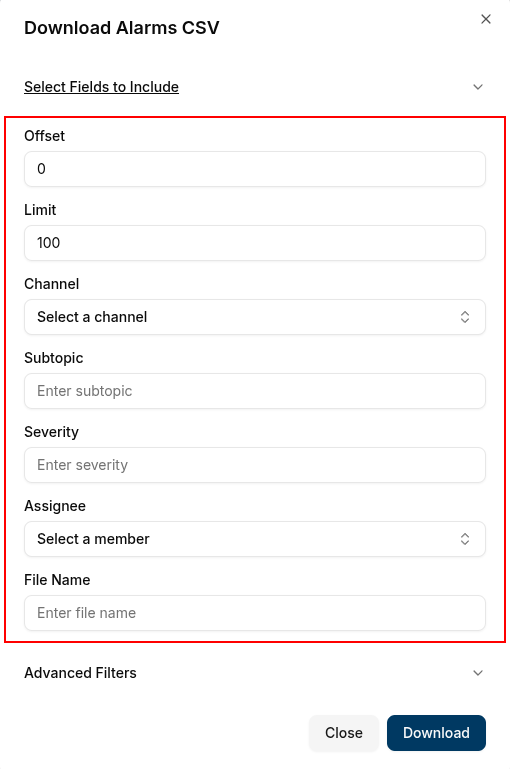
Advanced Filters
- Updated By: Filter by who modified the alarm
- Assigned By: Filter by who assigned the alarm
- Acknowledged By: Filter by who acknowledged the alarm
- Resolved By: Filter by who resolved the alarm
- Created From: Start date for alarm creation
- Created To: End date for alarm creation
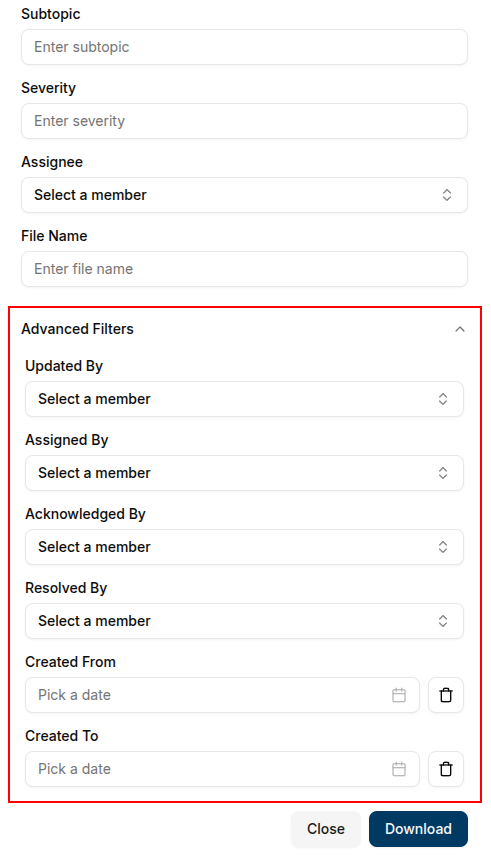
- Click Download to generate and save the CSV file
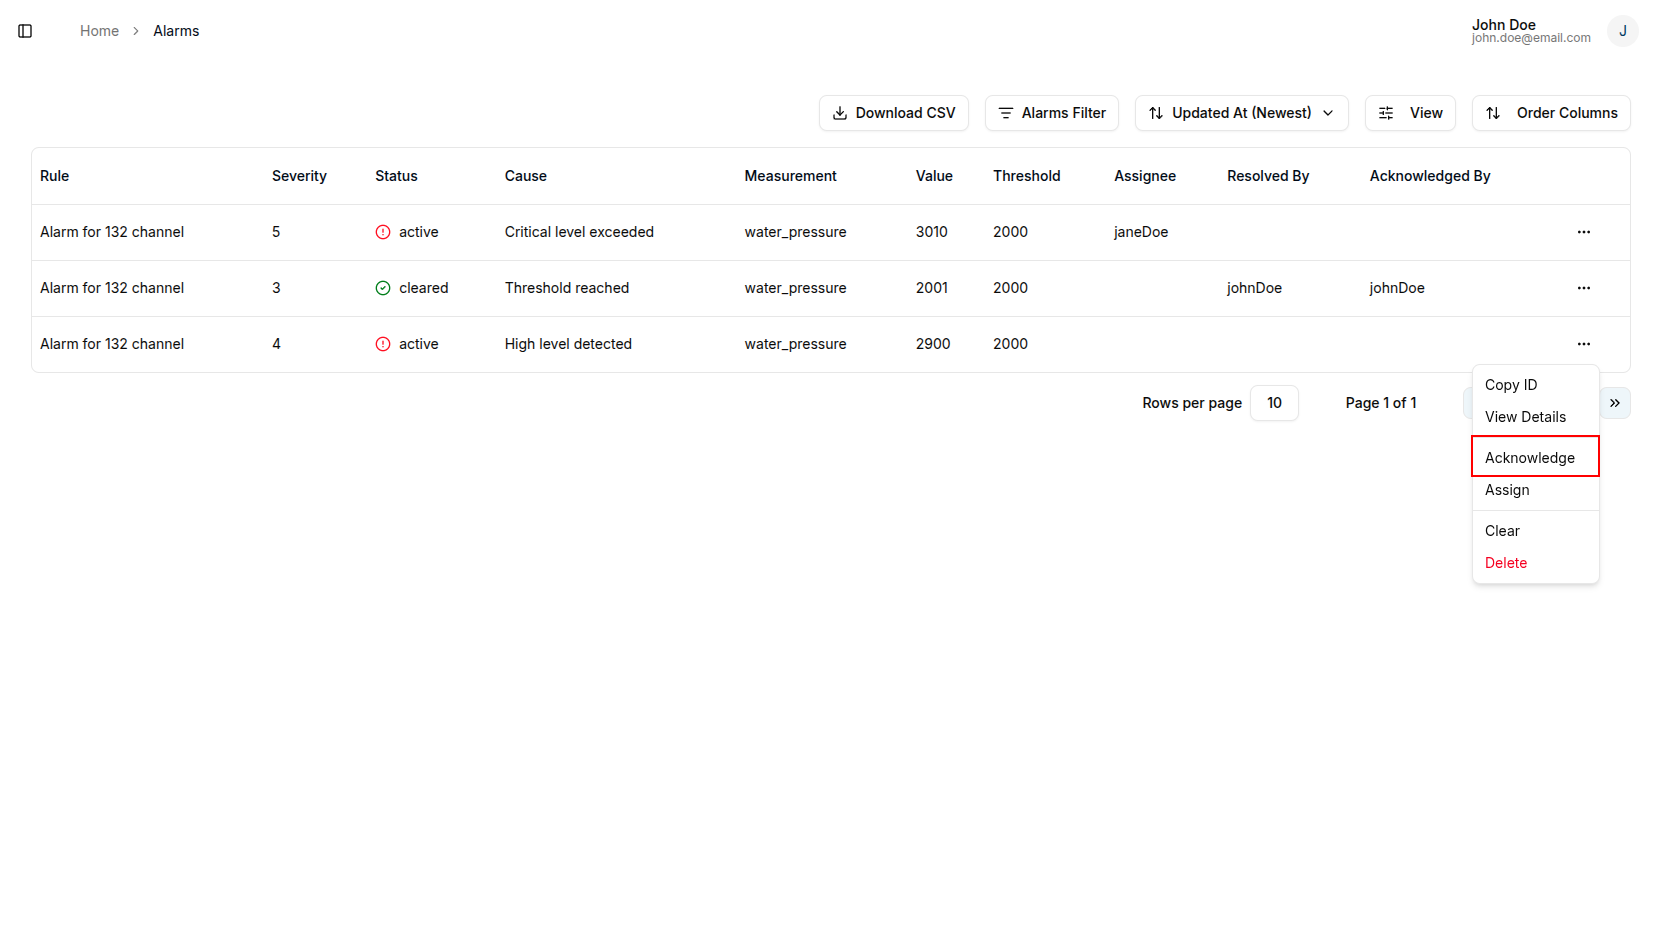
Acknowledge Alarm
To acknowledge an alarm:
- Click the quick links button next to the alarm
- Select Acknowledge from the dropdown menu
- Confirm the acknowledgment

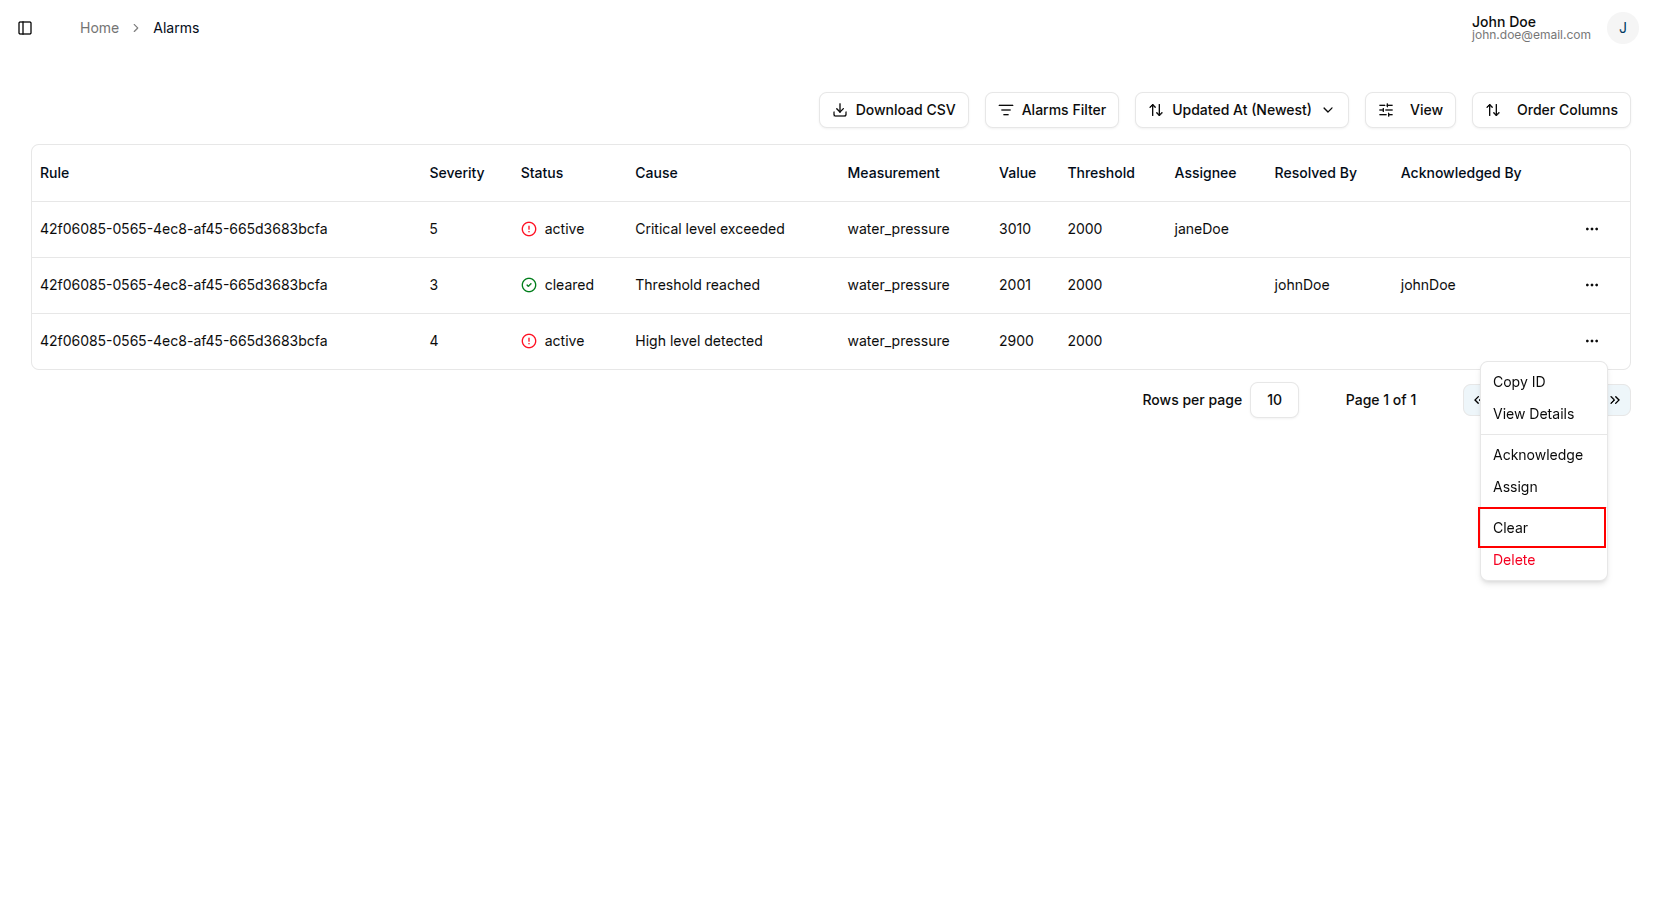
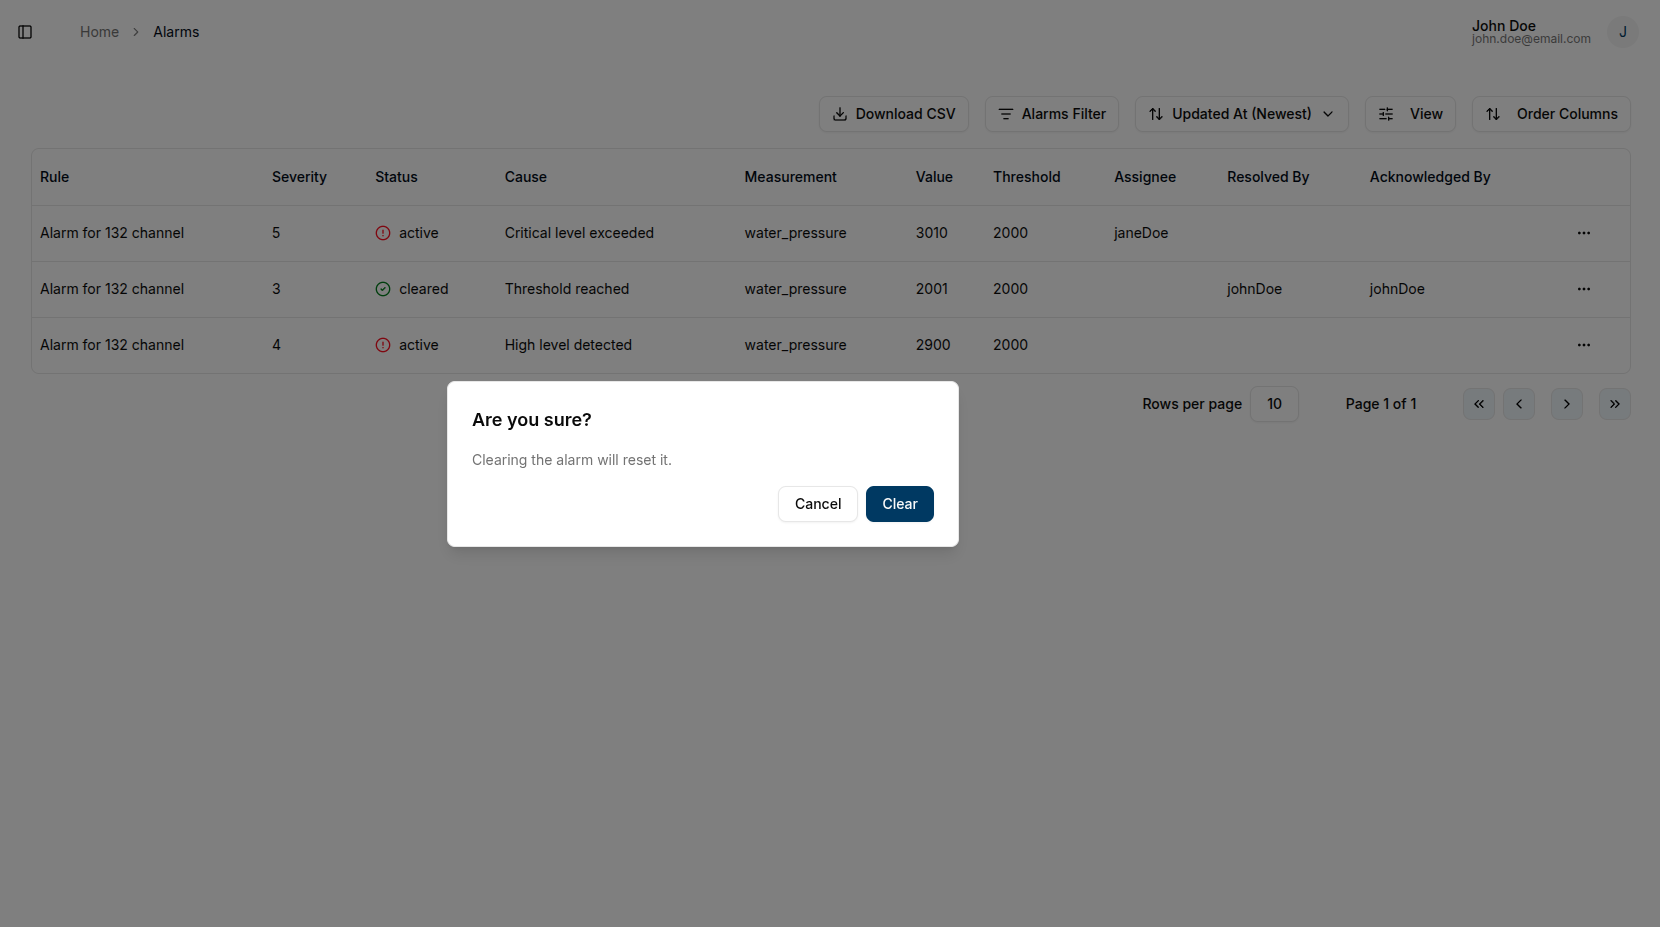
Clear Alarm
To clear an alarm:
- Click the quick links button next to the alarm
- Select Clear from the dropdown menu
- Confirm the action
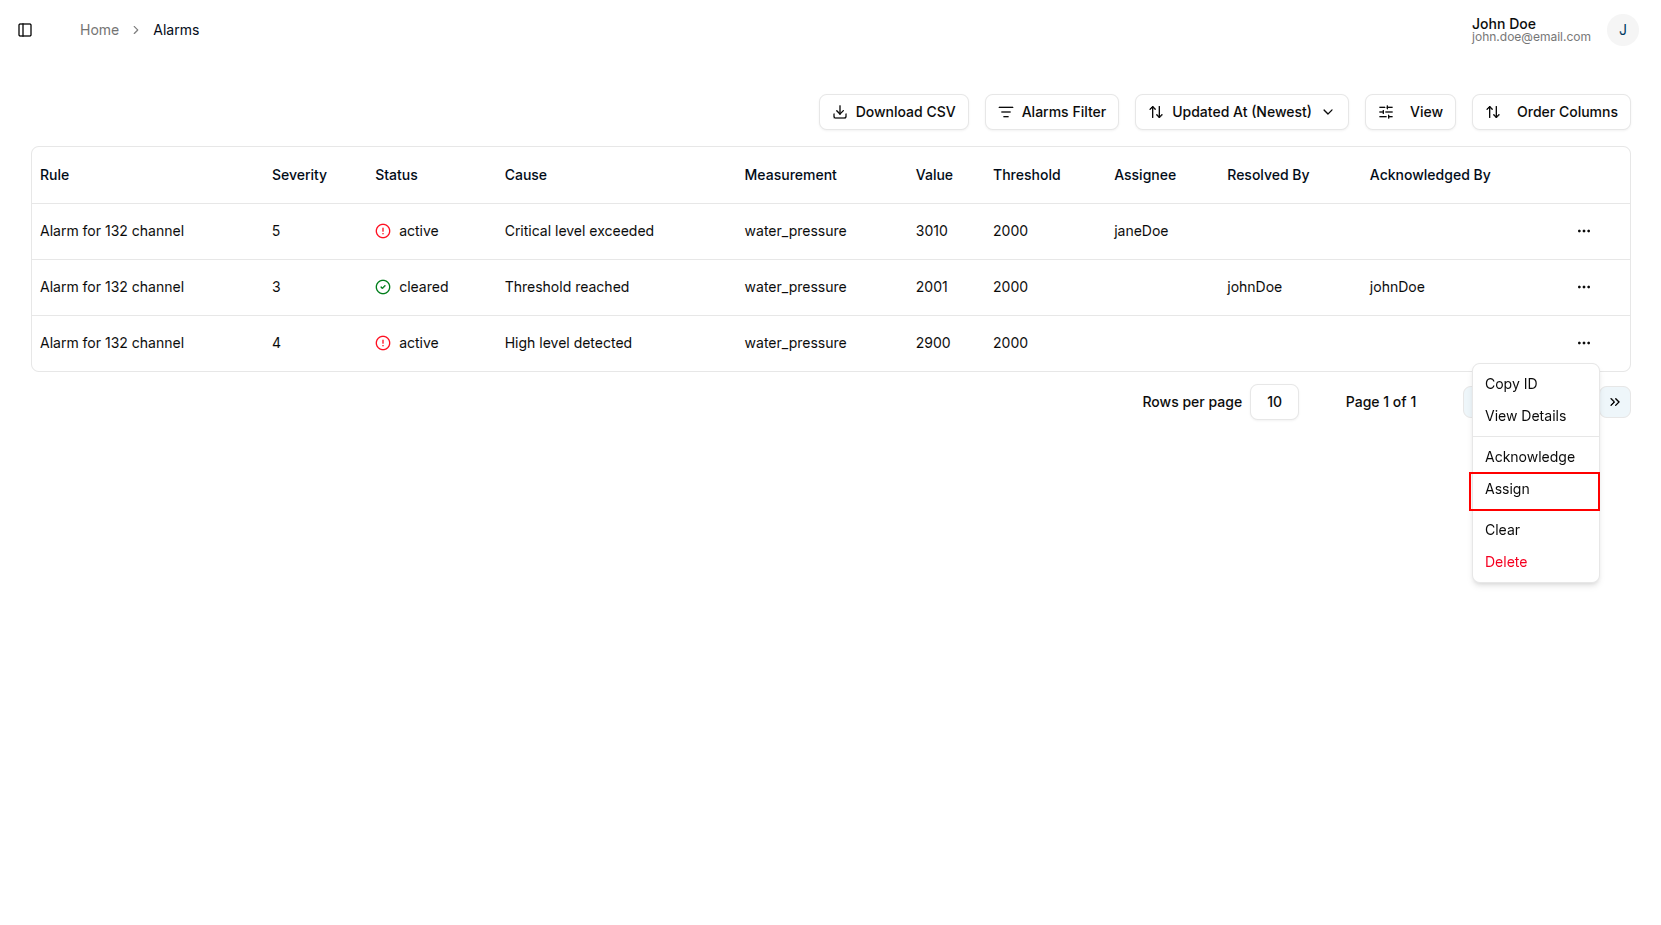
Assign Alarm
To assign an alarm to a domain member:
- Click the quick links button next to the alarm
- Select Assign from the dropdown menu
- Choose the member from the available users
- Click Assign to confirm
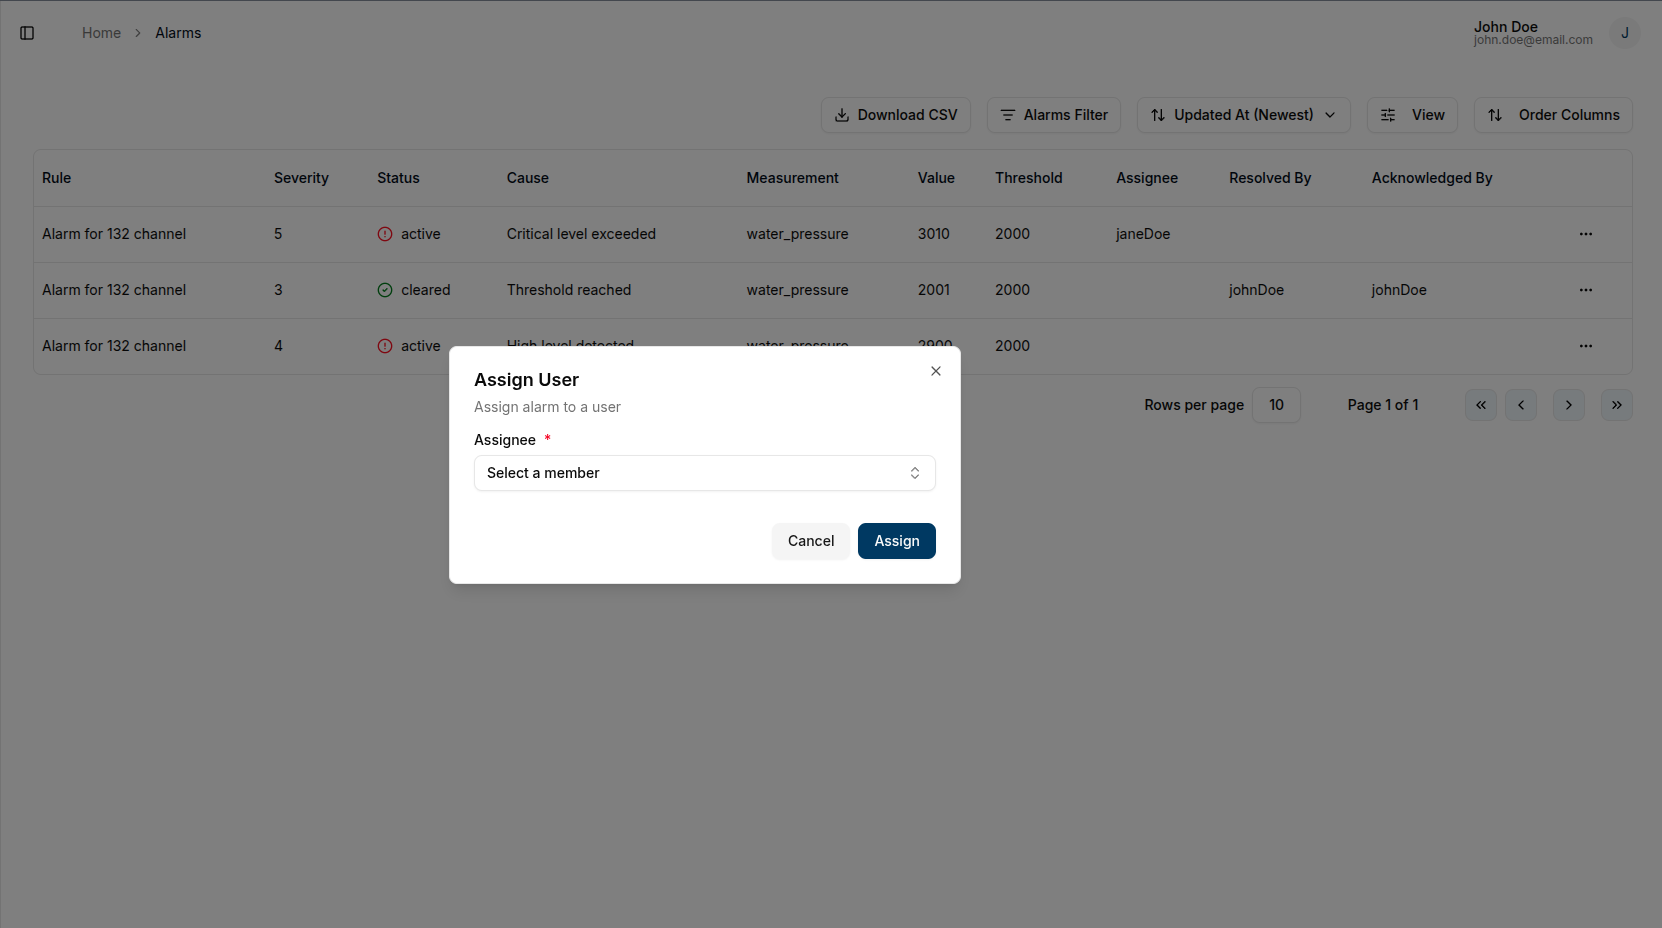

To reassign an alarm to a different person, follow the same process and select the new assignee.
View Details
To view comprehensive alarm information:
- Click the quick links button next to the alarm
- Select View Details from the dropdown menu
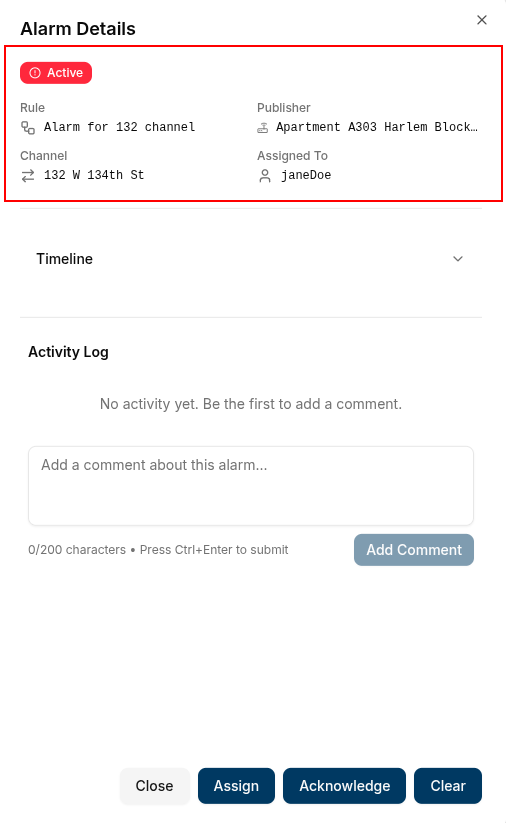
The alarm details dialog contains three sections:
General Details
Displays core alarm information:
- Alarm status
- Rule that triggered the alarm
- Publisher (device/client)
- Channel where the message was published
- Current assignee (if assigned)
Timeline
Shows chronological alarm actions:
- Alarm creation
- Acknowledgment events
- Resolution events
- Assignment changes

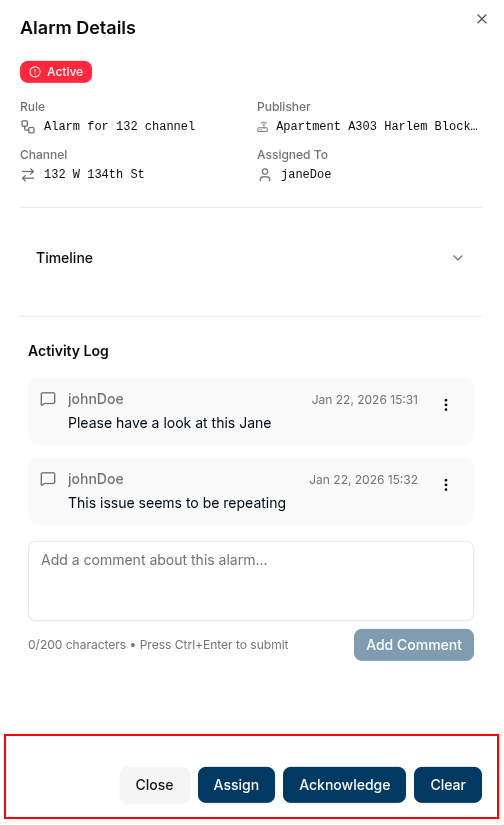
Activity Log
Allows team collaboration:
- Add comments about the alarm
- View previous comments
- Track communication history

Quick Actions
From the details dialog, you can:
- Assign the alarm to a team member
- Acknowledge the alarm
- Clear/resolve the alarm
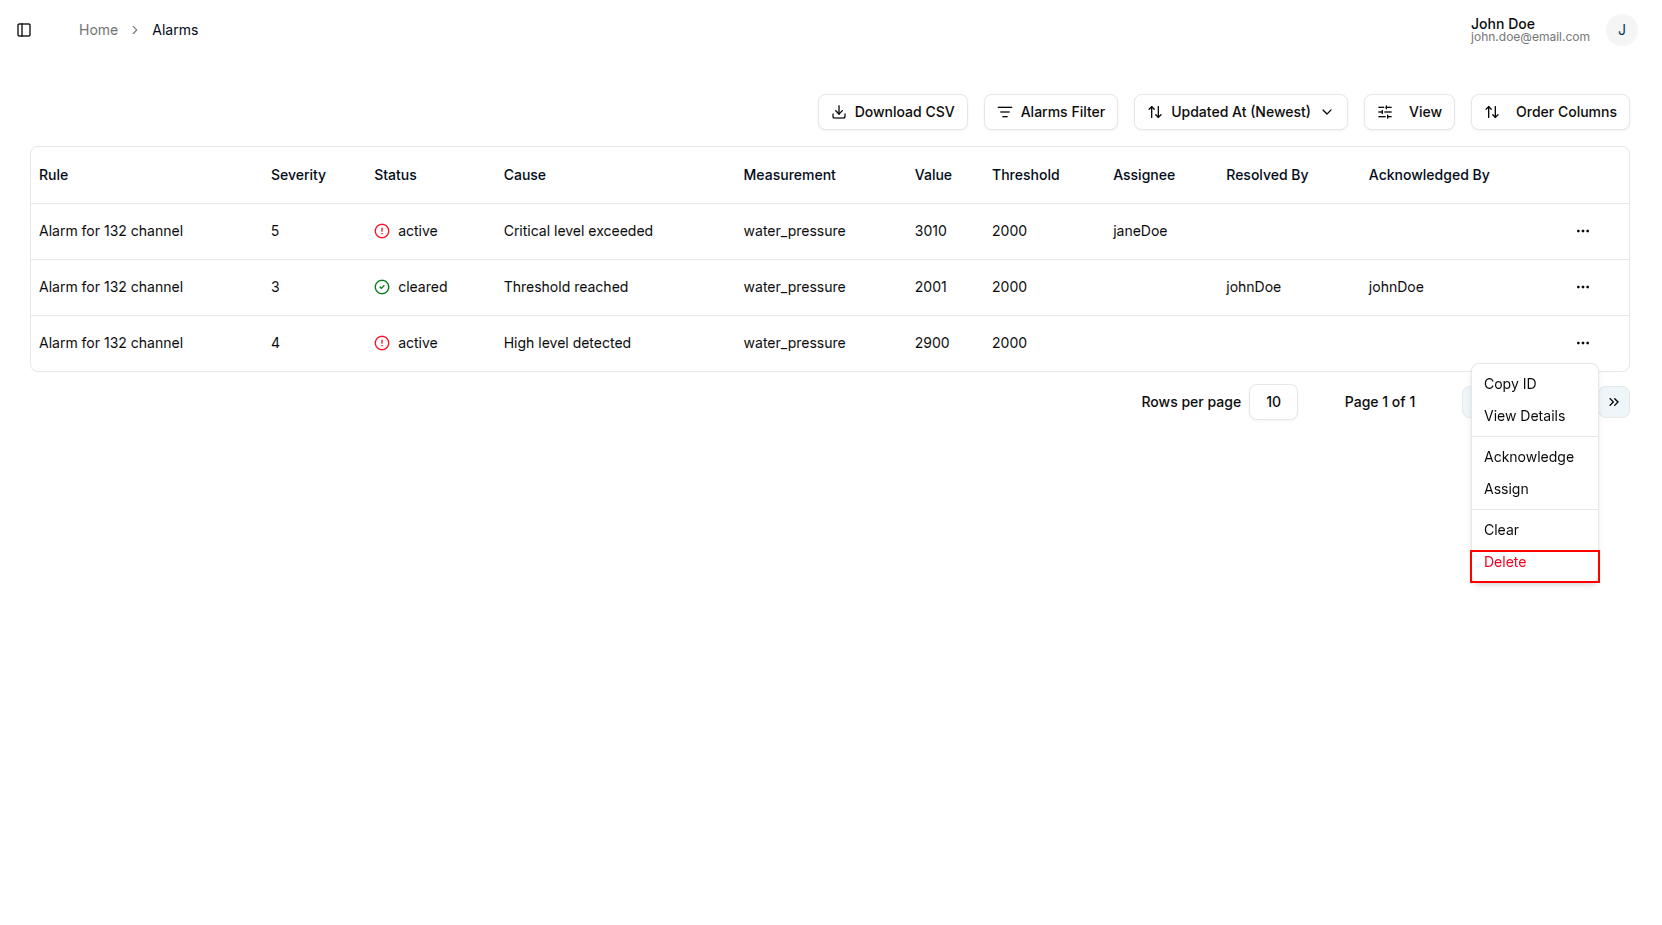
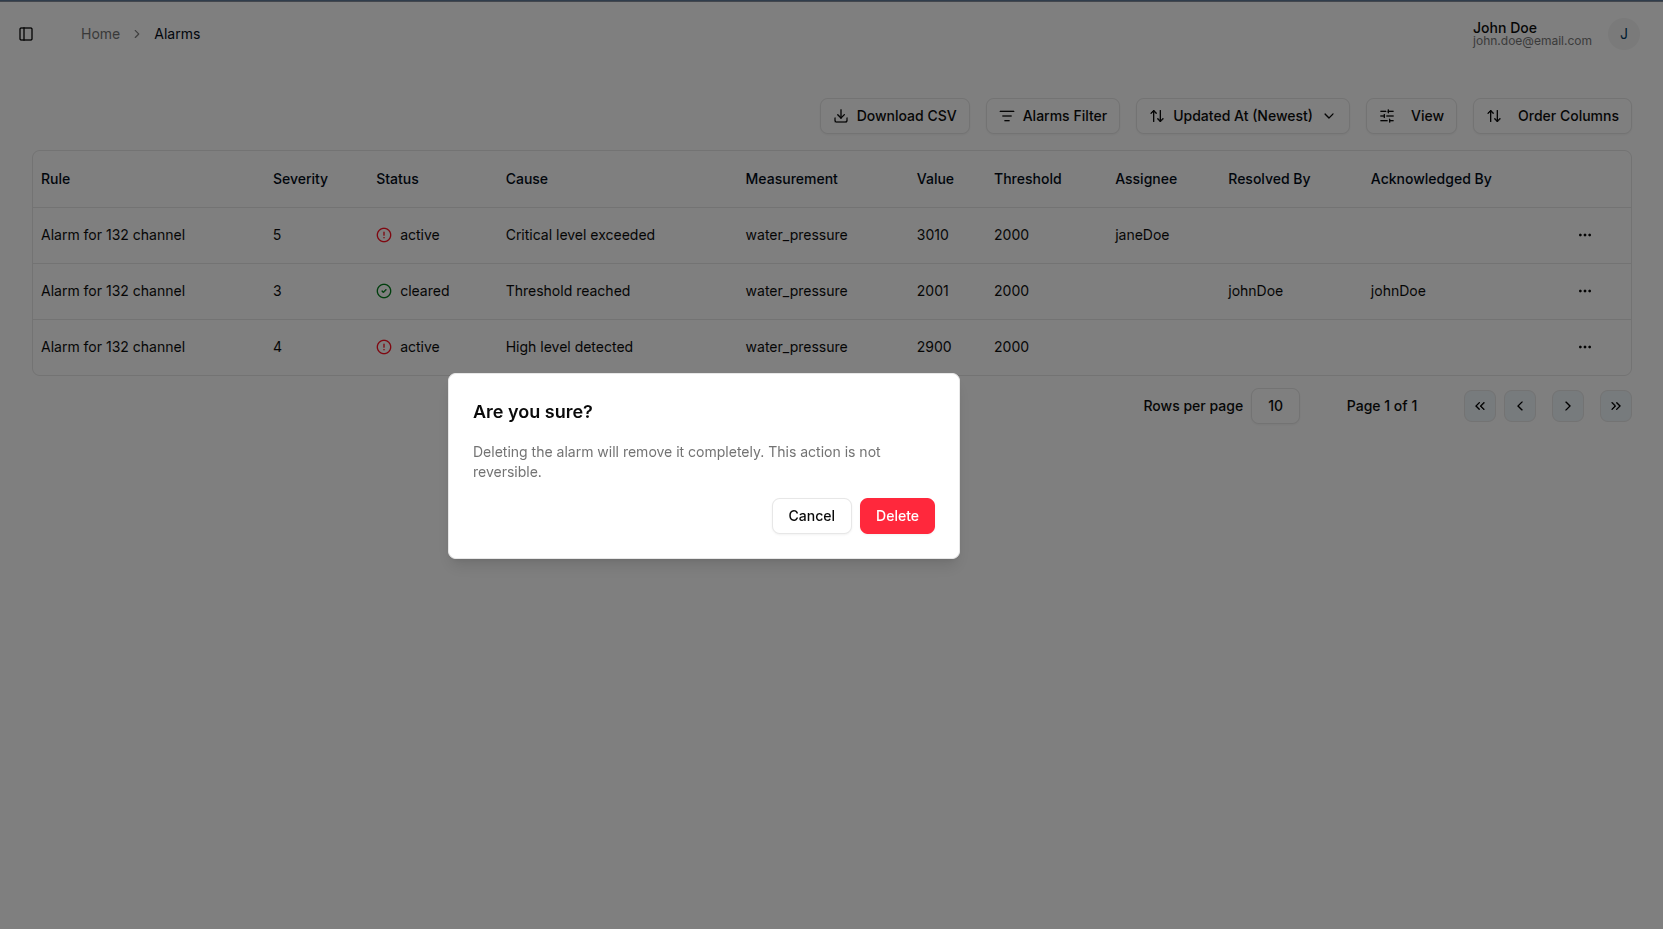
Delete Alarm
To delete an alarm:
- Click the quick links button next to the alarm
- Select Delete from the dropdown menu
- Confirm the deletion