Groups
Manage and Organize Groups
Groups in Magistrala are collections that organize clients and channels together.
They make it easier to assign users with specific roles to a set of related channels and clients.
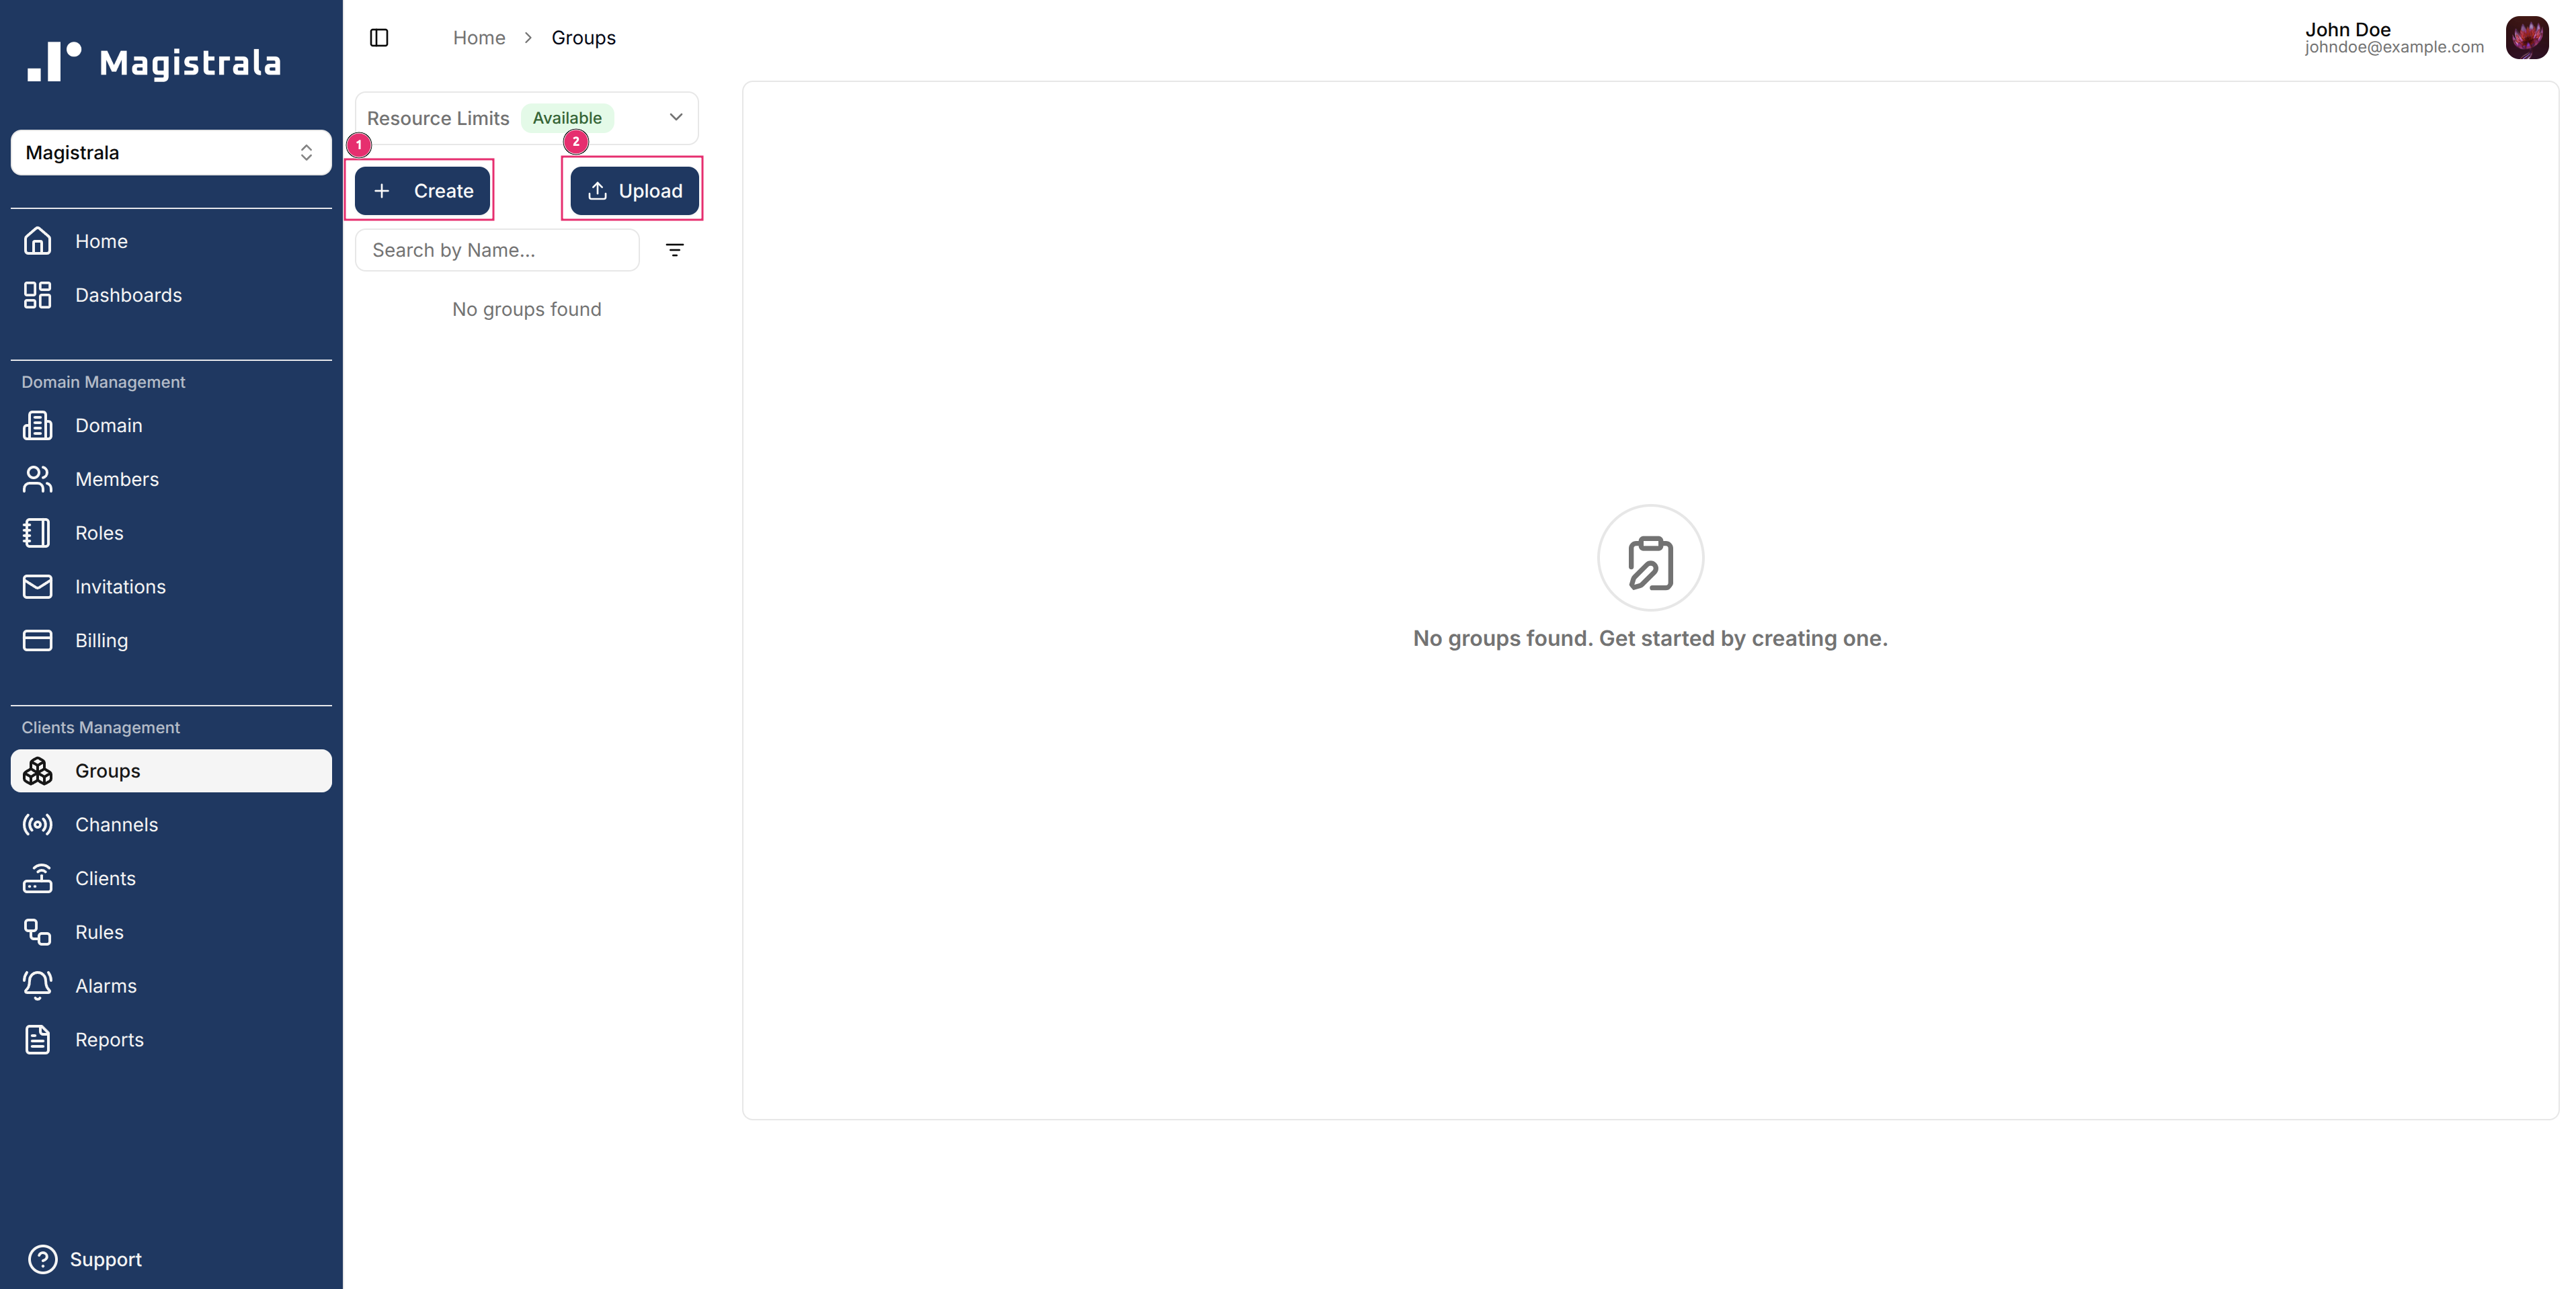
Create a Group
To create a group, click on the + Create button present on the top of the Groups sidebar. You can also create multiple groups by uploading a .csv file with group names and any other fields you would like to add.
Bulk Creation
Groups can be created in bulk using a .csv file with the following fields (in order):
- Name (Required)
- Metadata
- Description
A sample groups CSV file is available for reference.

Group Information
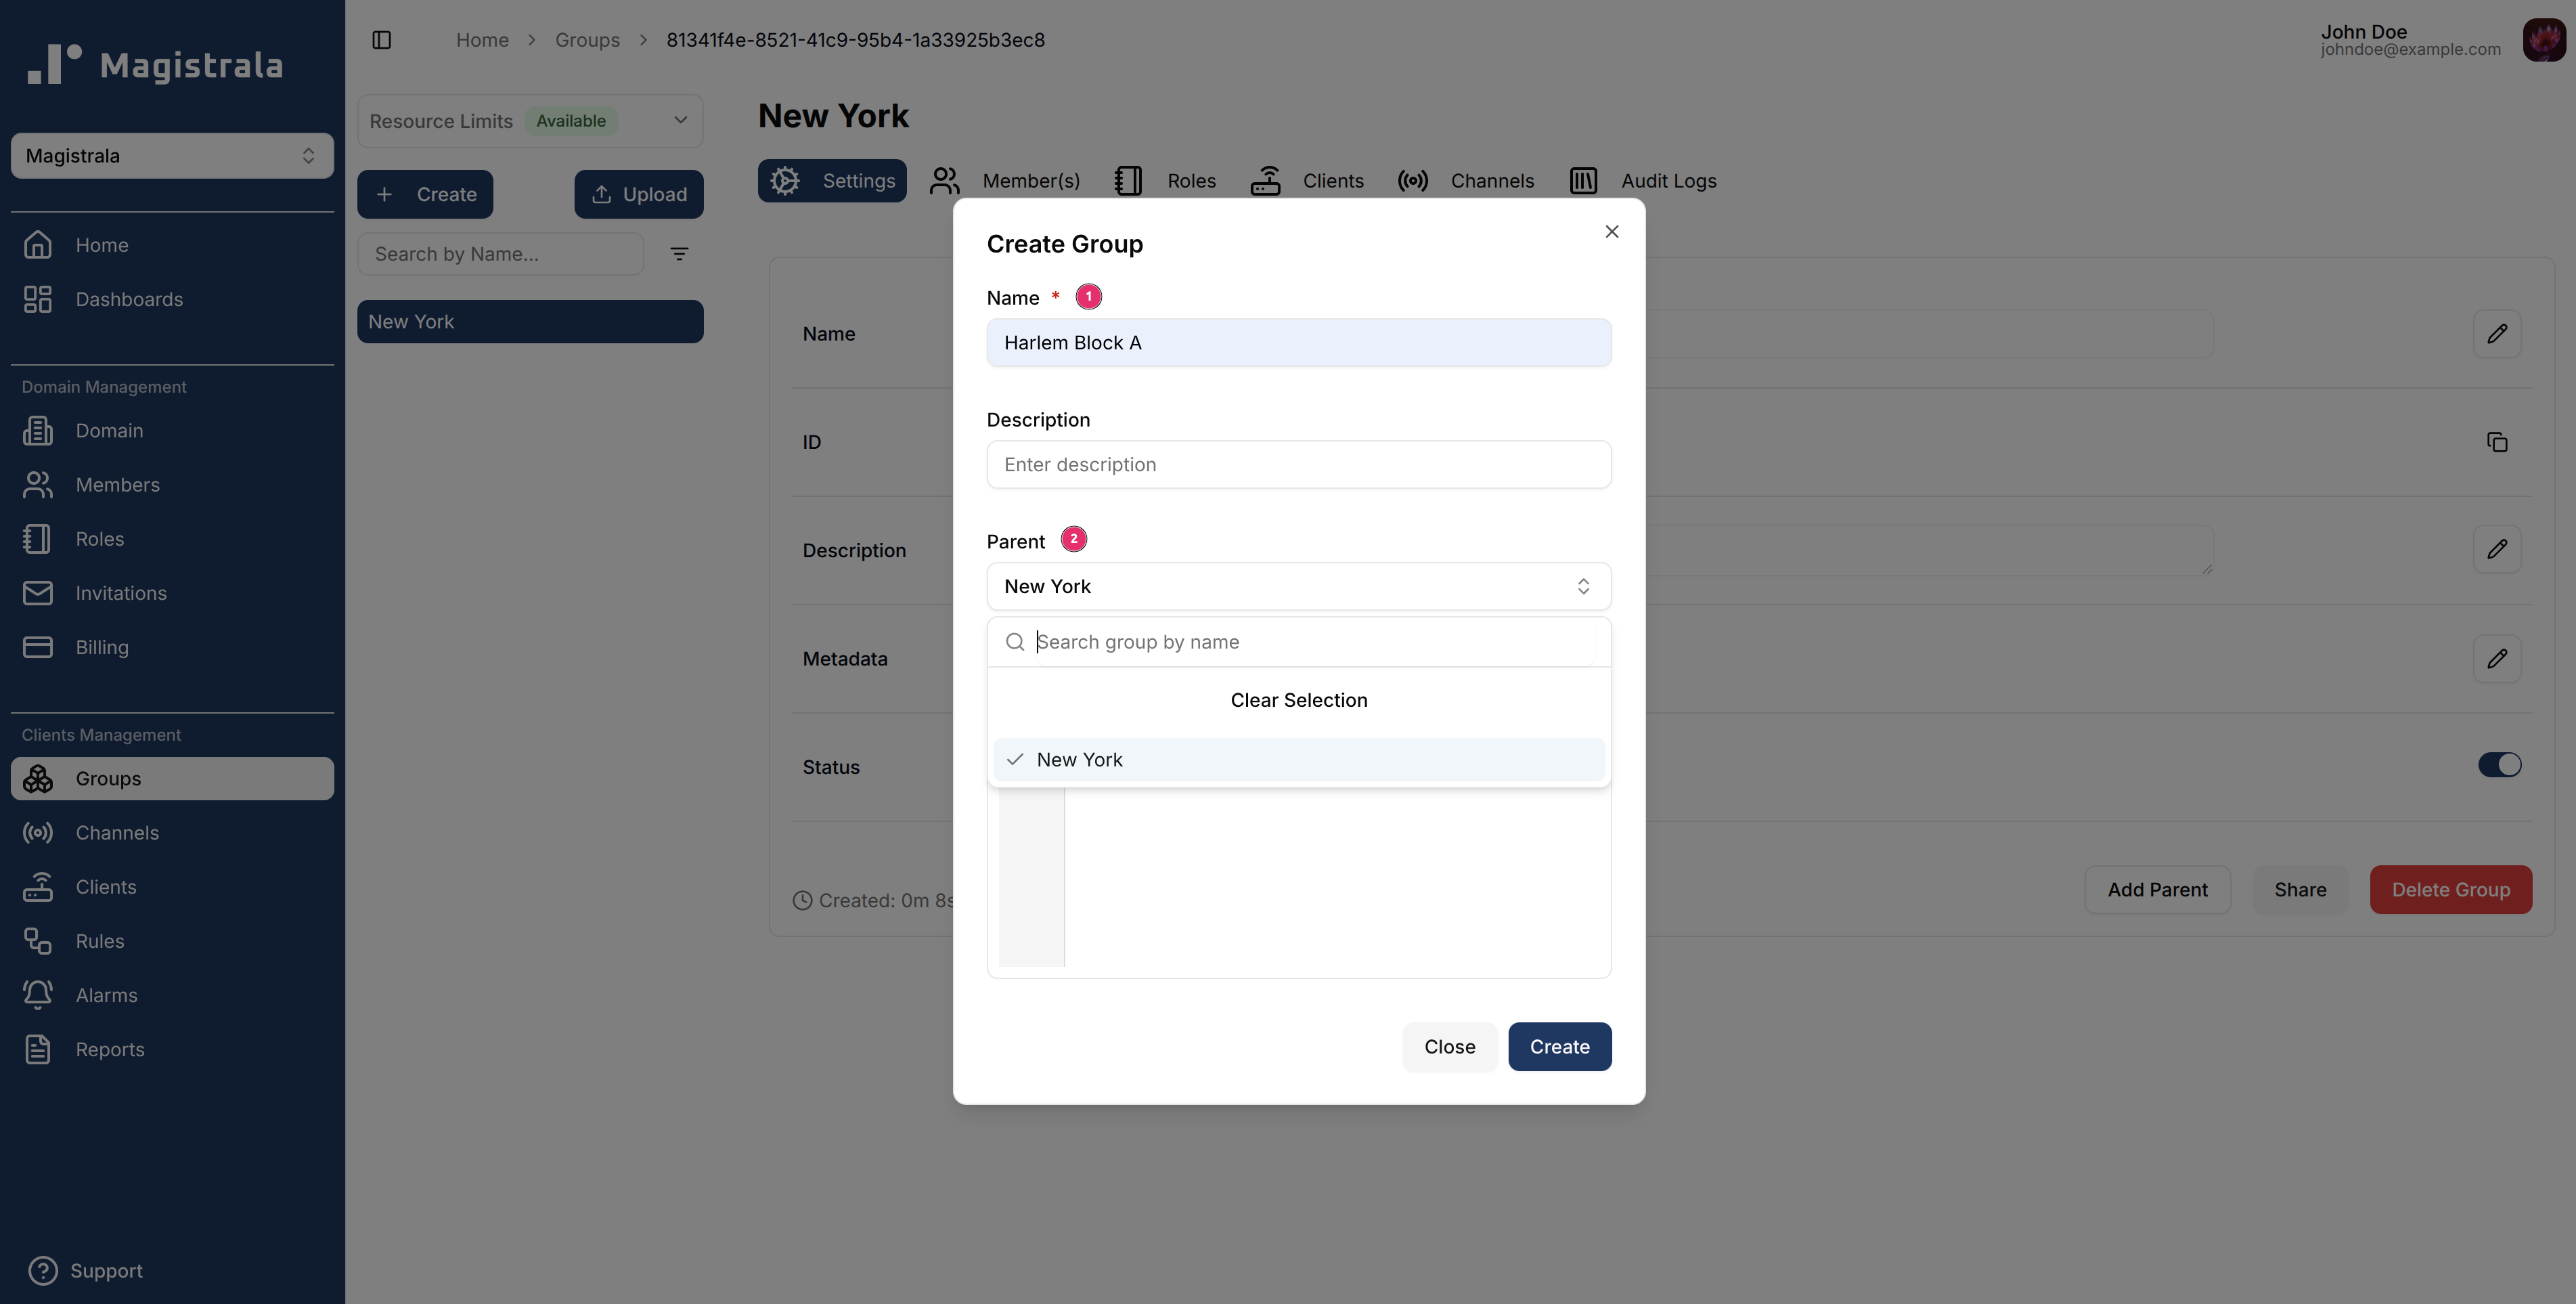
When creating a group, you must provide a name and can optionally add a description, metadata, and a parent group.
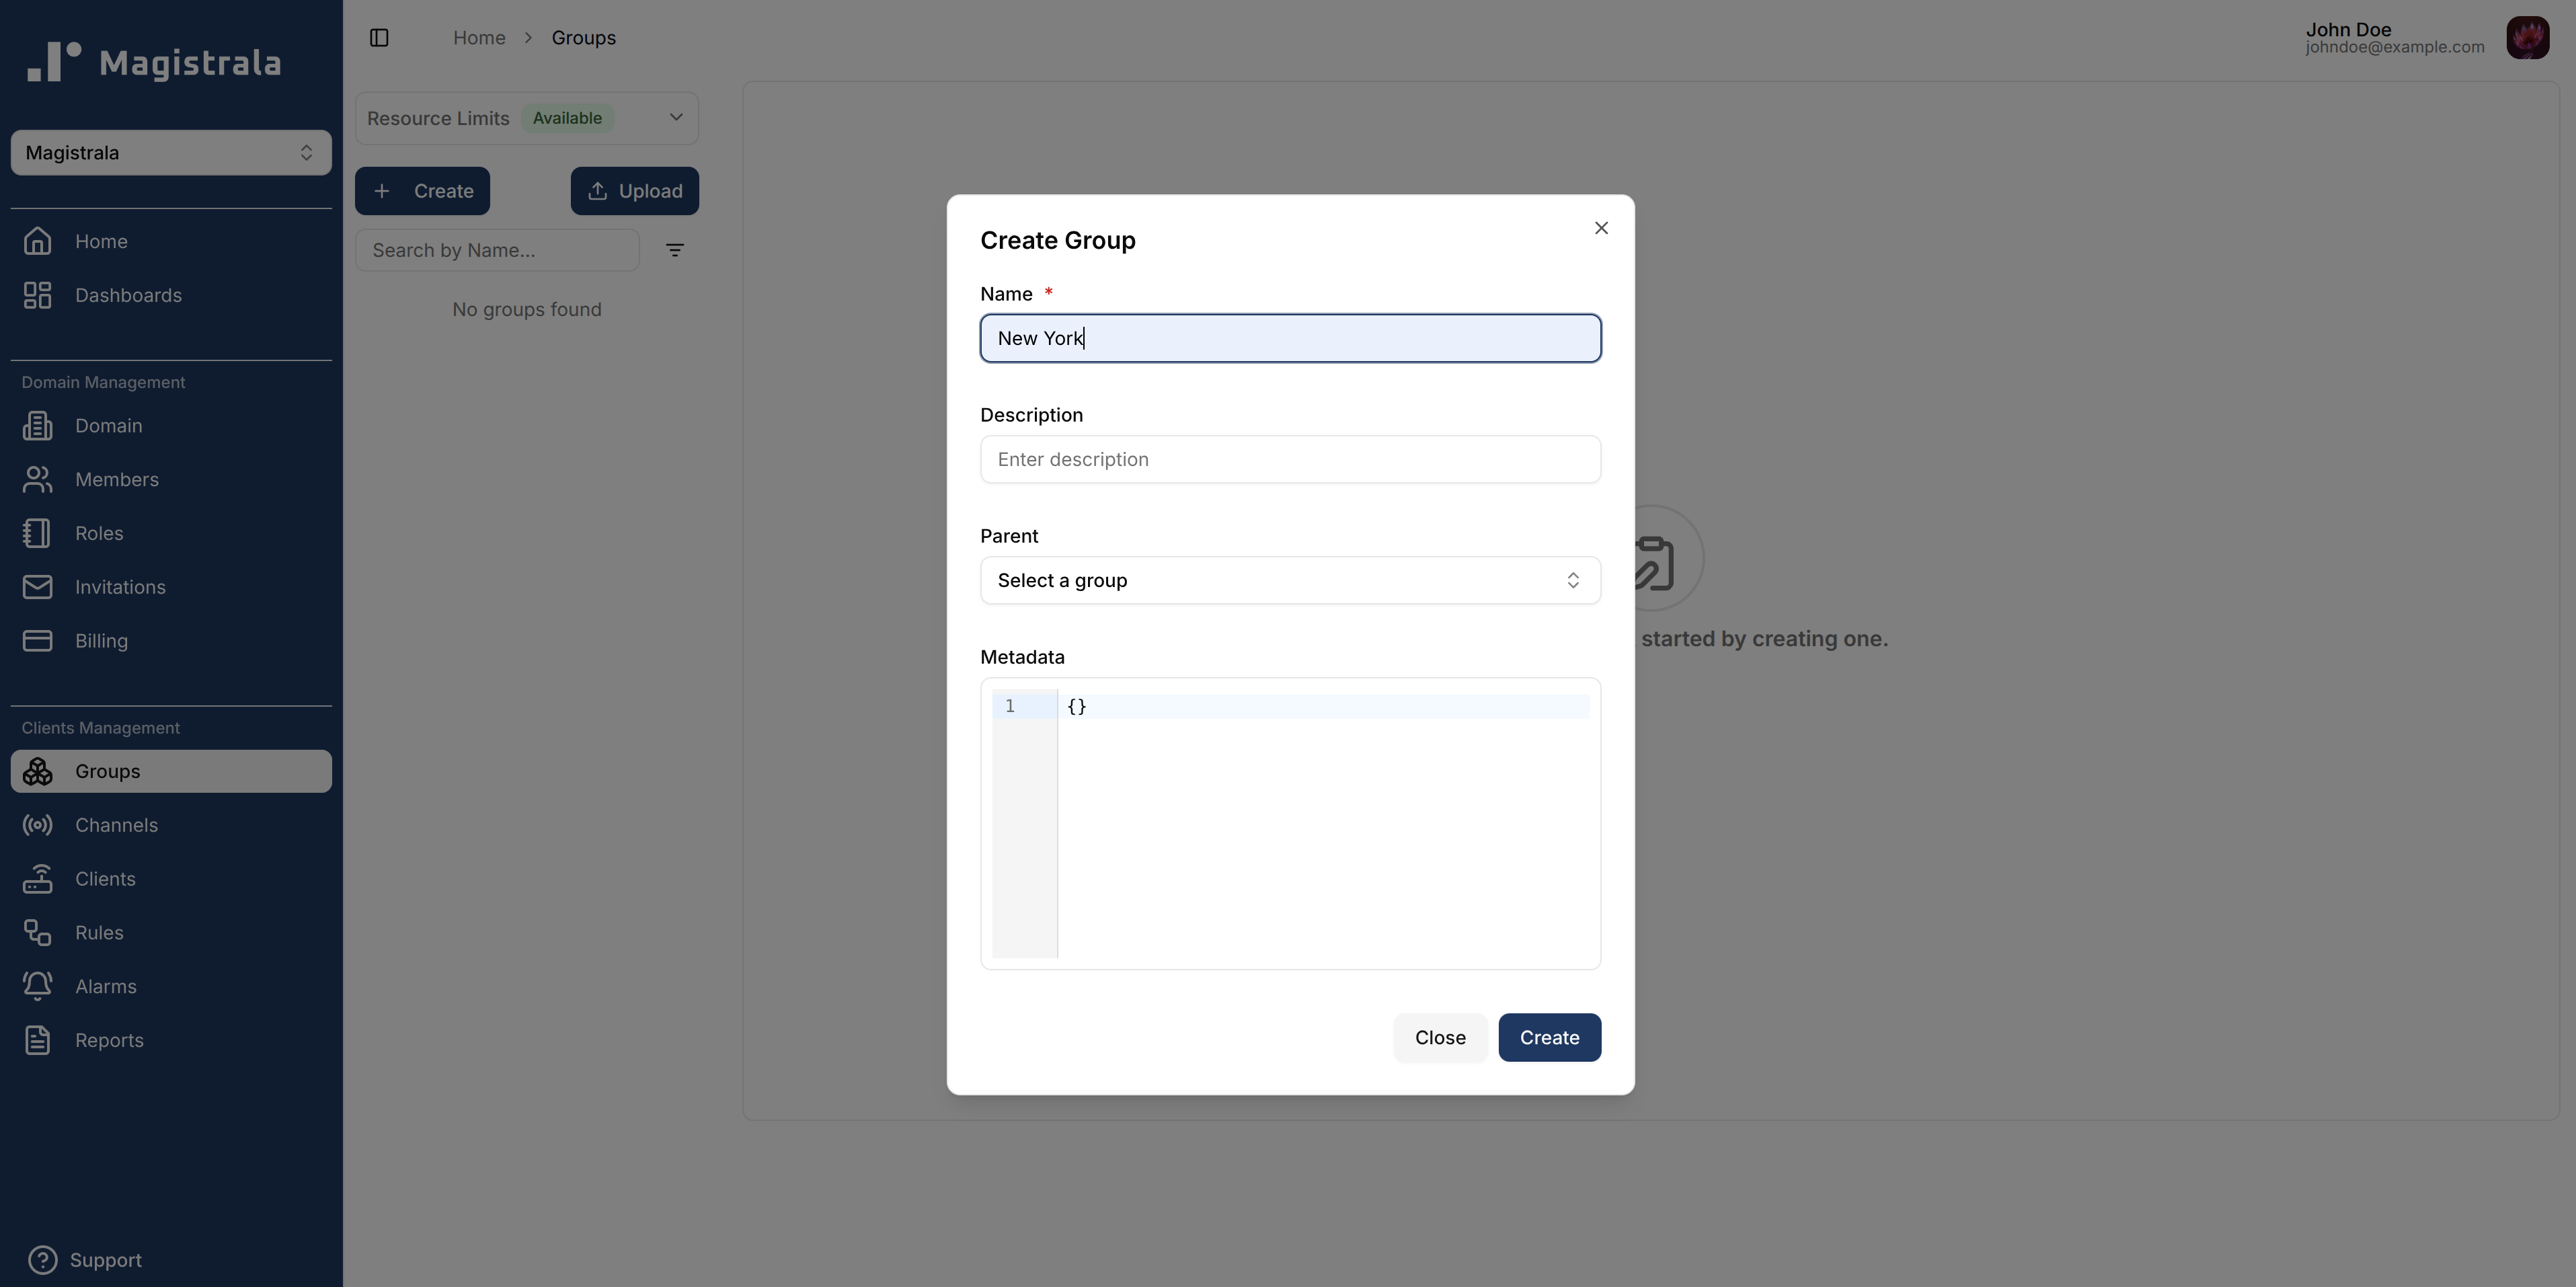
If a parent group is selected, the new group becomes its child.
This creates a hierarchy where role actions assigned in the parent group are automatically inherited by all child groups.
View a Group
After creation, the group will appear in the Groups sidebar.
The group page has two tabs: Settings and Metadata.
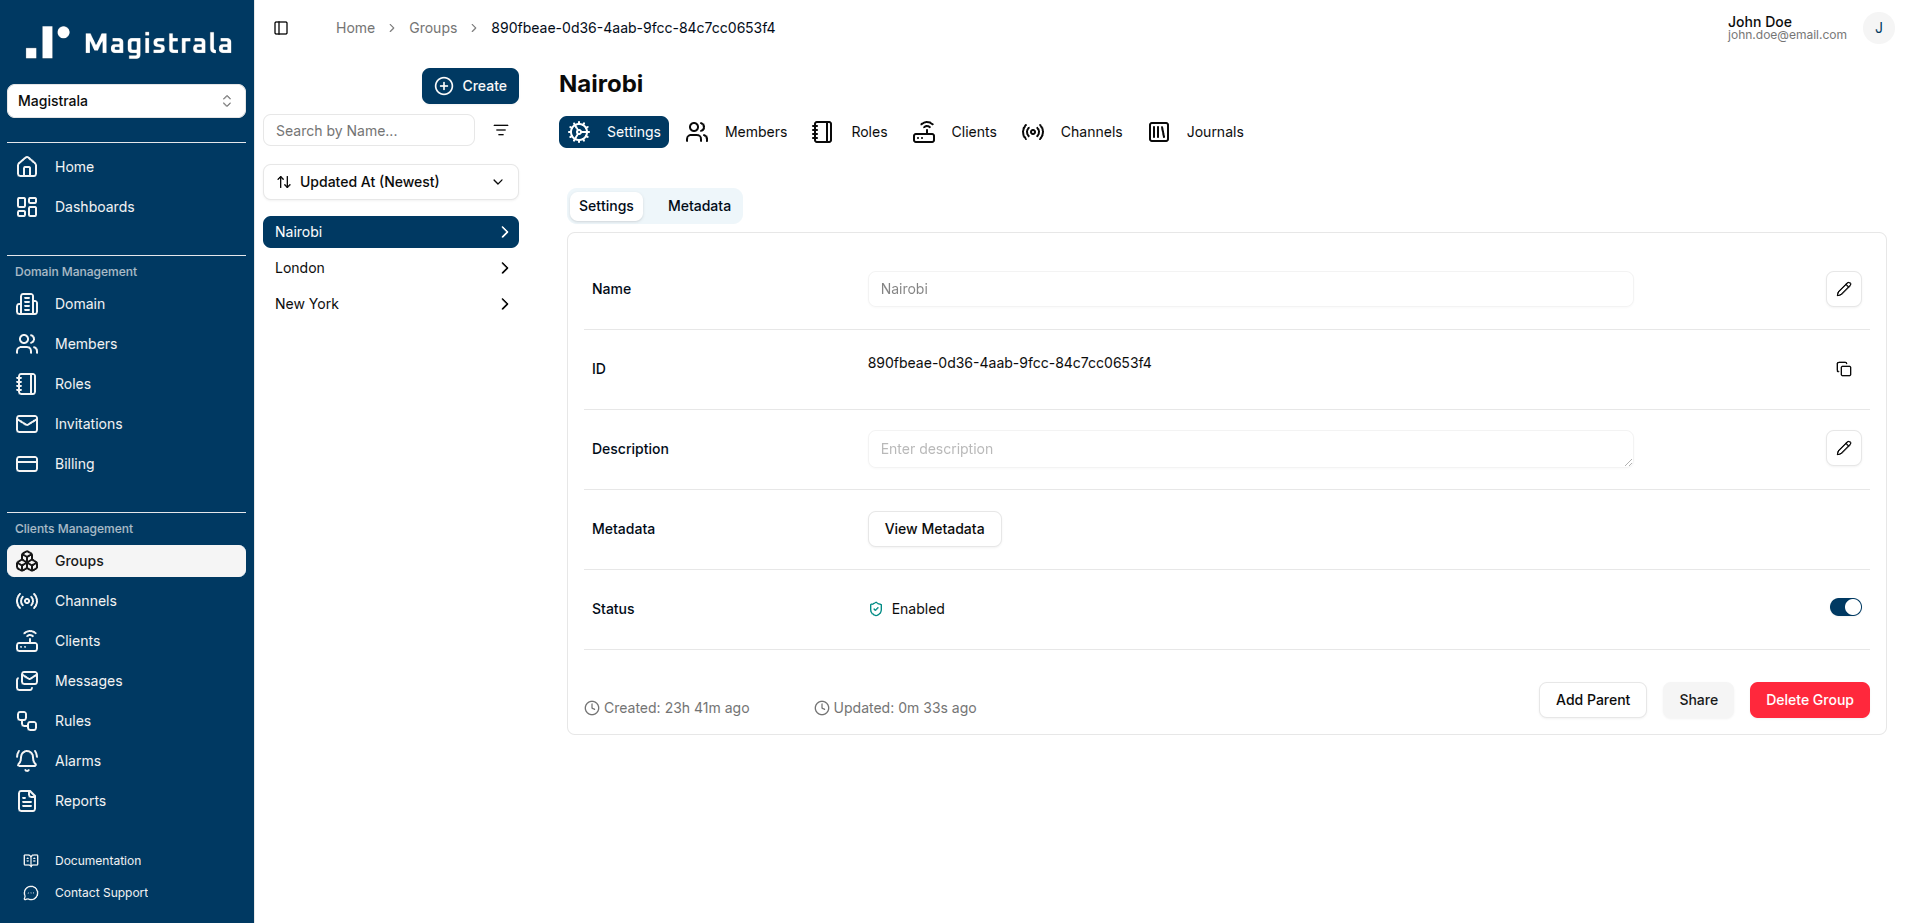
Settings Tab
The Settings tab displays key details about a group and allows you to edit core properties:
Editable Fields:
- Name – Group identifier
- Description – Optional description of the group
- Status – Enable or disable the group using the toggle switch
View-Only Fields:
- ID – Unique group identifier
- Metadata – View existing metadata in JSON format (managed in the Metadata tab)
To update a field, click the pencil icon next to it. Once you have updated the value, click the check icon to save changes or the cross icon to cancel.
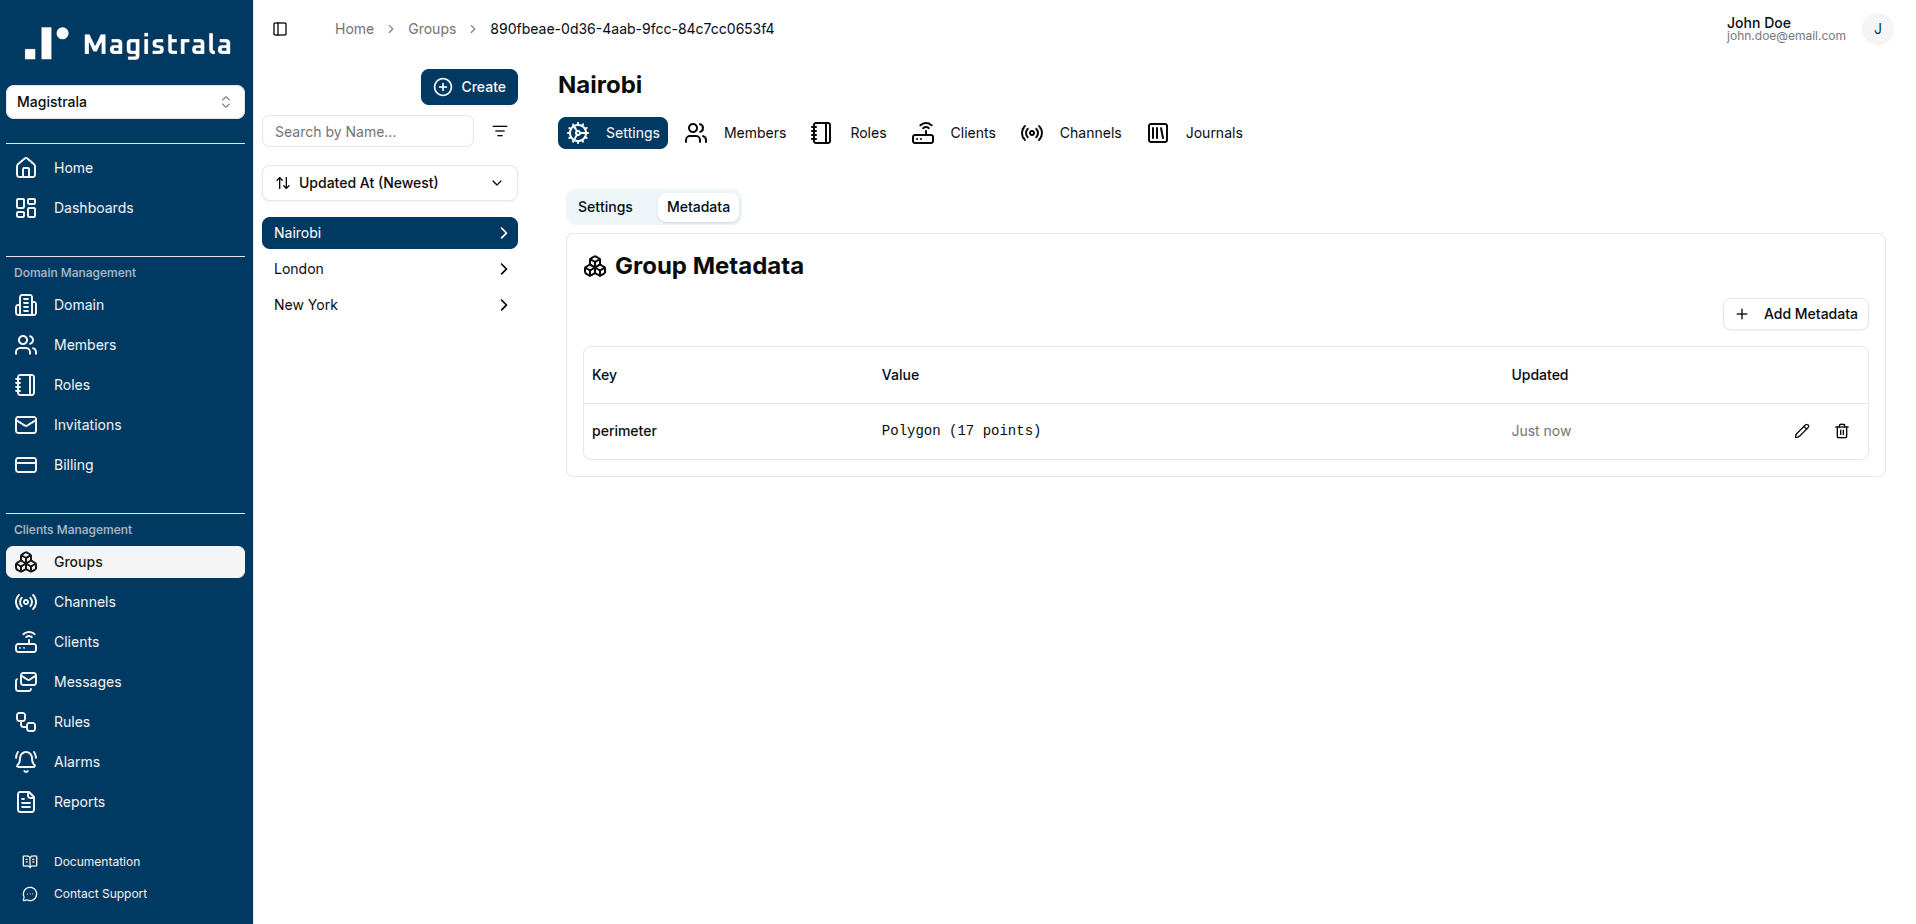
Metadata Tab
The Metadata tab allows you to add, view, and manage additional information for the group. Metadata supports various value types including text, numbers, booleans, JSON objects, locations, and perimeters.
For detailed instructions on managing metadata, including working with interactive maps for location and perimeter data, see the Metadata Management Guide.
Update a Group
While on the View Group page, you are allowed to update the group details such as the name, description, metadata, and status.
To update a field, click on the pencil icon on the far end of the field to edit. Once you have updated the value, click on the check icon to update the changes or the cross icon to cancel the change.
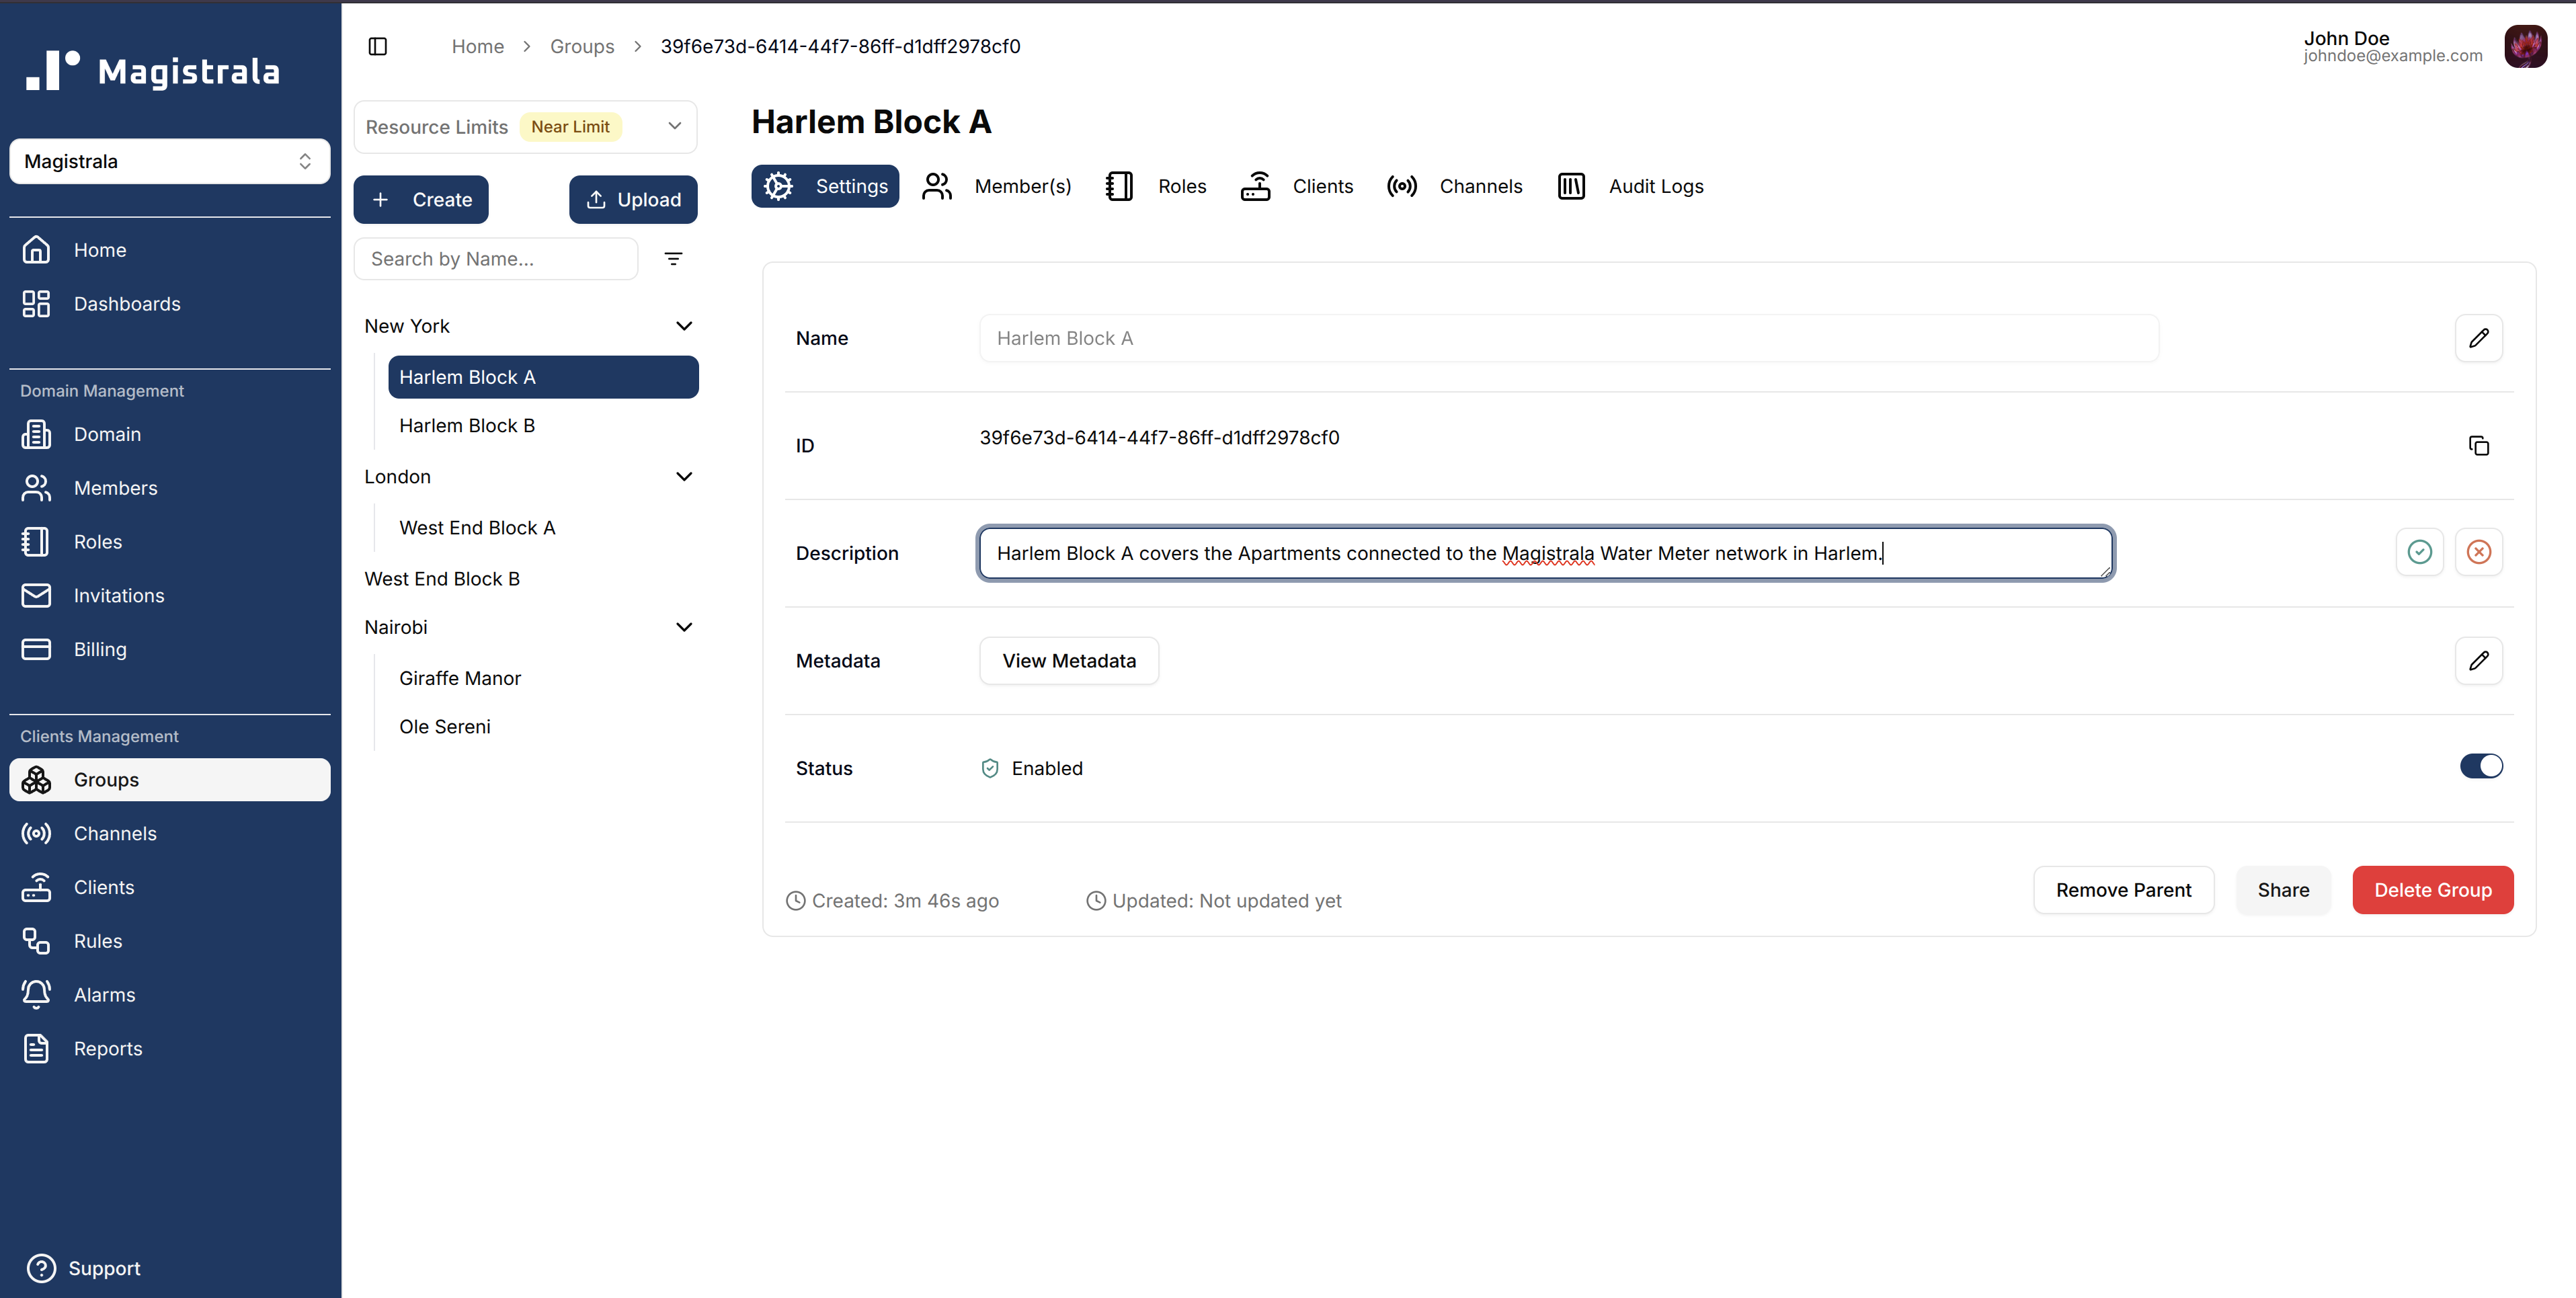
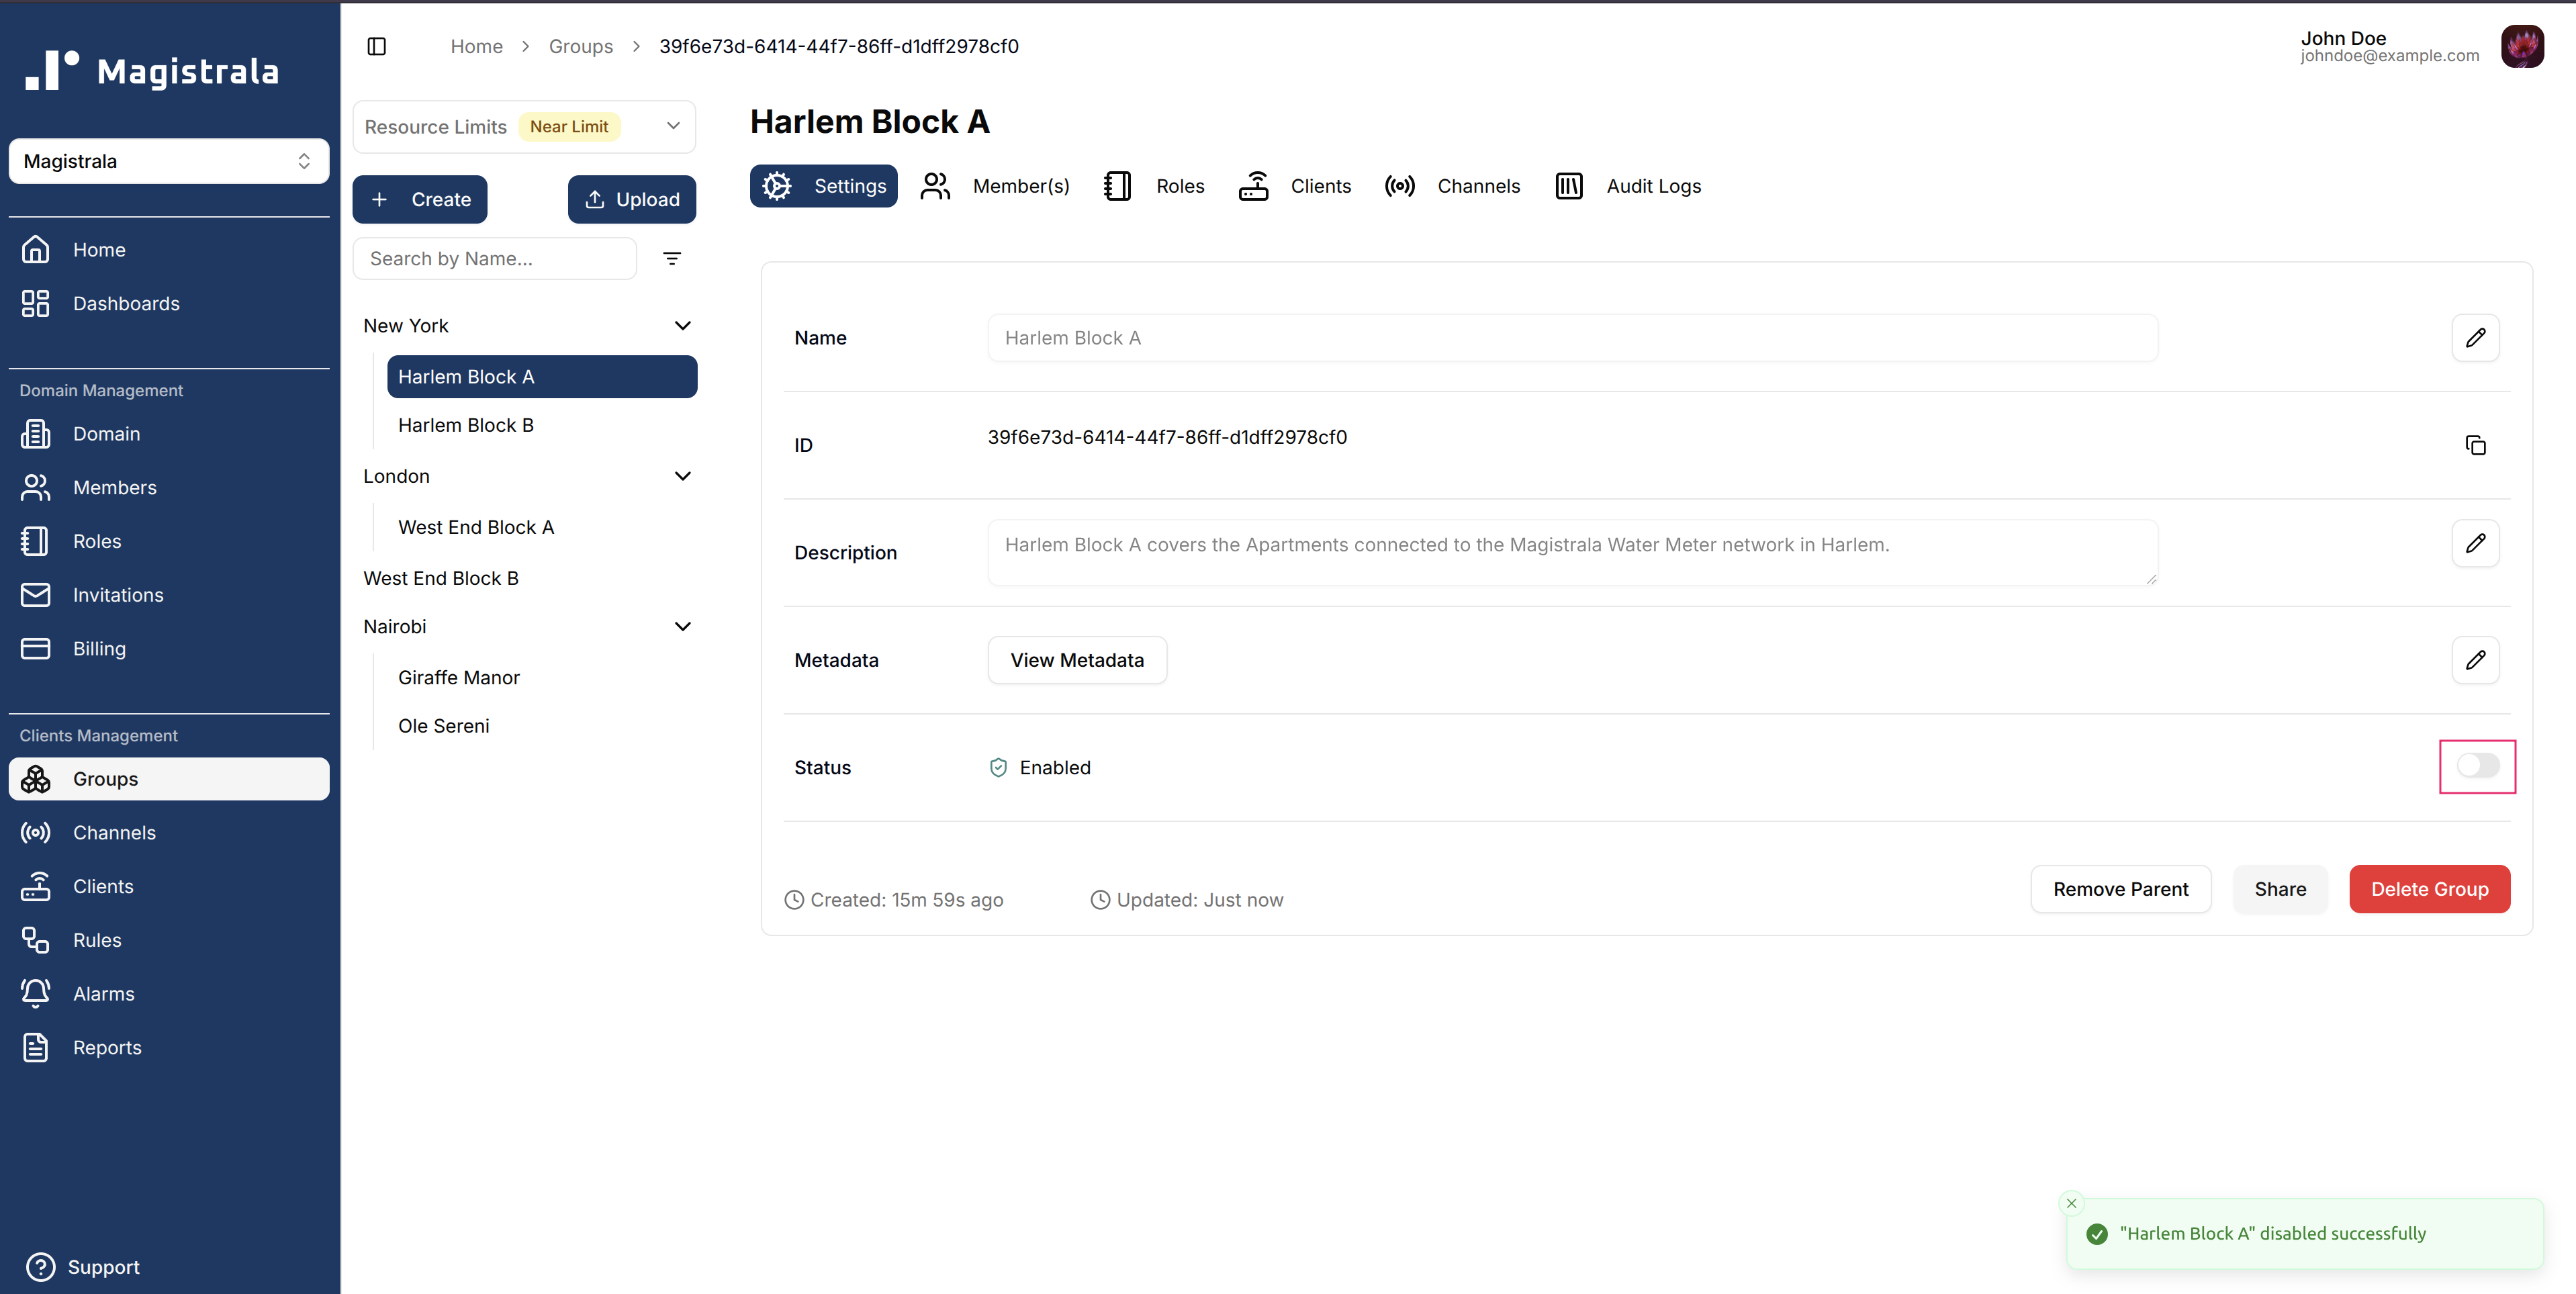
Groups can also be enabled or disabled by toggling the switch in the Status field.
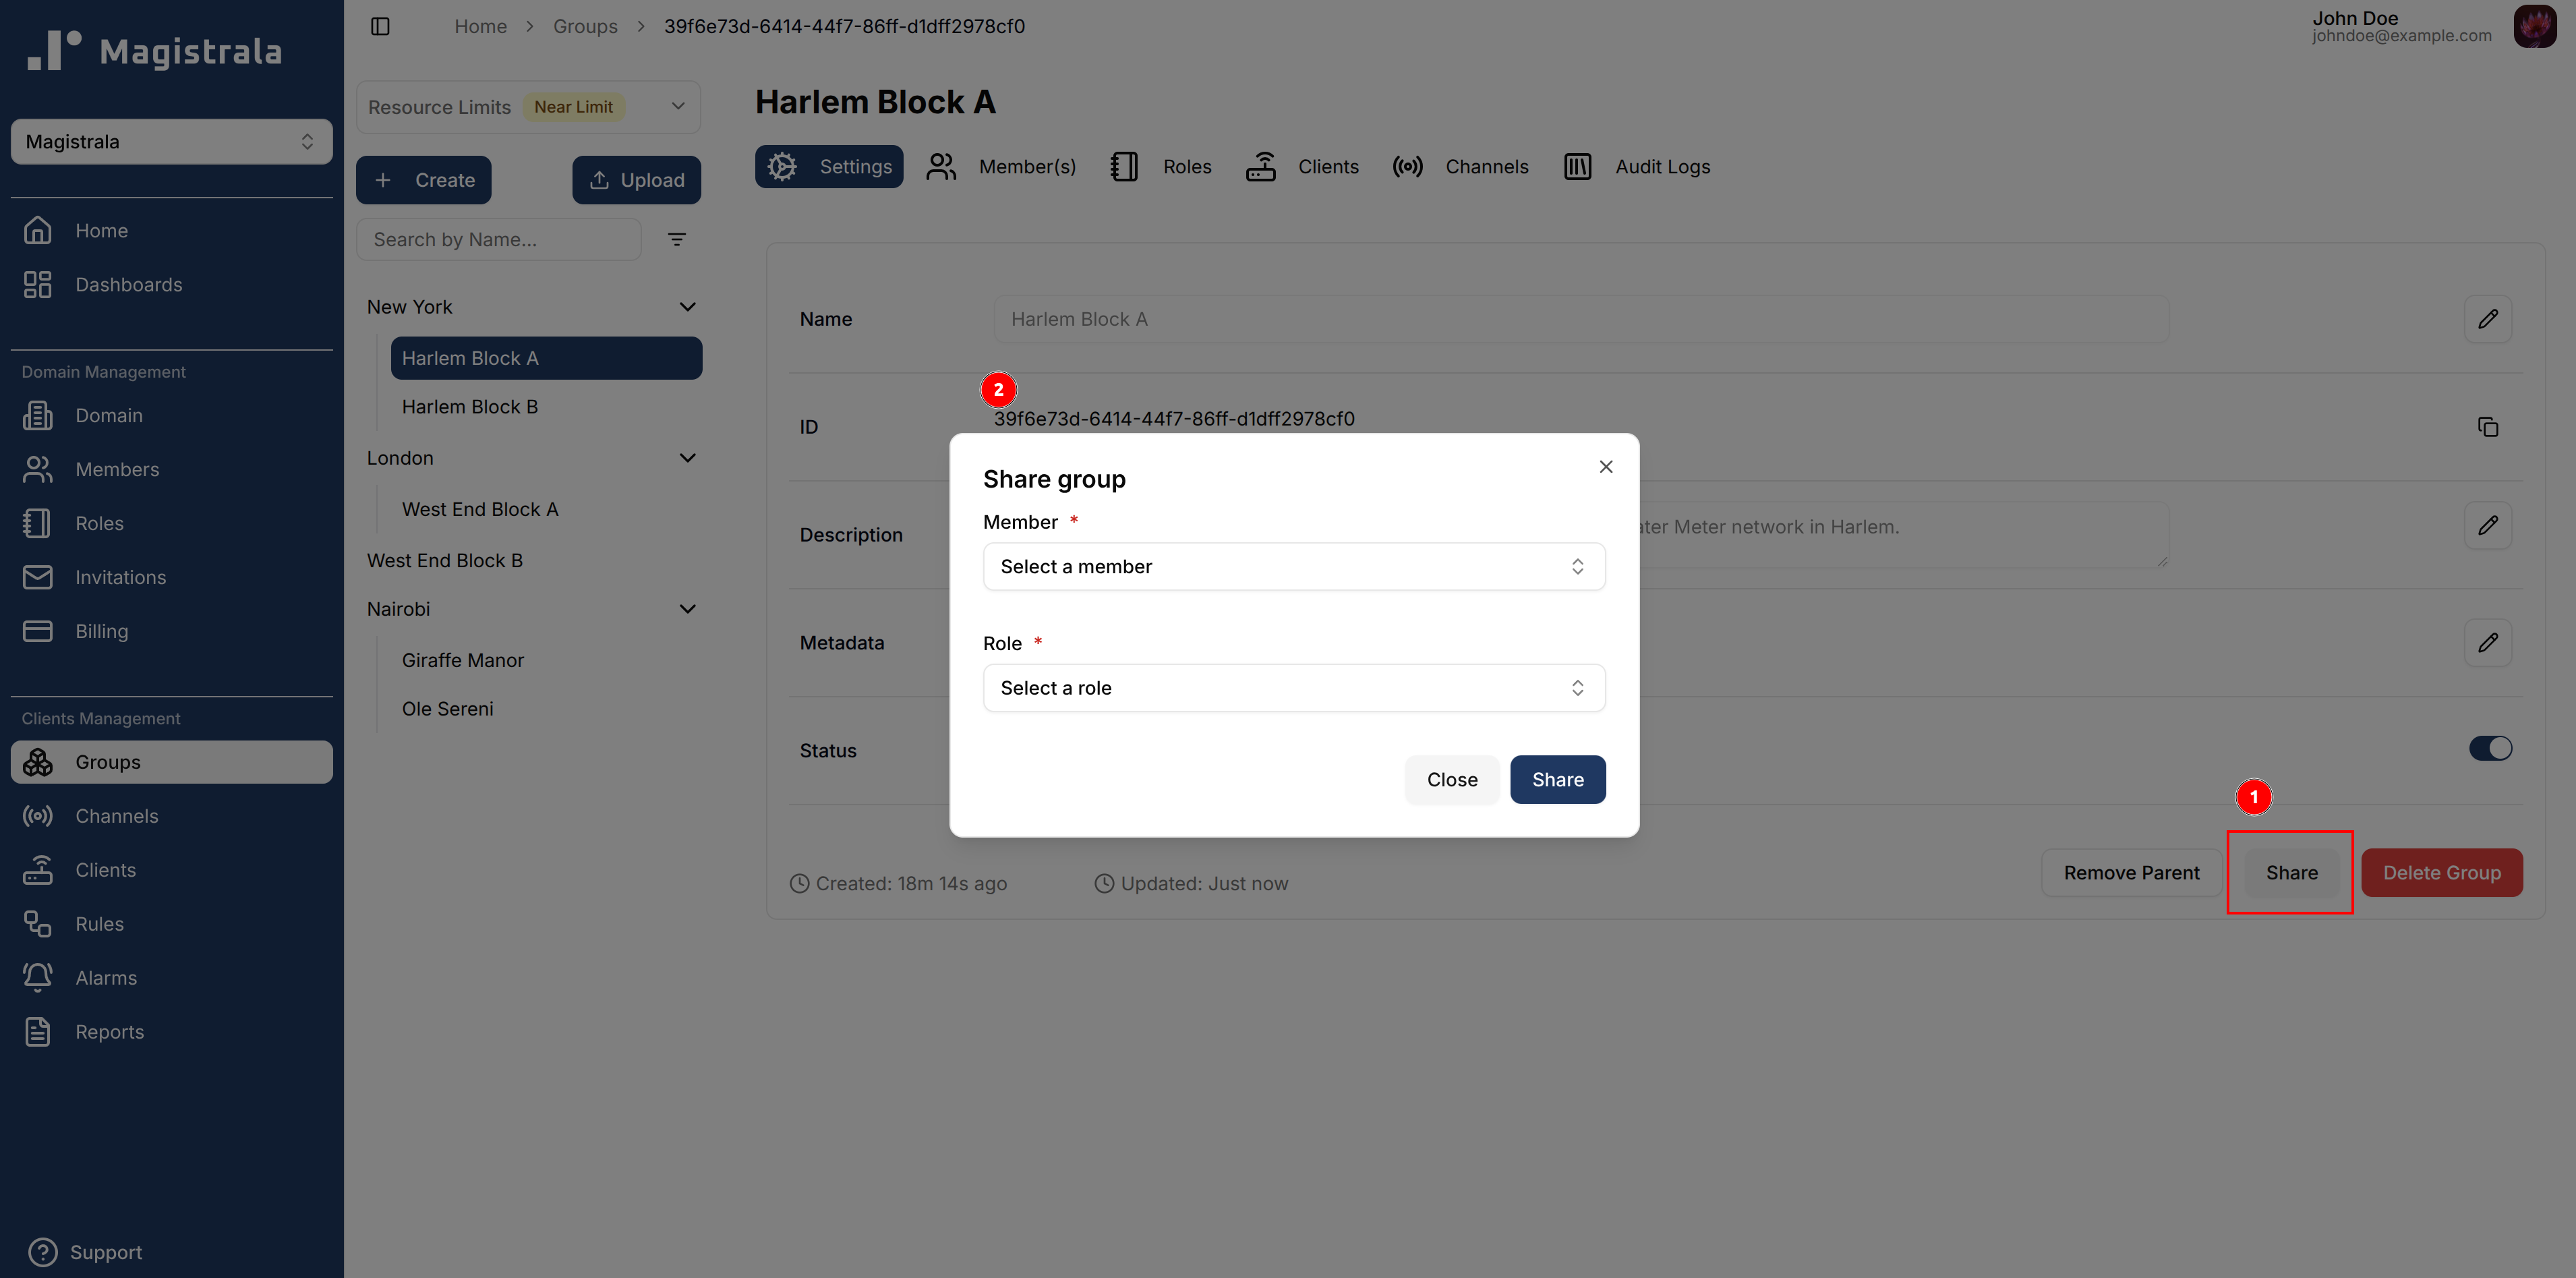
Share a Group
A group can also be shared to another domain member with specific group roles attached. Clicking on the Share button opens up a dialog that needs a Member as well as a Role.
Group Roles will be explained in the next section.
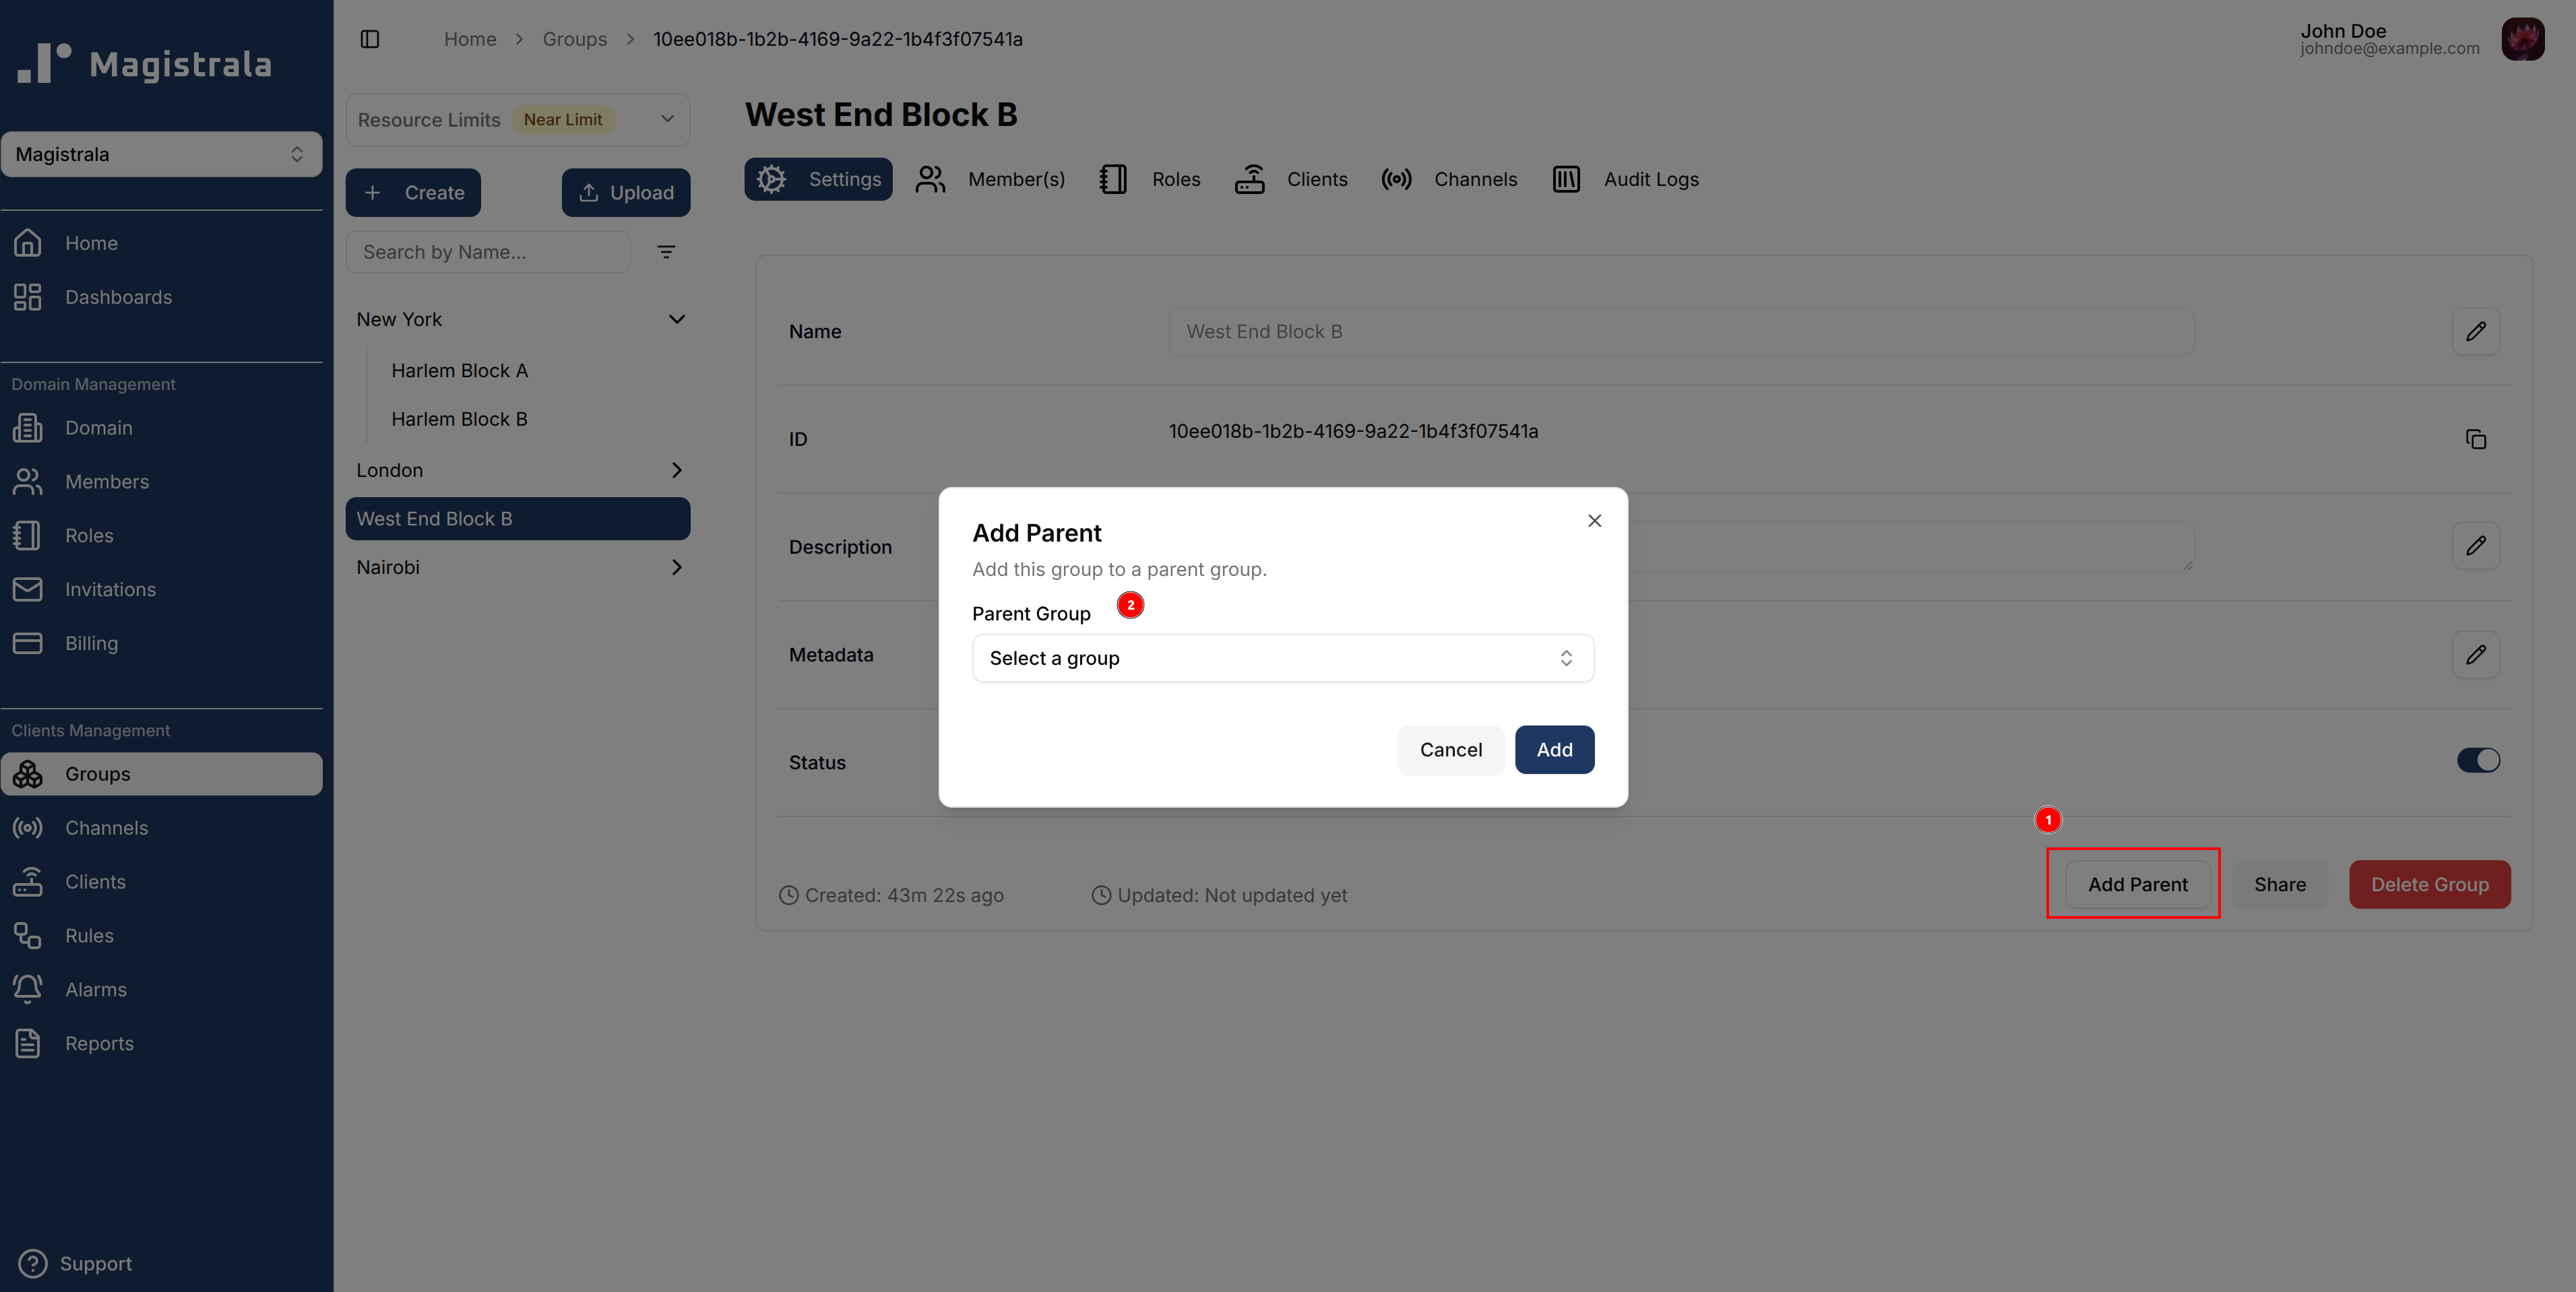
Manage Parent Groups
To remove a child from the hierarchy it currently resides in, simply click on the Remove Parent button. This will remove it from the tier in the group sidebar and have it lose all the role actions and members it previously had access to.
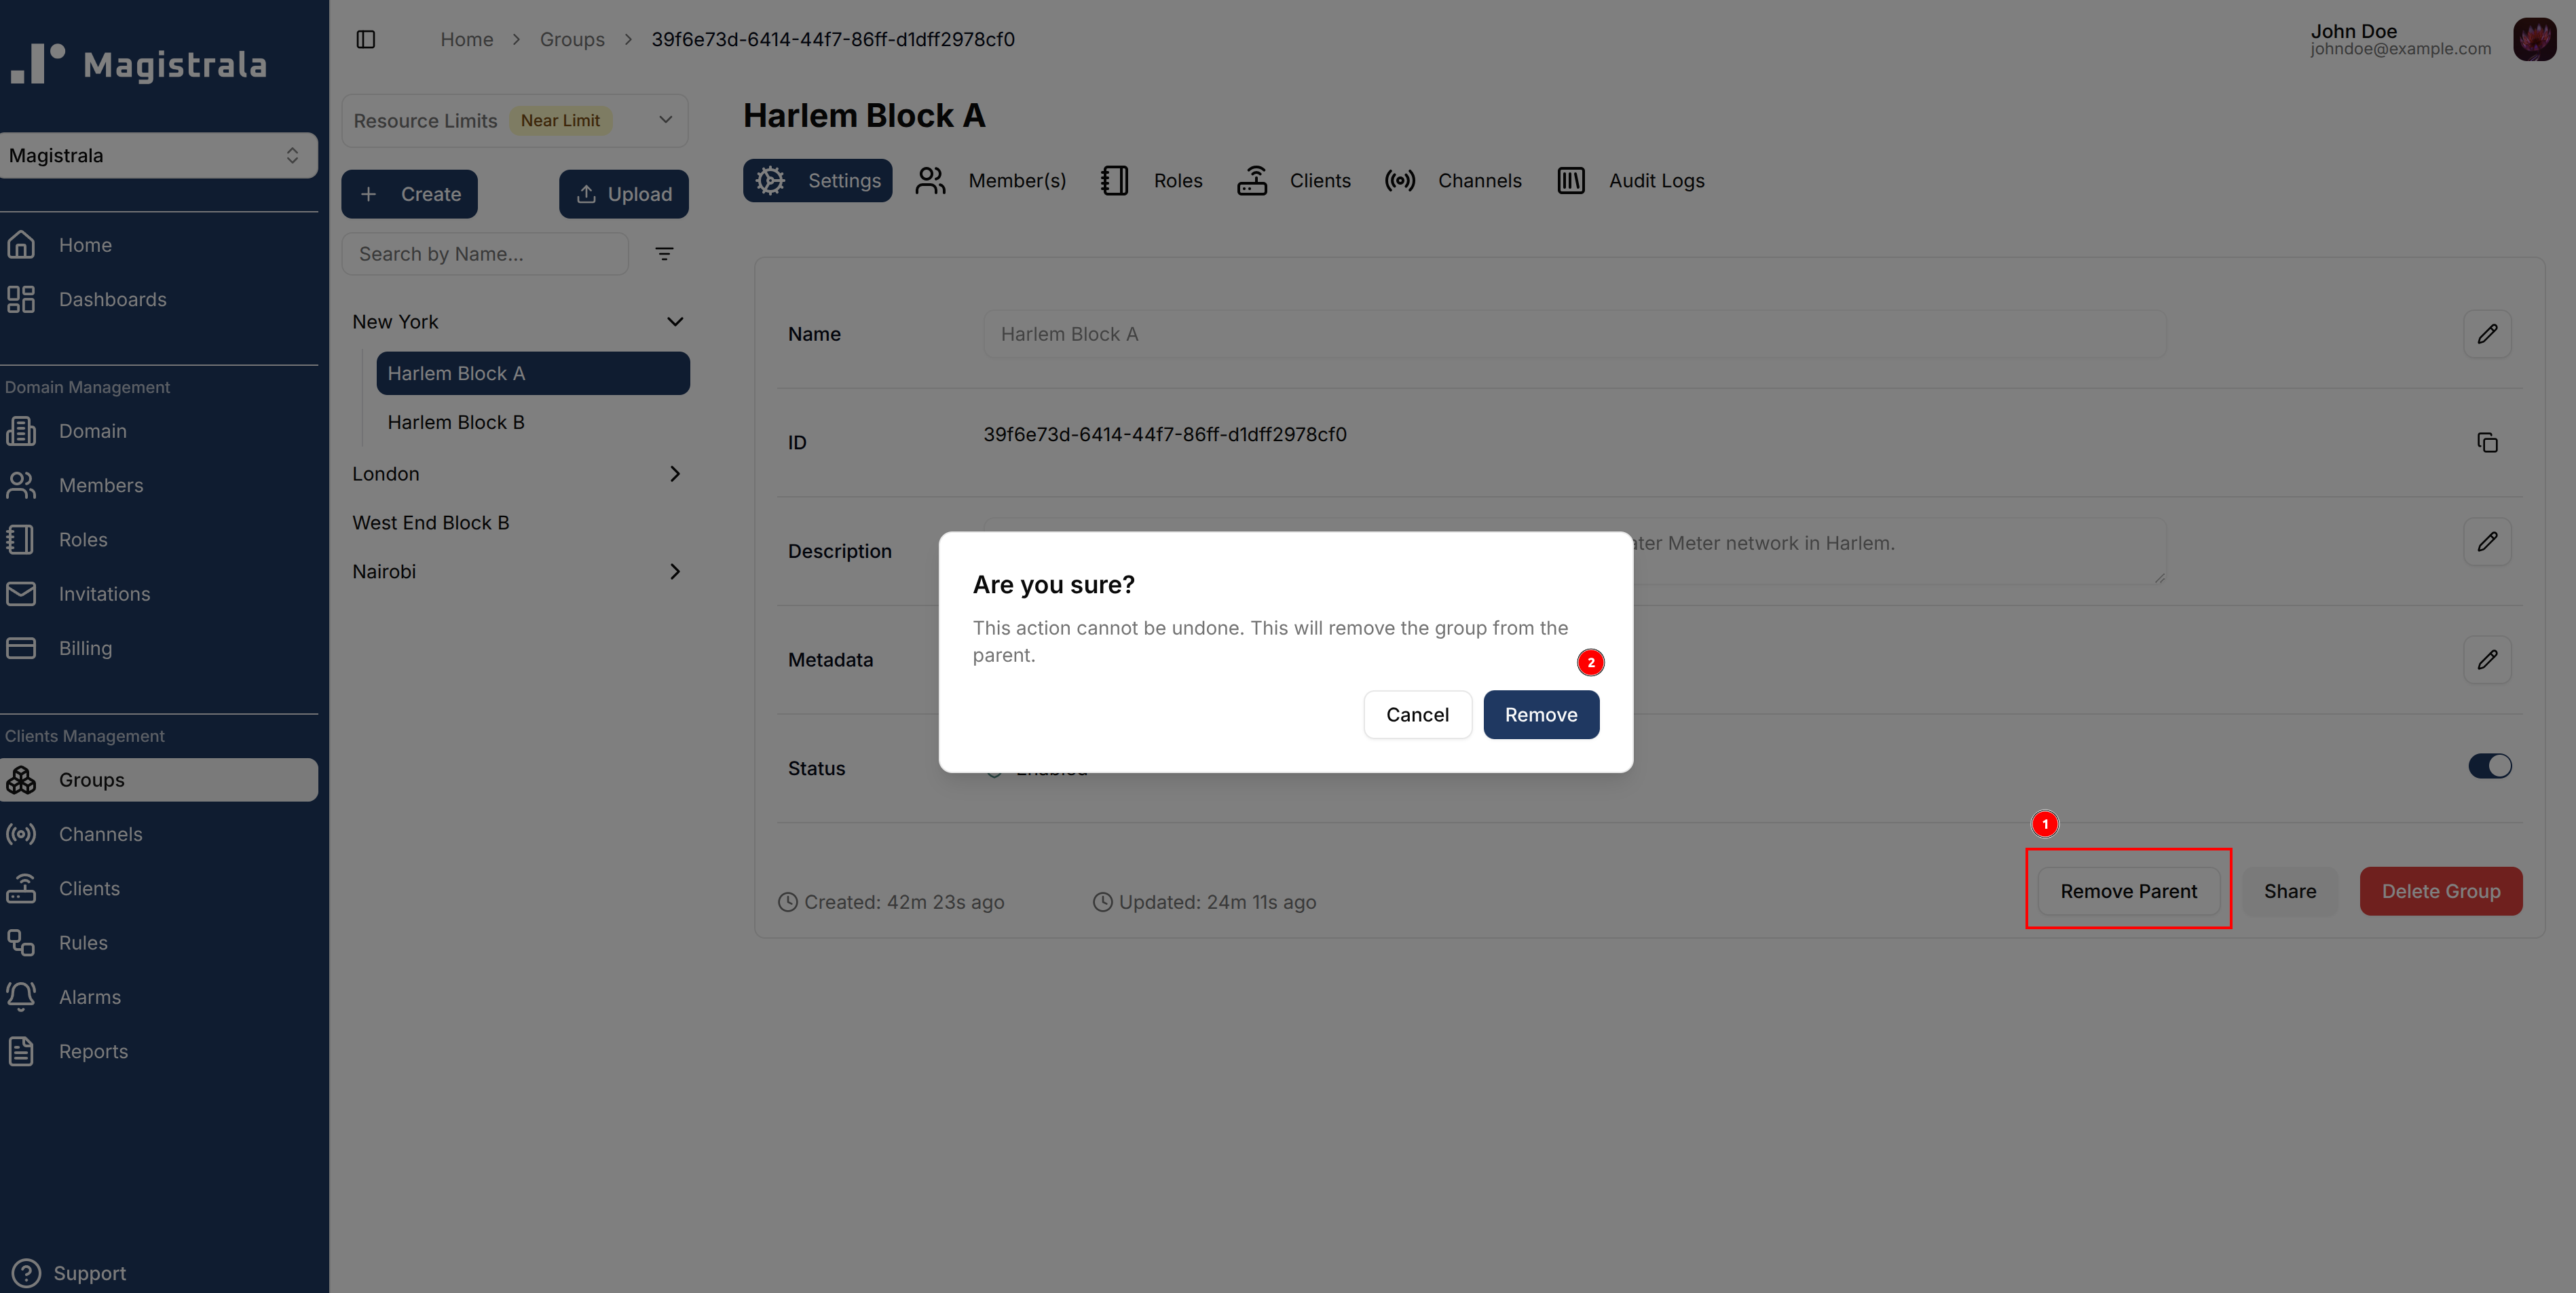
In the case of a group without a parent, the button will instead prompt you to select a parent group from the current list of groups.
Group Roles
Create Group Roles
Roles allow you to group a specific set of actions and allocate them to users.
To create a role, navigate to the Roles section on the group navbar. Click on the + Create button and provide a role name. The actions and members are optional fields.
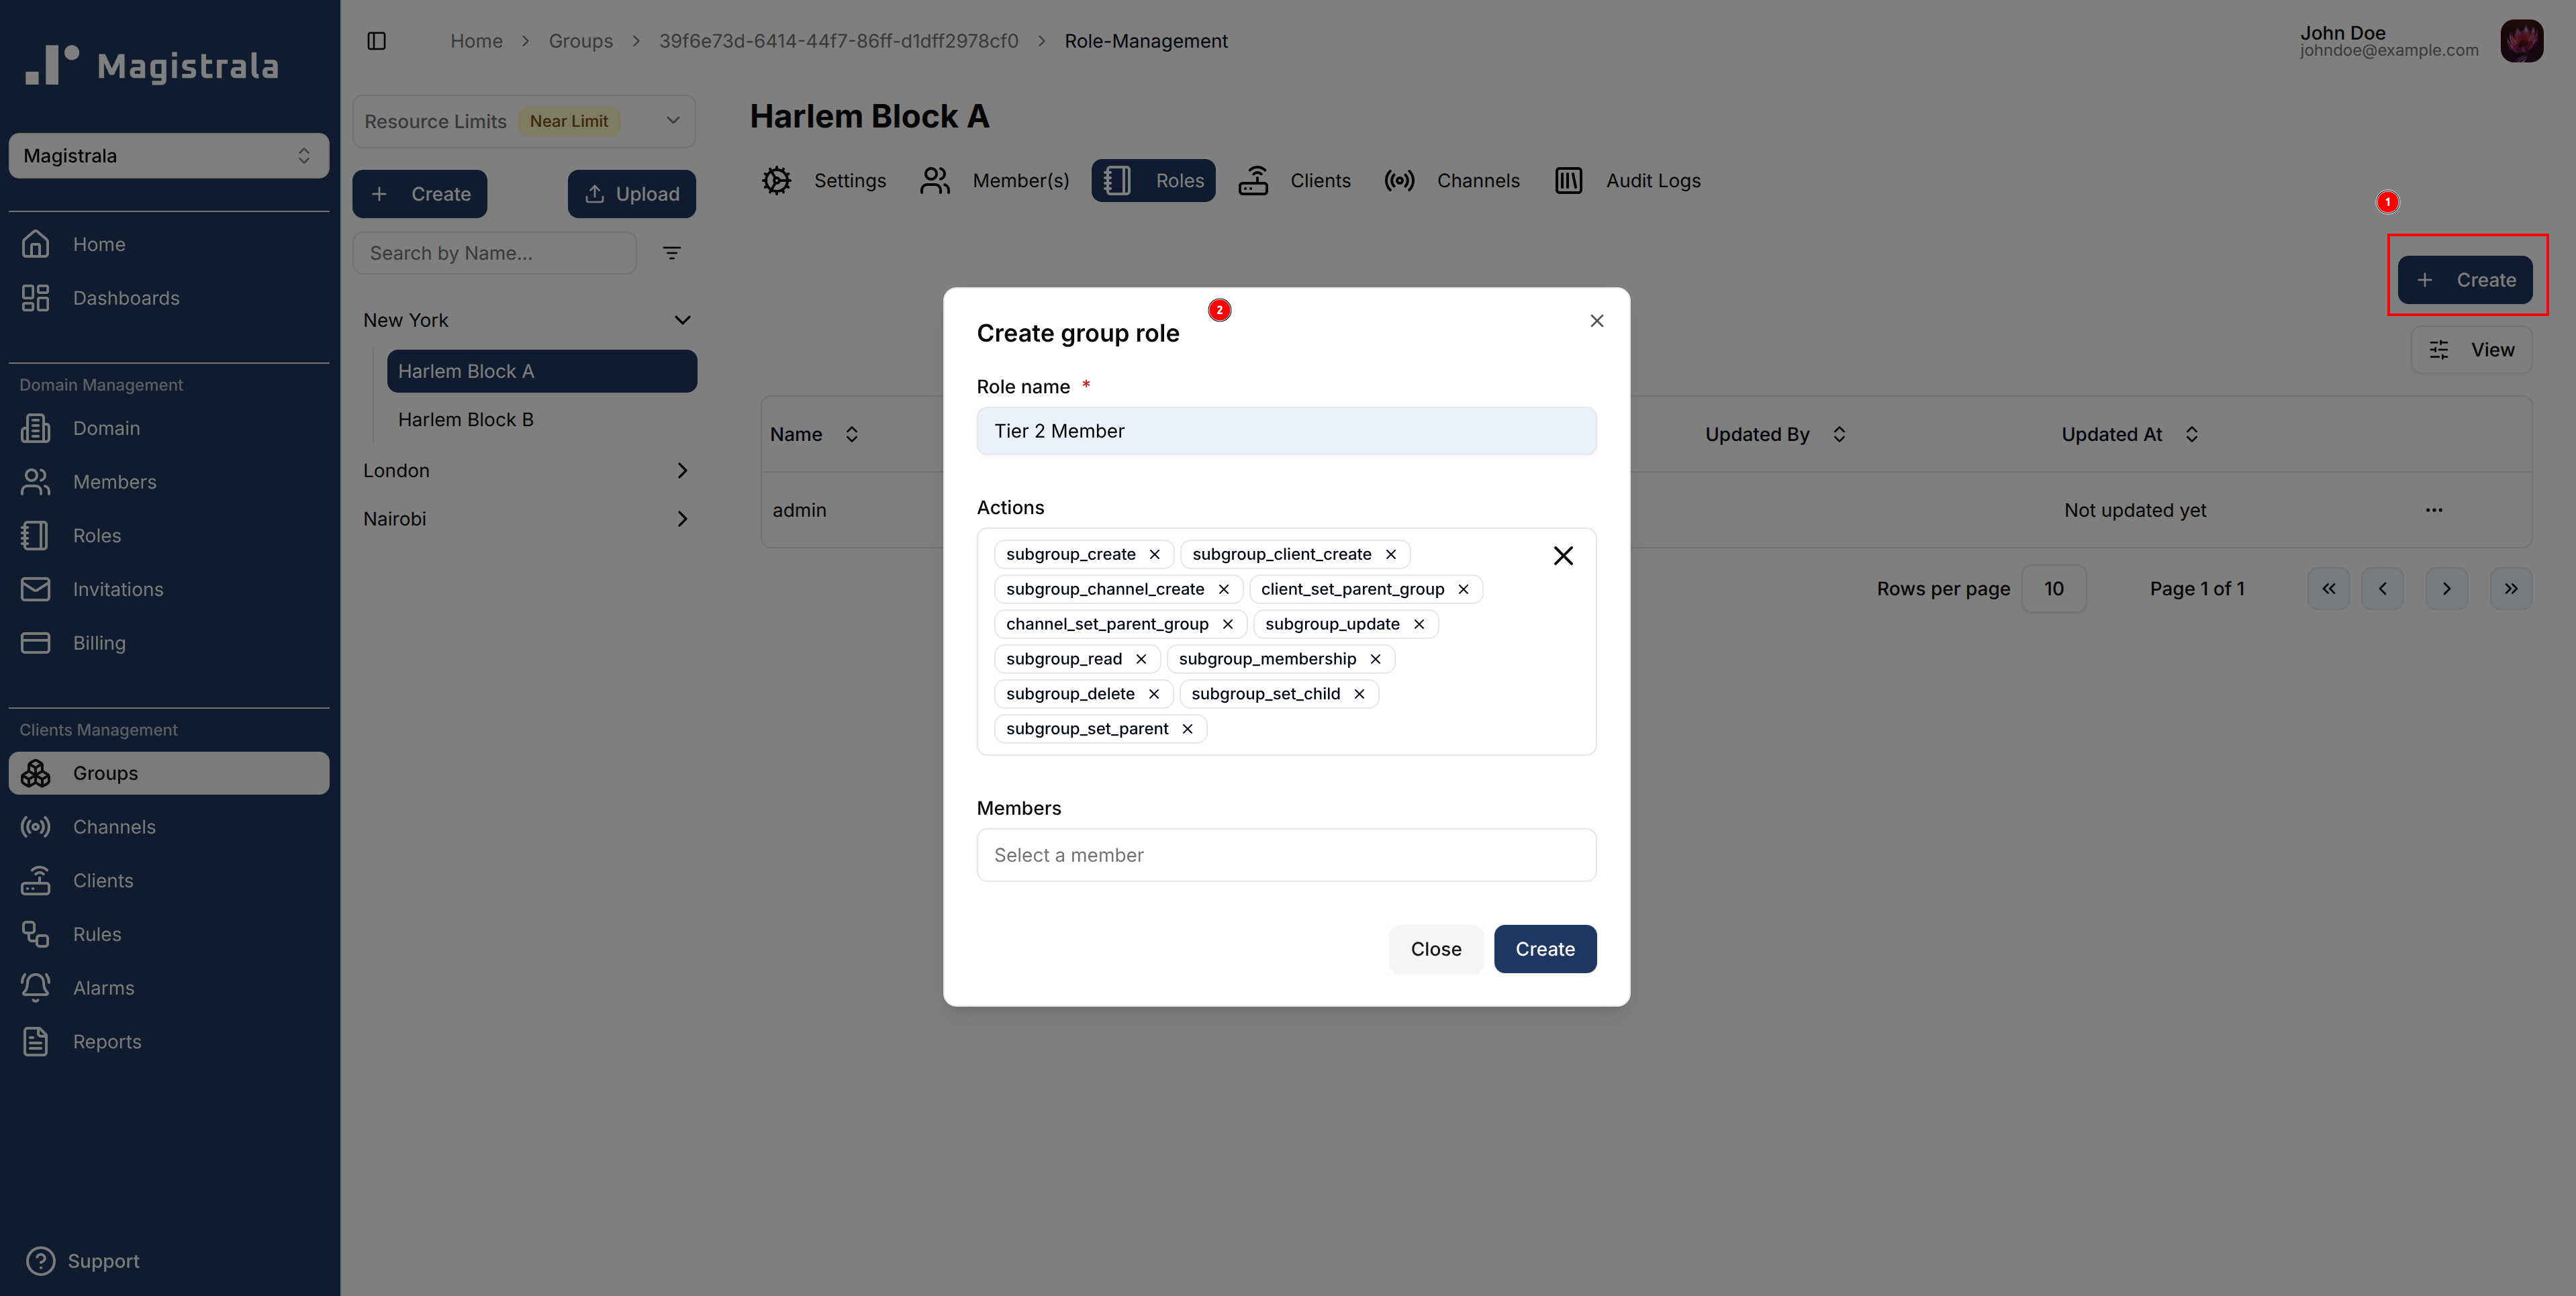
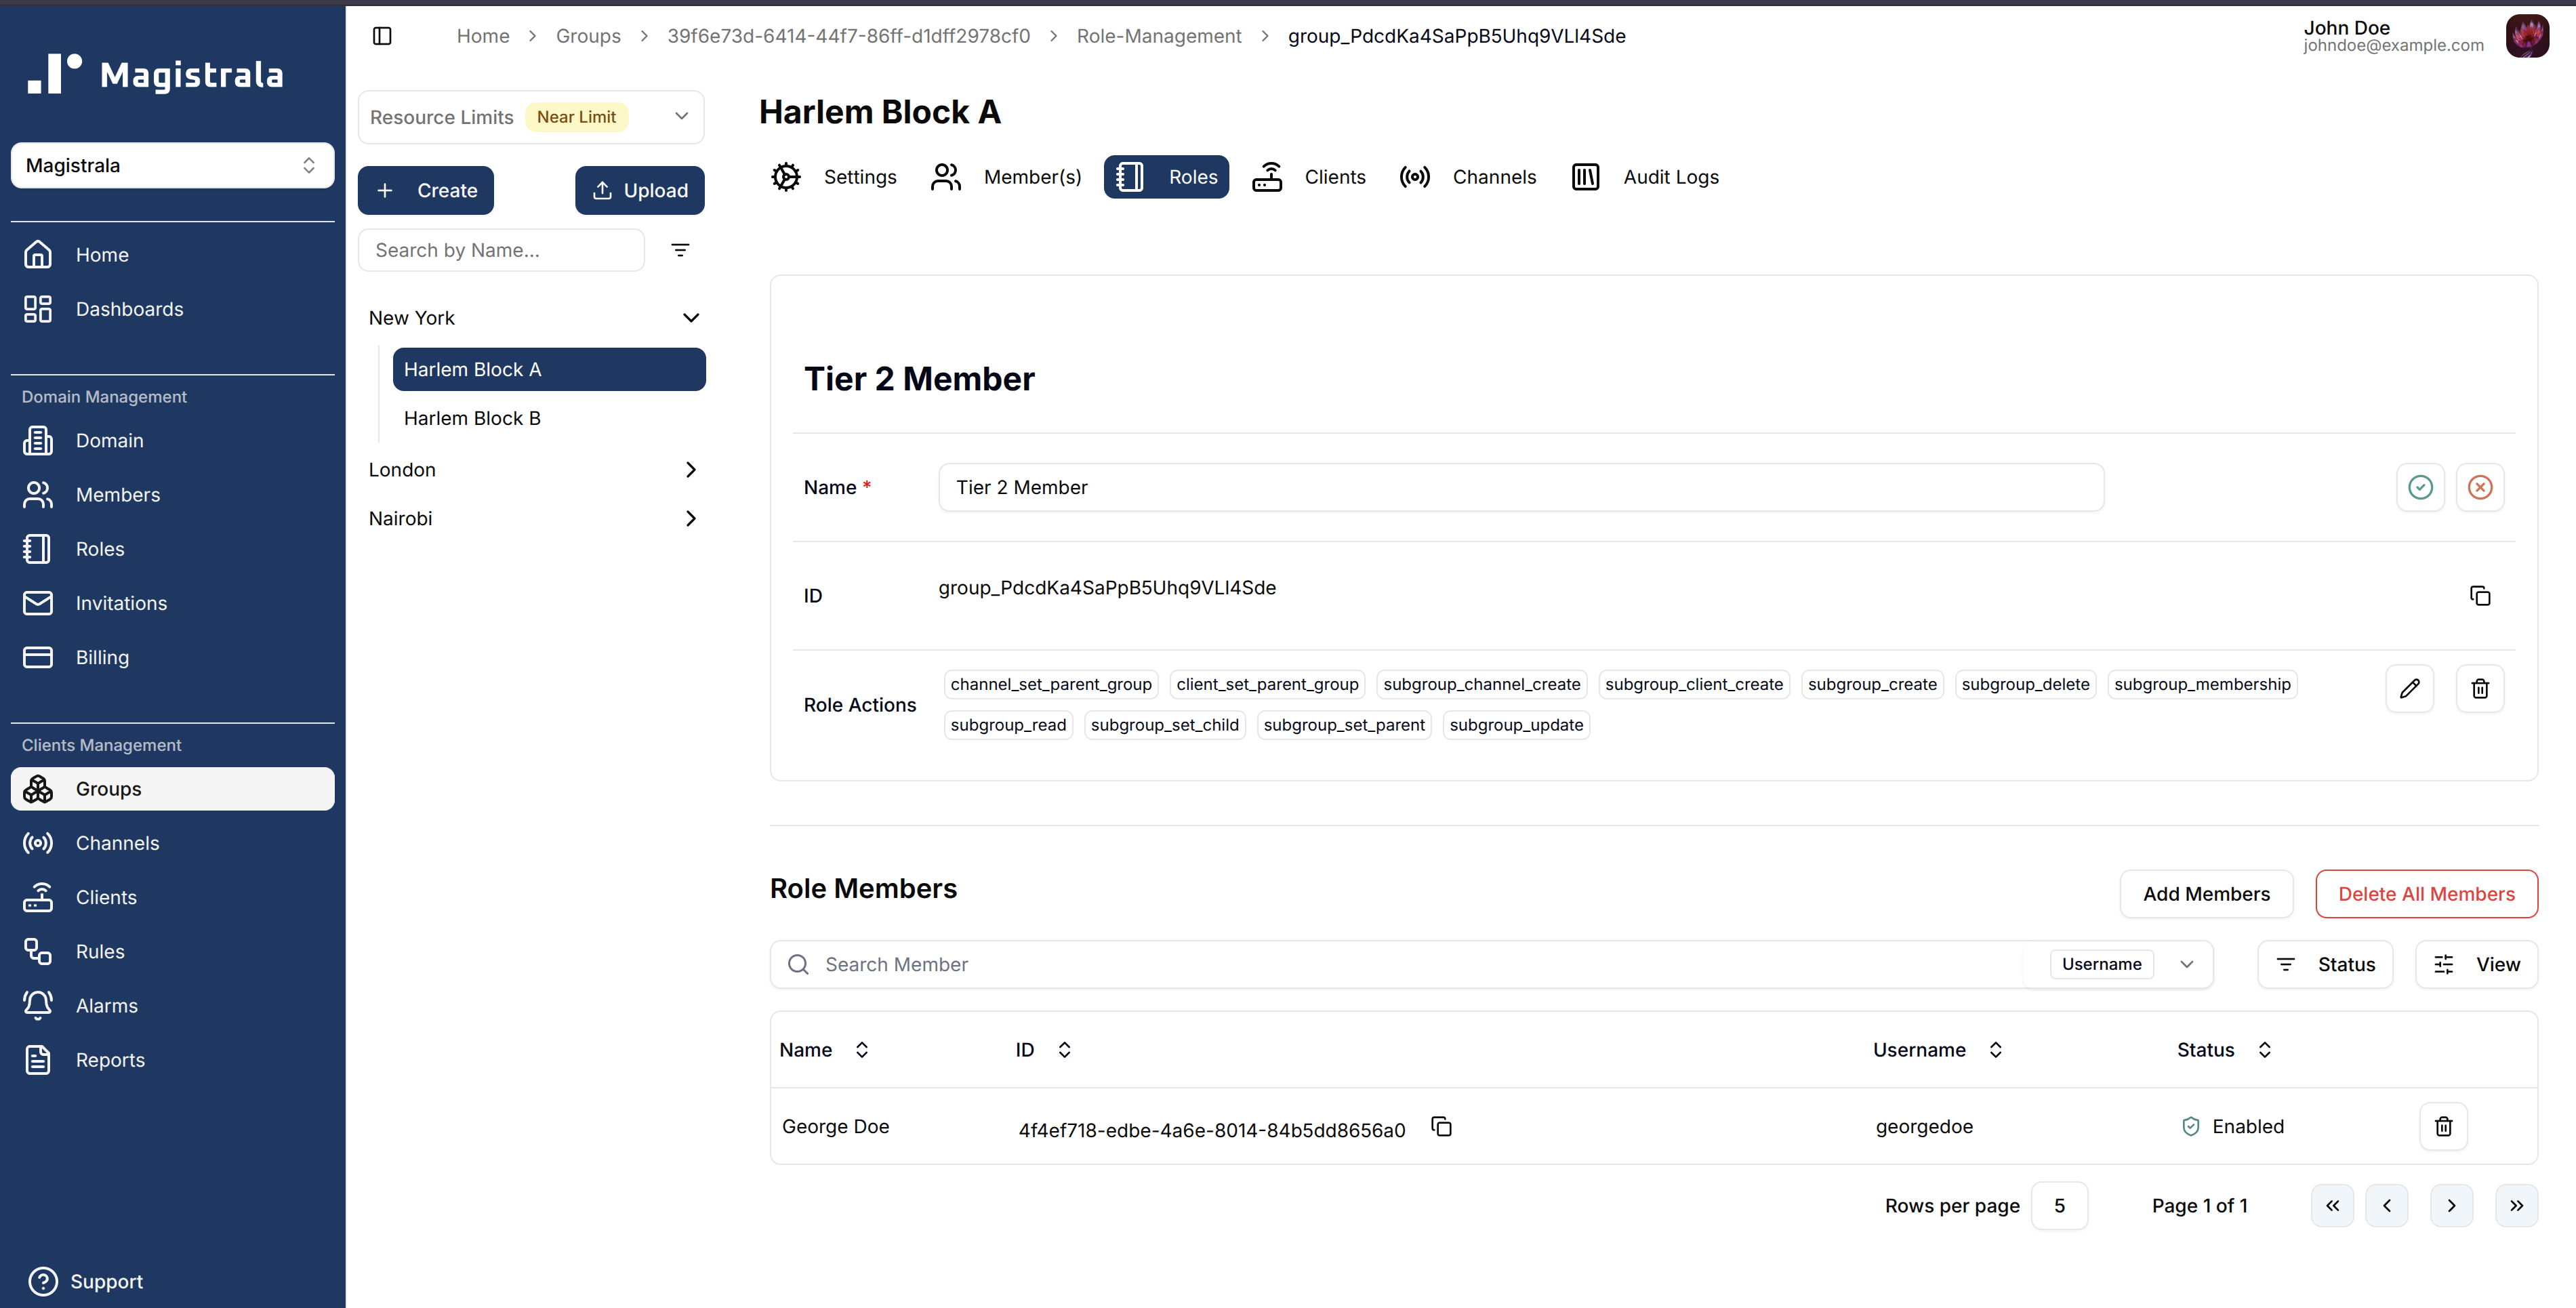
Role Information
When creating the Group Role, the role name is compulsory. You can optionally provide the role actions by selecting from the available actions. You can also optionally provide the members by searching for a user with their username. These Users must be members of the same domain however.
The following is the list of available actions for a group:
-
Group Management
- read
- update
- membership
- delete
-
Hierarchy Management
- set_child
- set_parent
-
Role Management
- manage_role
- add_role_users
- remove_role_users
- view_role_users
-
Client Management
- client_create
- client_update
- client_read
- client_delete
- client_set_parent_group
- client_connect_to_channel
- client_manage_role
- client_add_role_users
- client_remove_role_users
- client_view_role_users
-
Channel Management
- channel_create
- channel_update
- channel_read
- channel_delete
- channel_set_parent_group
- channel_connect_to_client
- channel_publish
- channel_subscribe
- channel_manage_role
- channel_add_role_users
- channel_remove_role_users
- channel_view_role_users
-
Subgroup Management
- subgroup_create
- subgroup_channel_create
- subgroup_client_create
- subgroup_client_update
- subgroup_client_read
- subgroup_client_delete
- subgroup_client_set_parent_group
- subgroup_client_connect_to_channel
- subgroup_read
- subgroup_membership
- subgroup_delete
- subgroup_update
- subgroup_set_child
- subgroup_set_parent
- subgroup_add_role_users
- subgroup_manage_role
- subgroup_remove_role_users
- subgroup_view_role_users
Update Group Roles
To update a role name, click on the pencil icon on the far right end of the field, update the value then click on the check icon to update the changes or the cross icon to cancel the changes.
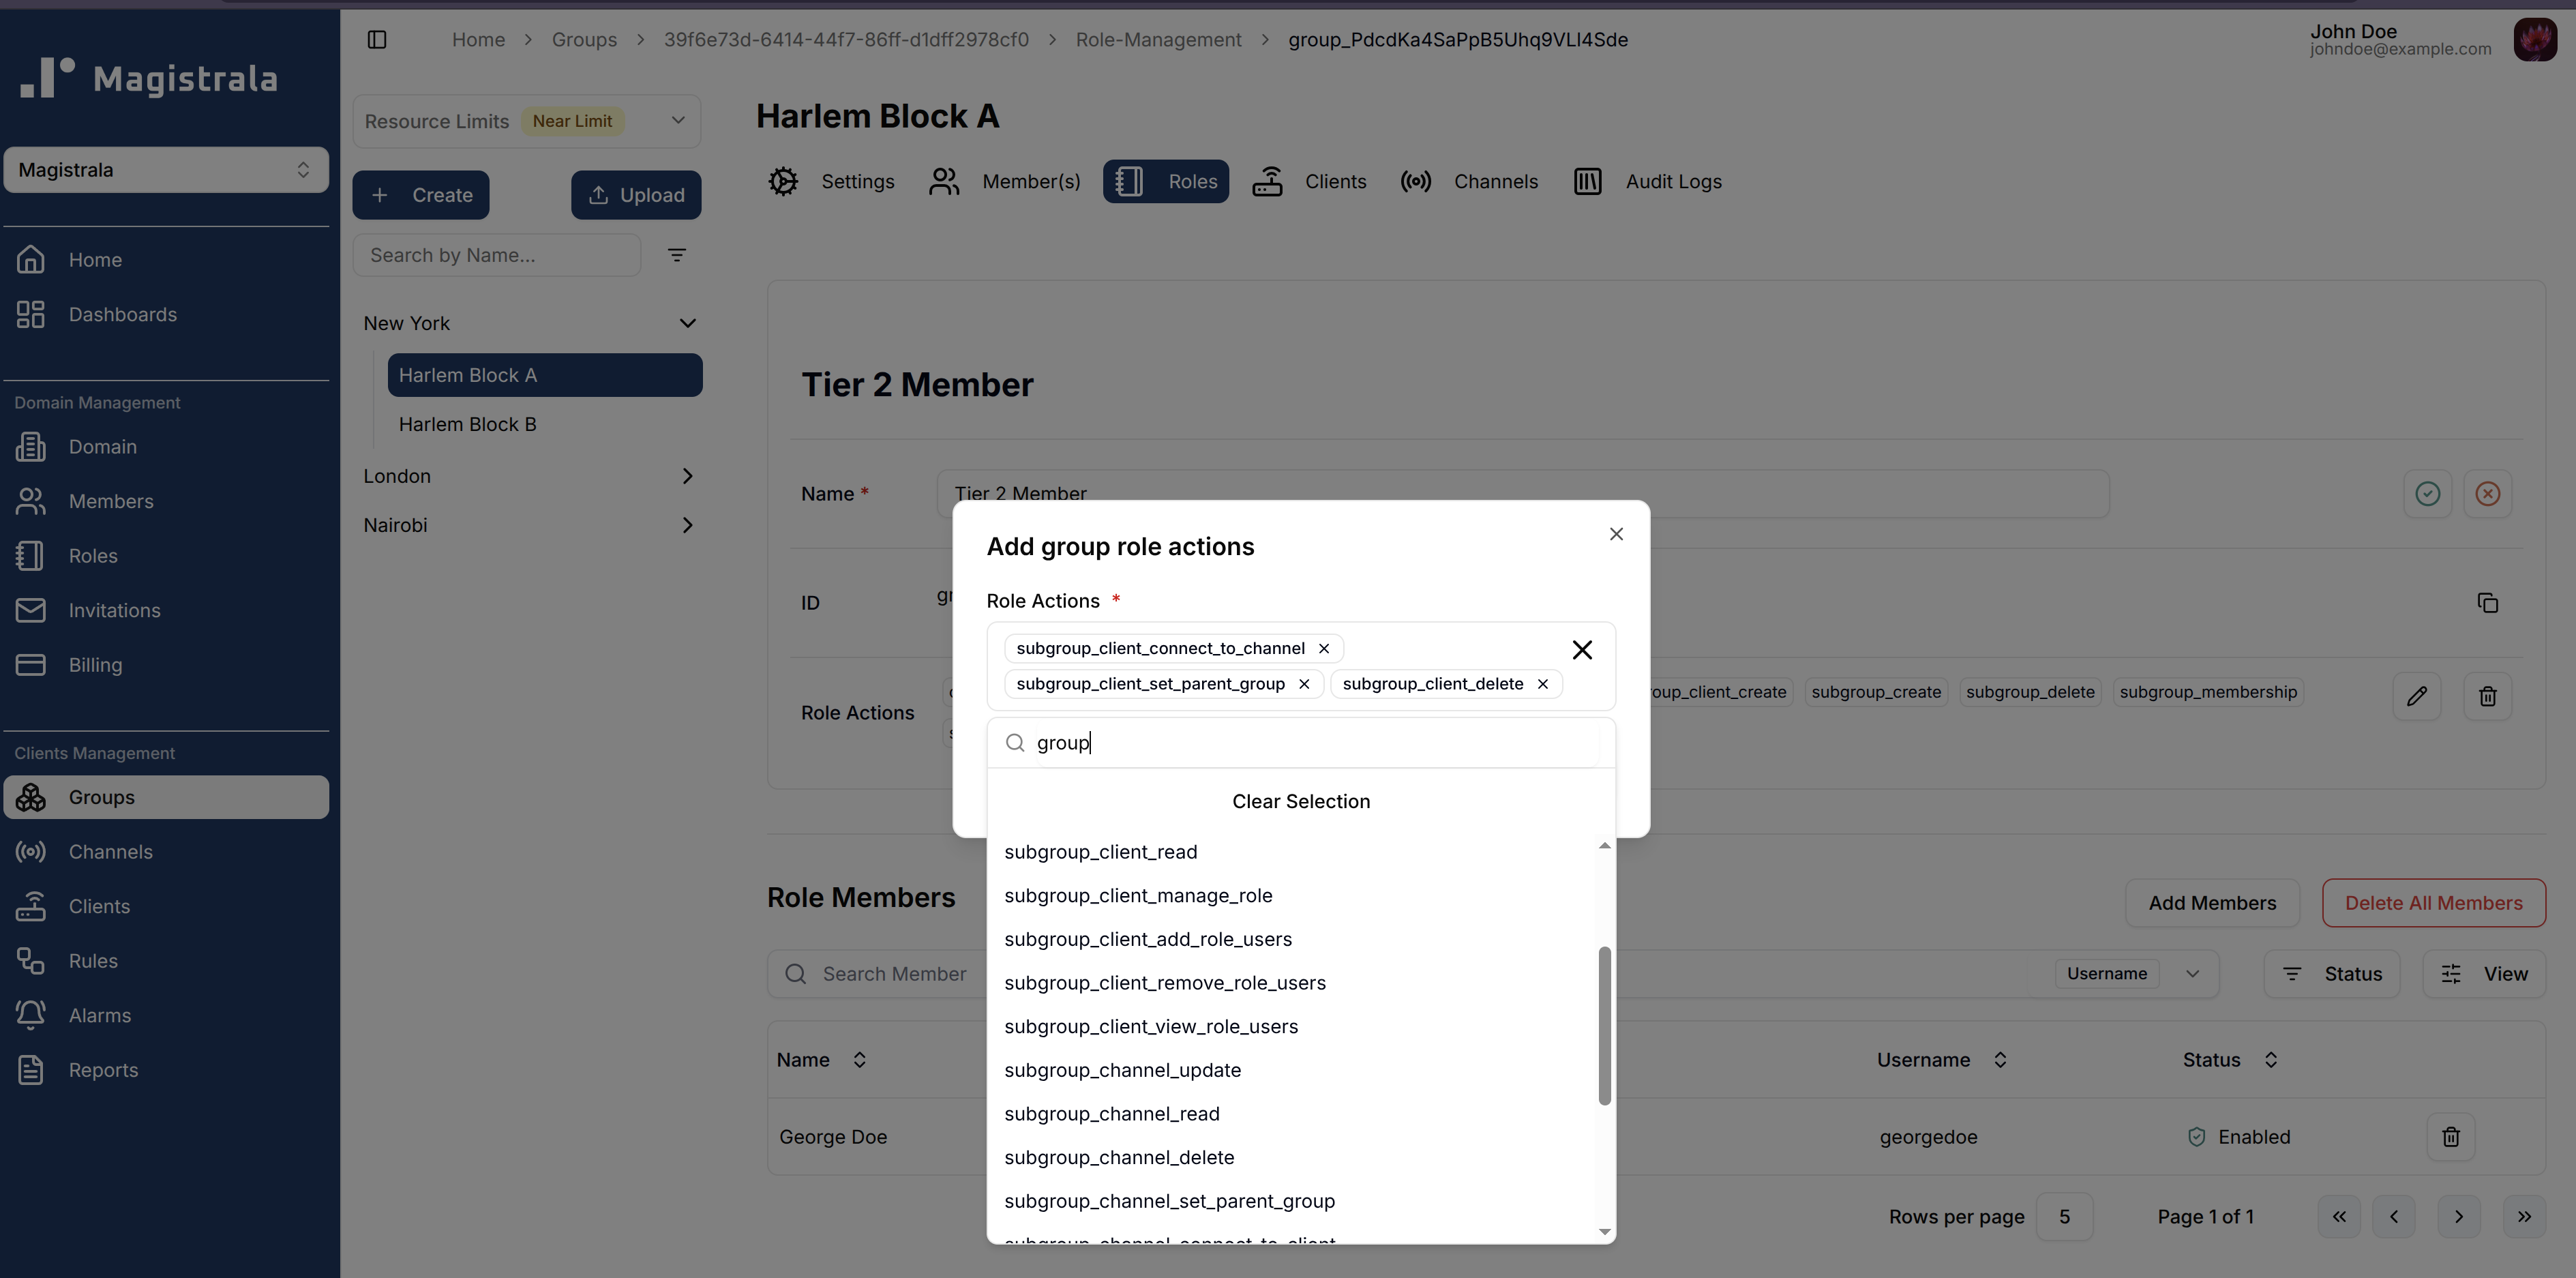
To update the actions click on the pencil iconA dialog will appear where you can select additional actions.
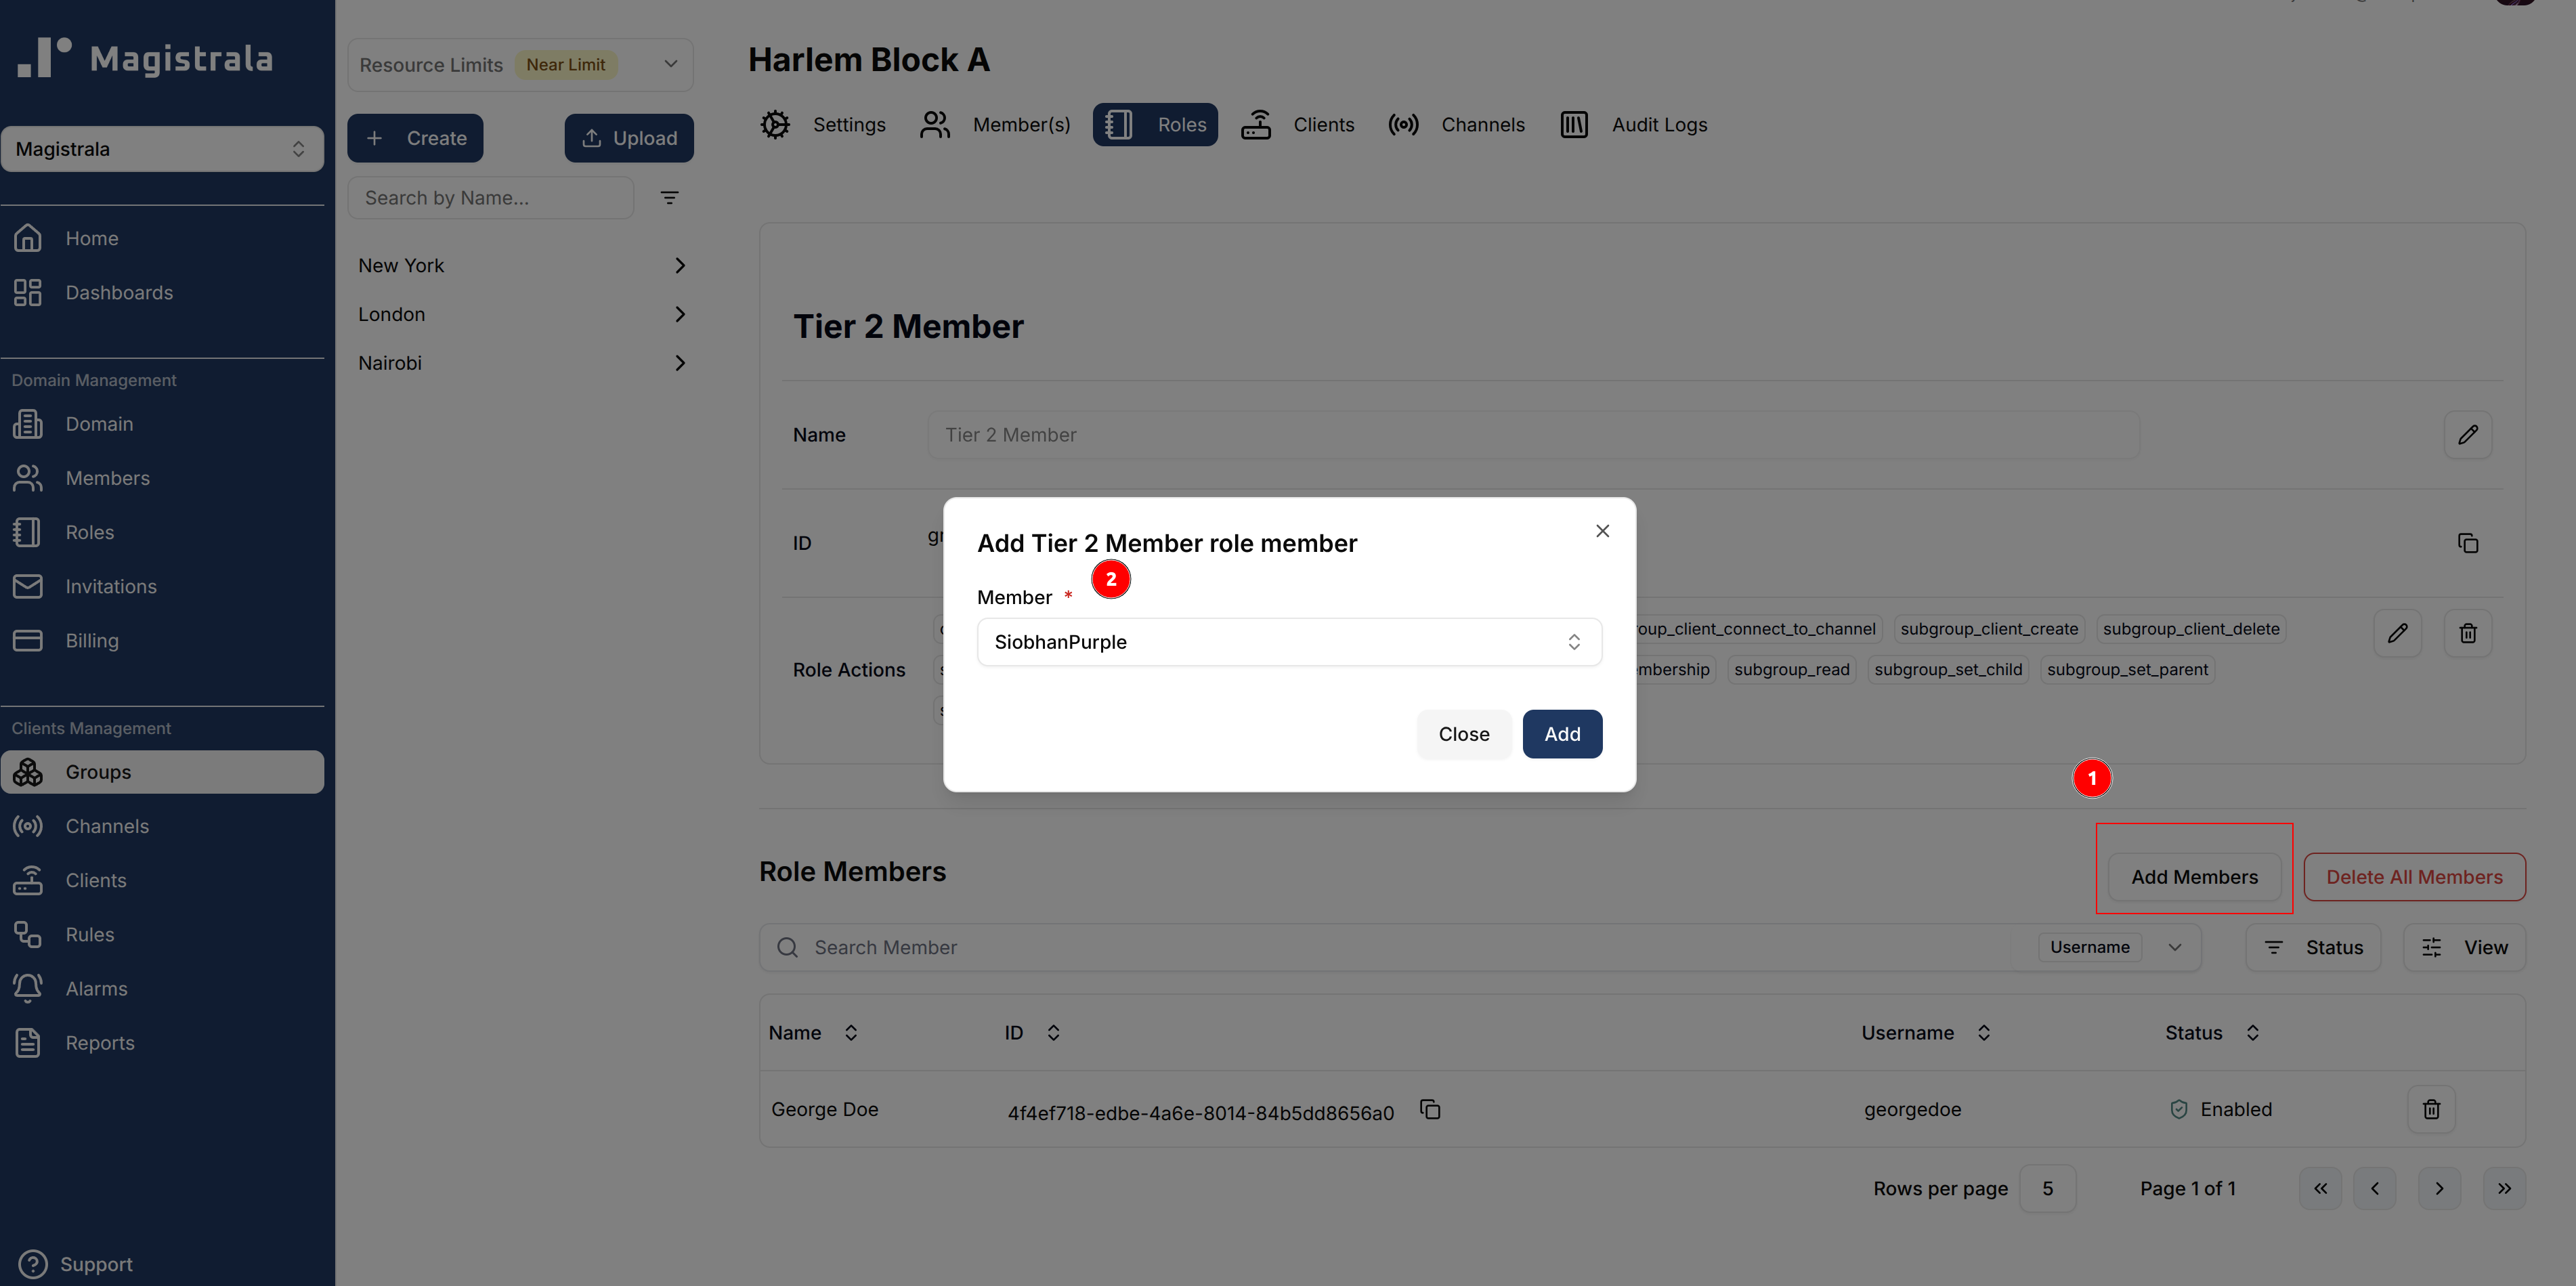
To manage role members, open the Members table and click Add Members. A dialog will allow you to search and assign users.
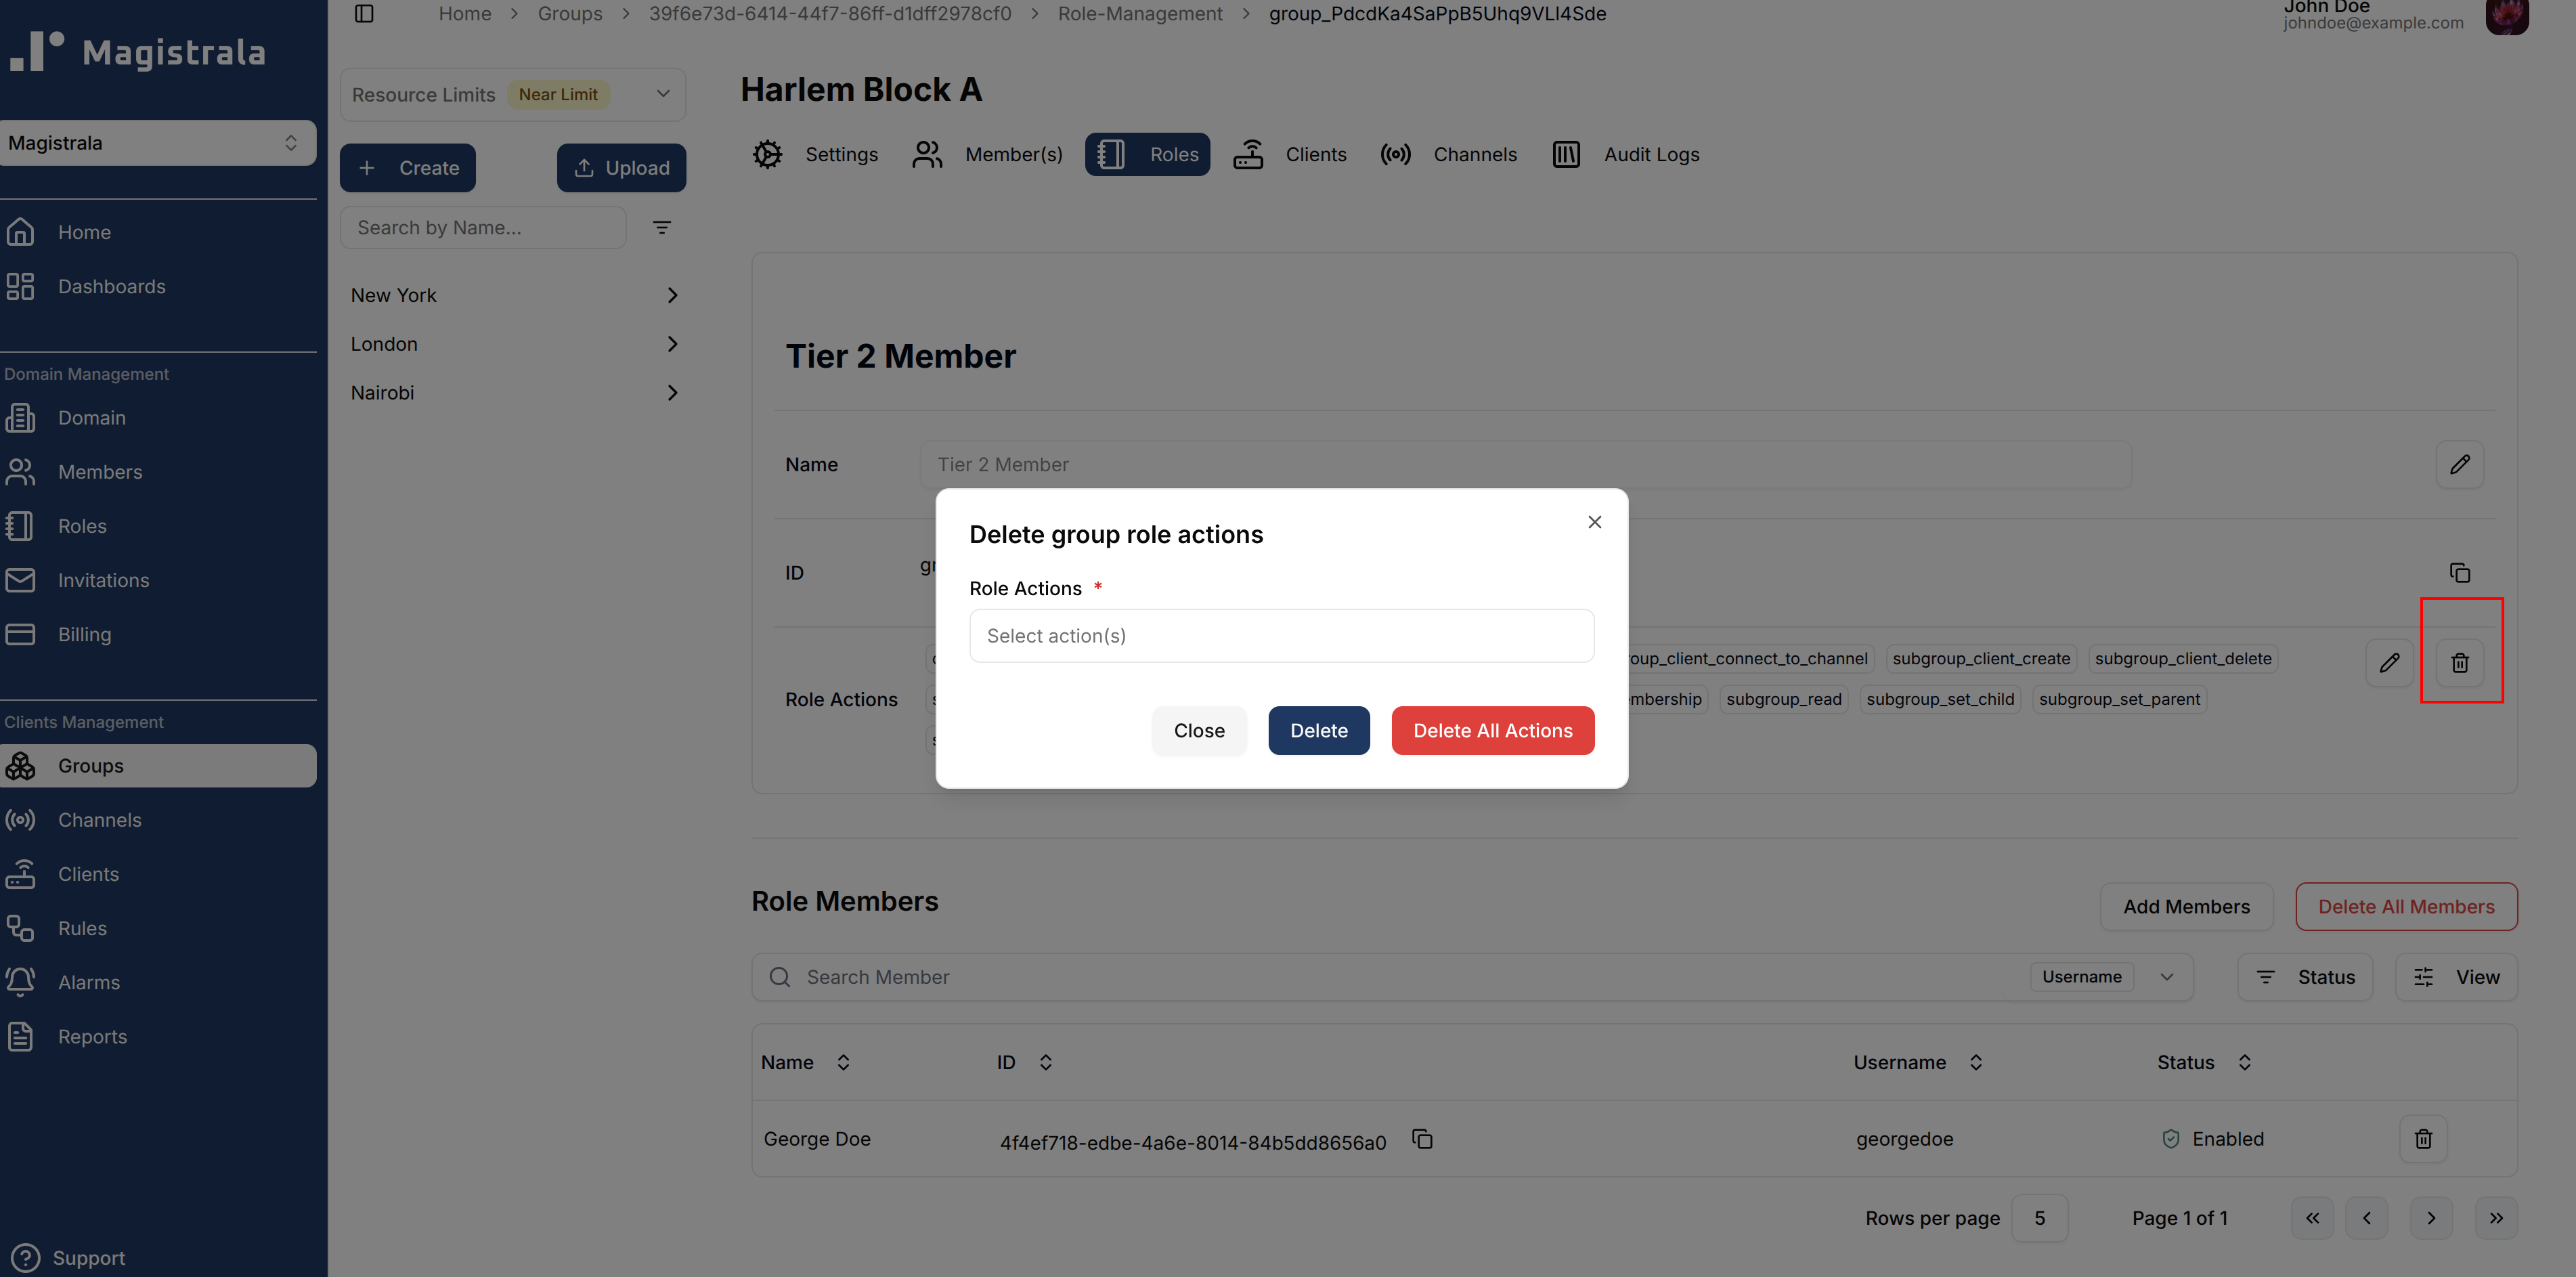
Delete Group Roles
You can also delete actions and members by clicking on the trash icon. It pops up a dialog that allows you to select which action you want to remove. Optionally you can delete all of the actions by clicking on the Delete All Actions buttons.
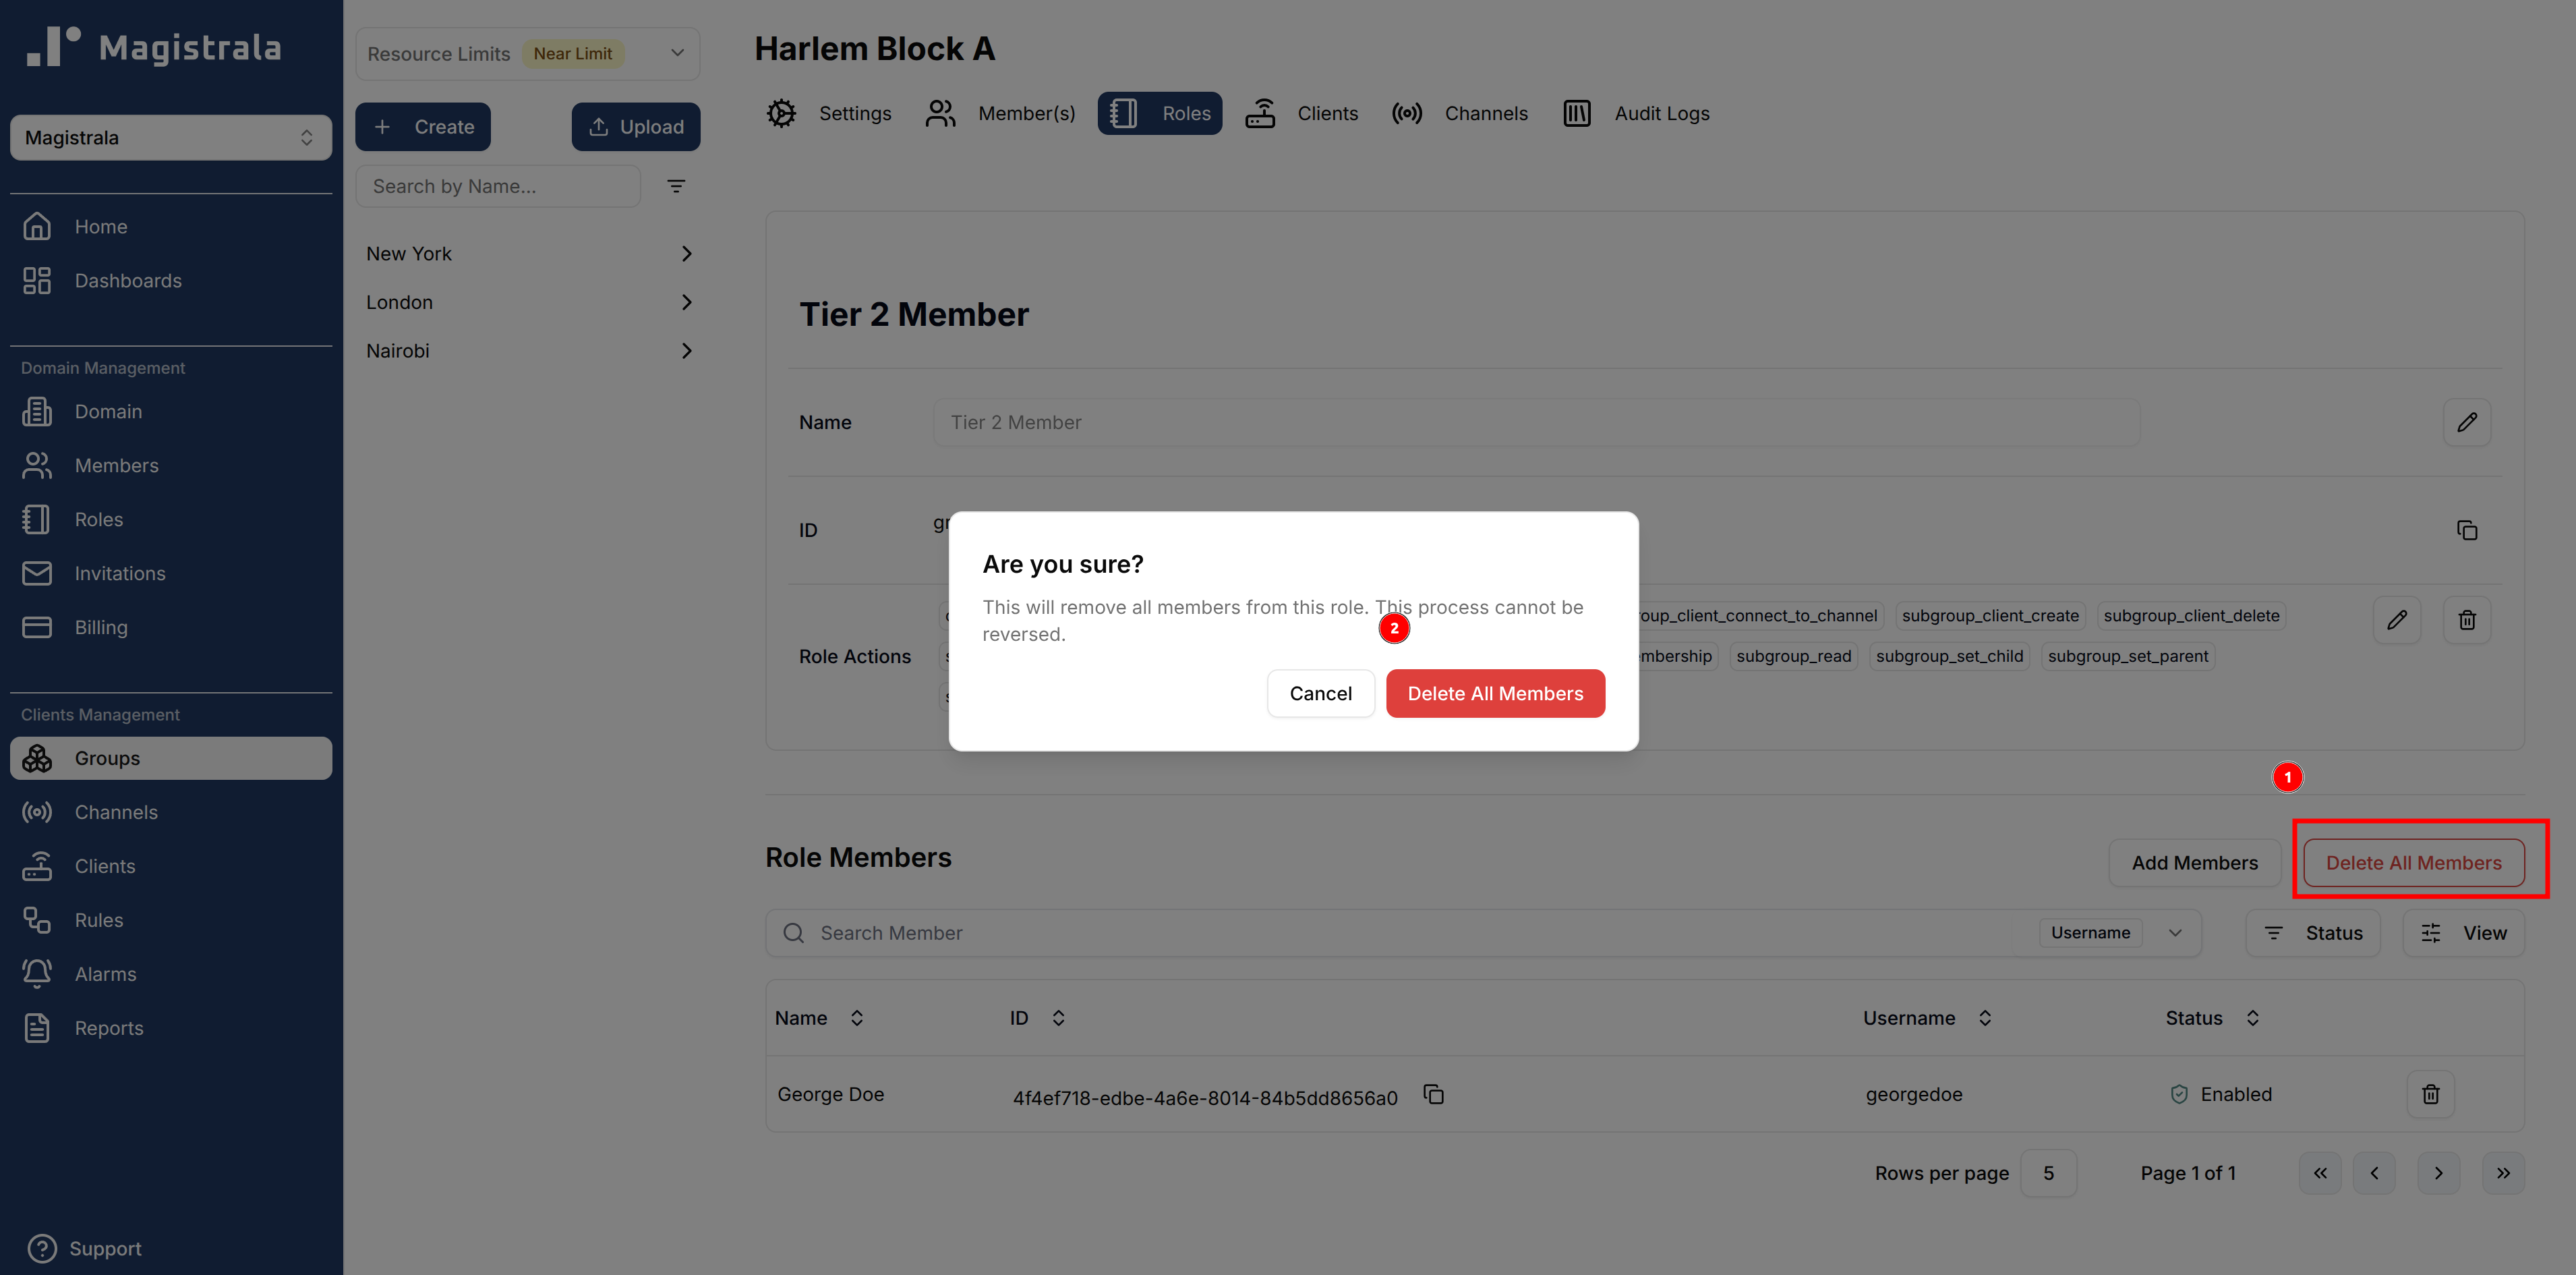
To delete All the Members in the Role simply use the Delete All Members button and click on the confirmation.
The Members table also has individual trash icons on each row which facilitates deleting specific Role Members.
Group Members
We can assign a user to a group by adding them as role members. This allows a user to be able to carry out the actions present in the role over the specific group.
To add role members, one can add them when creating a role or in the specific role page. This has been discussed in the earlier Roles section.
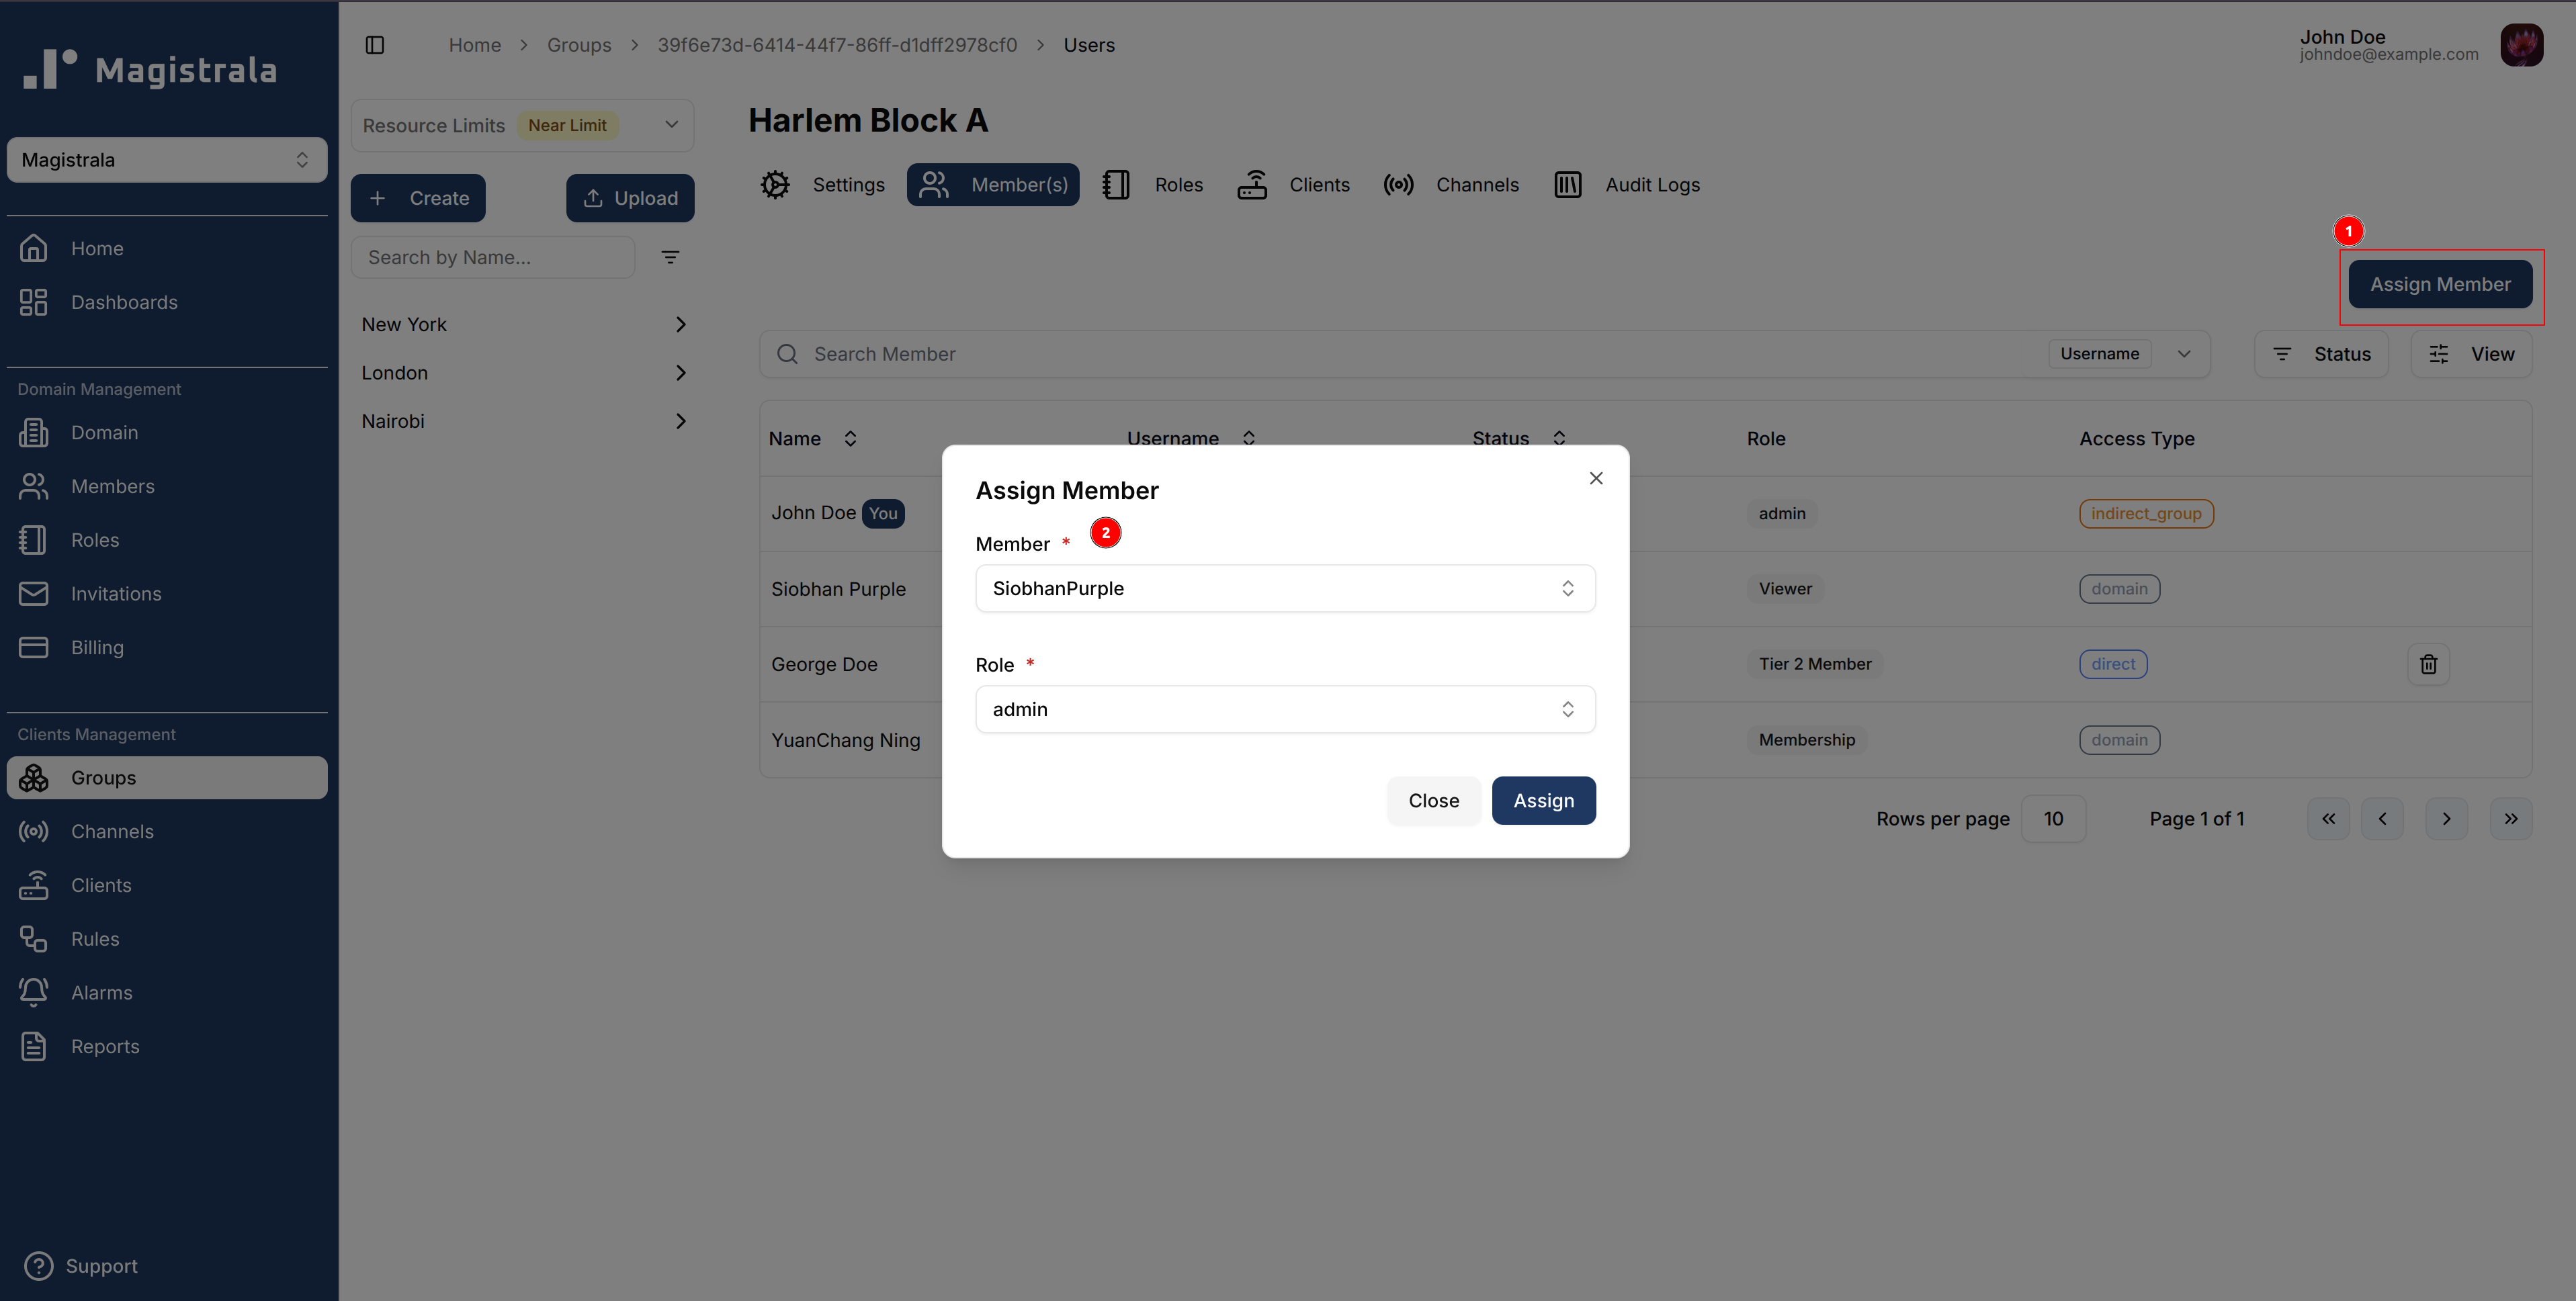
We have the capacity to add users by assigning them to a group in the Members section of the group. This will allow you to assign a user to a group by adding them to a specific role.
To remove members, use the trash icon next to each user.
Group Clients
Groups support managing clients directly at the group level.
From here, you can create, update, enable, disable, delete, assign, and connect clients.
(See the Clients section for a full overview of client functionality.)
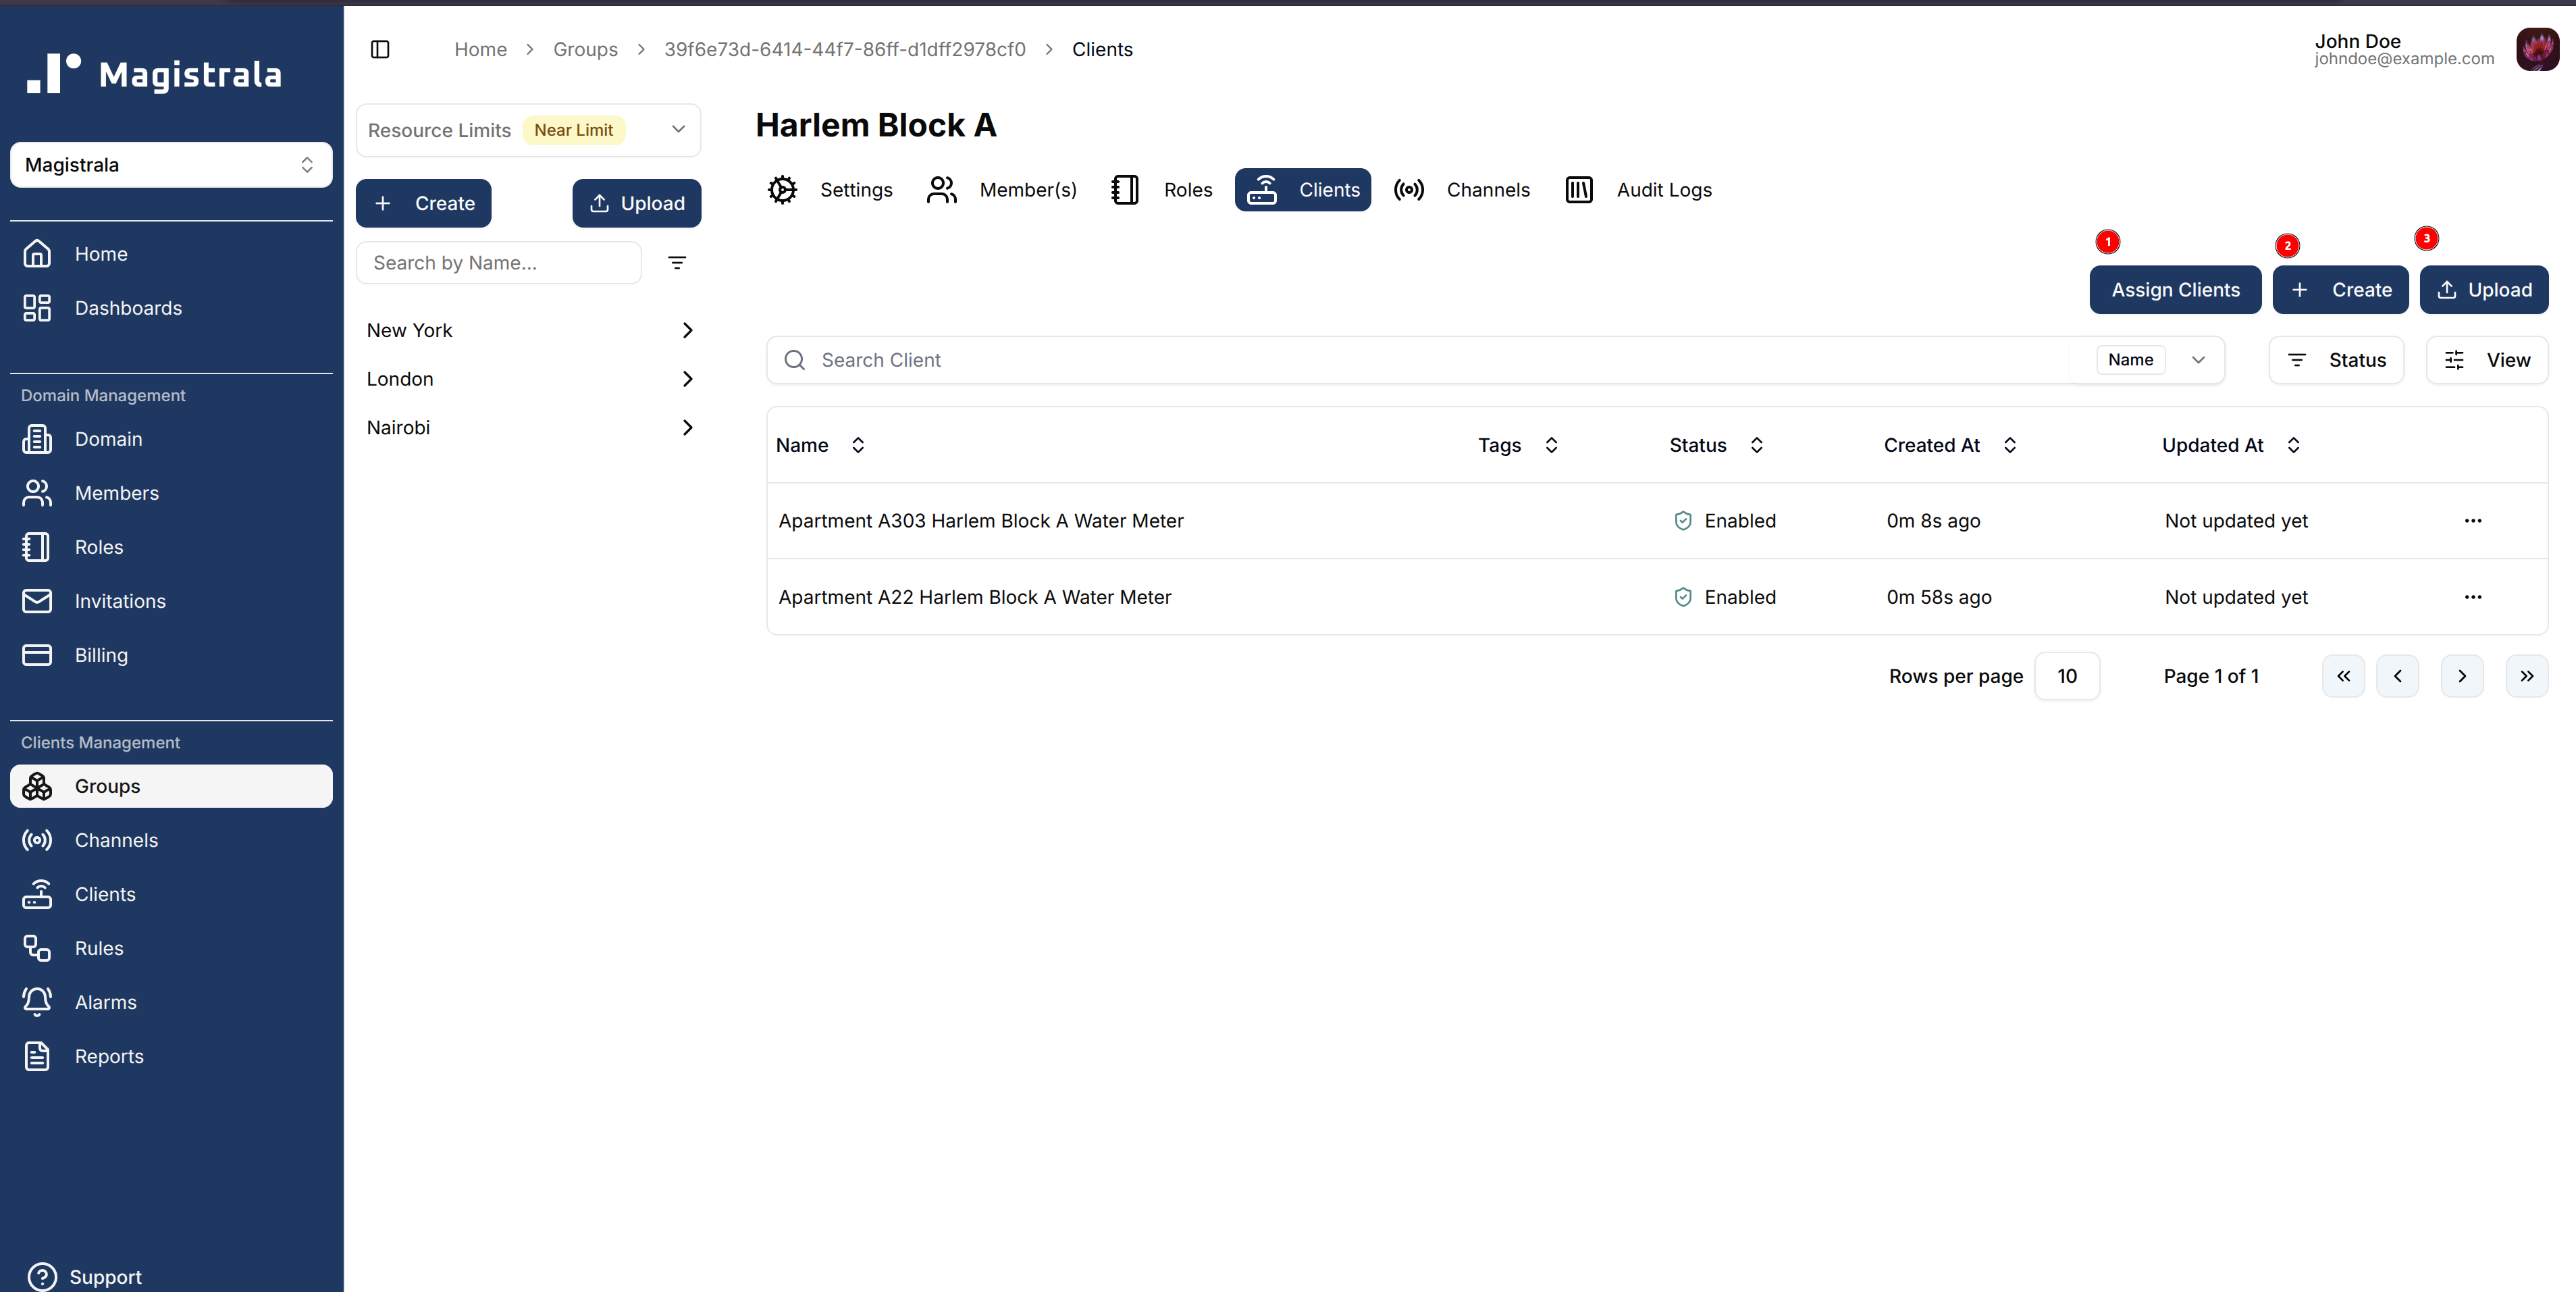
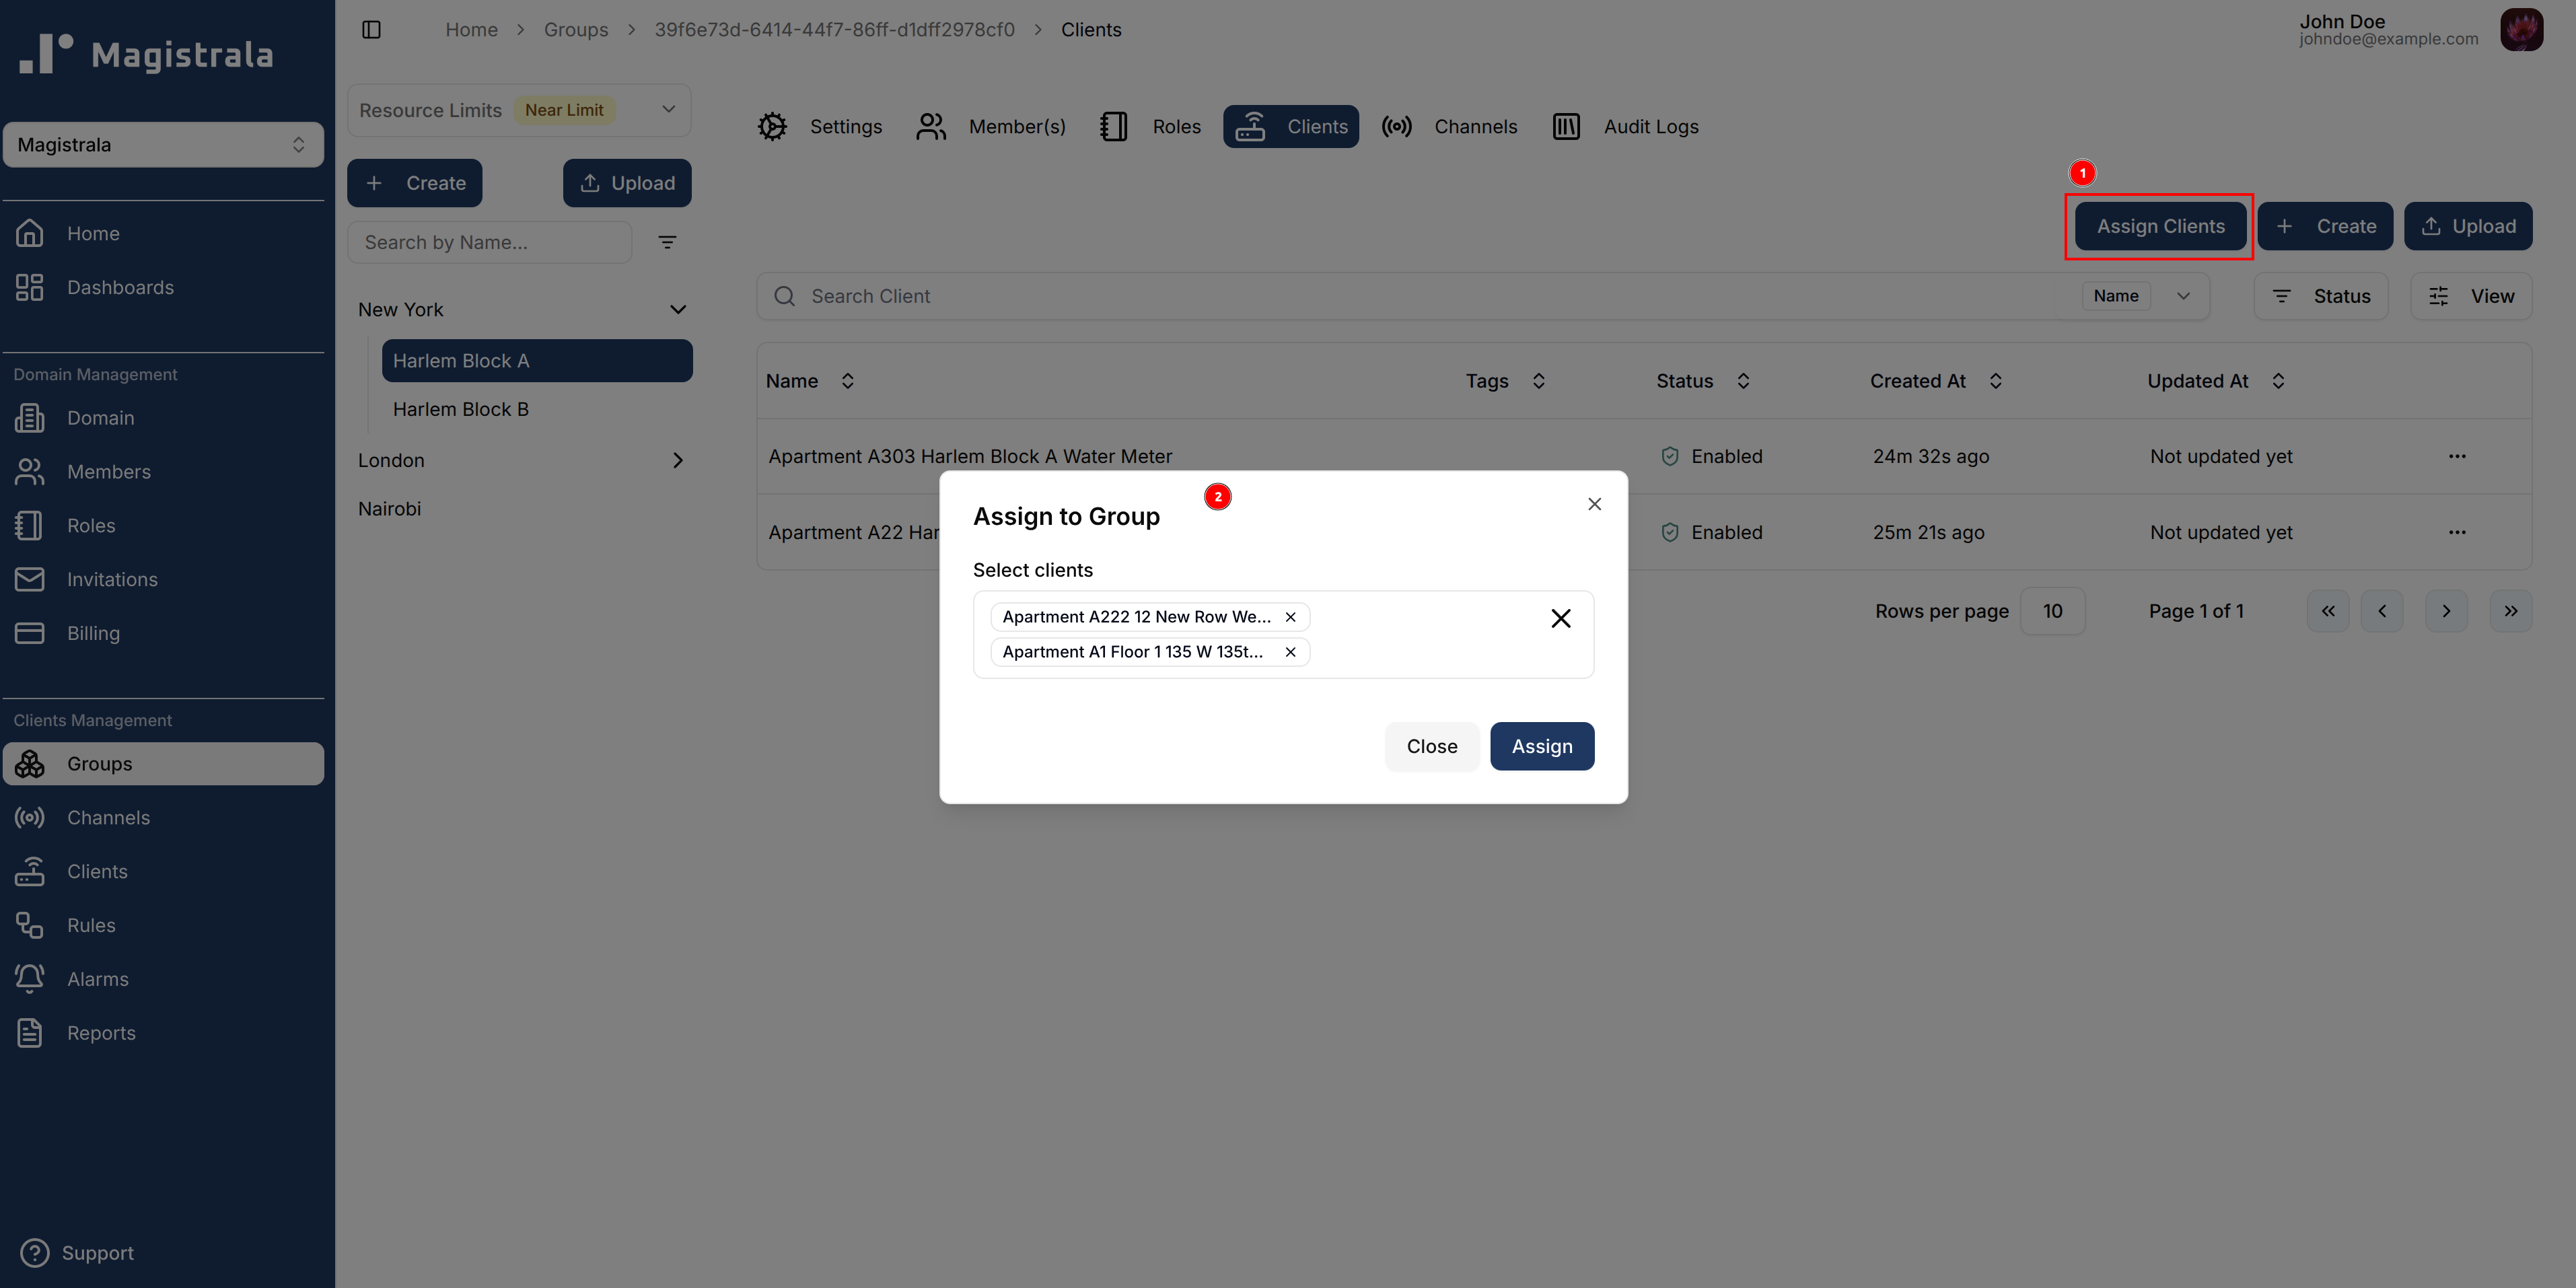
To assign clients to a group, click on the Assign Clients button.
A dialog will open where you can select multiple clients to attach to the group.
Group Channels
Groups also support managing channels directly at the group level.
You can create, update, enable, disable, delete, assign, and connect channels.
(See the Channels section for more details.)
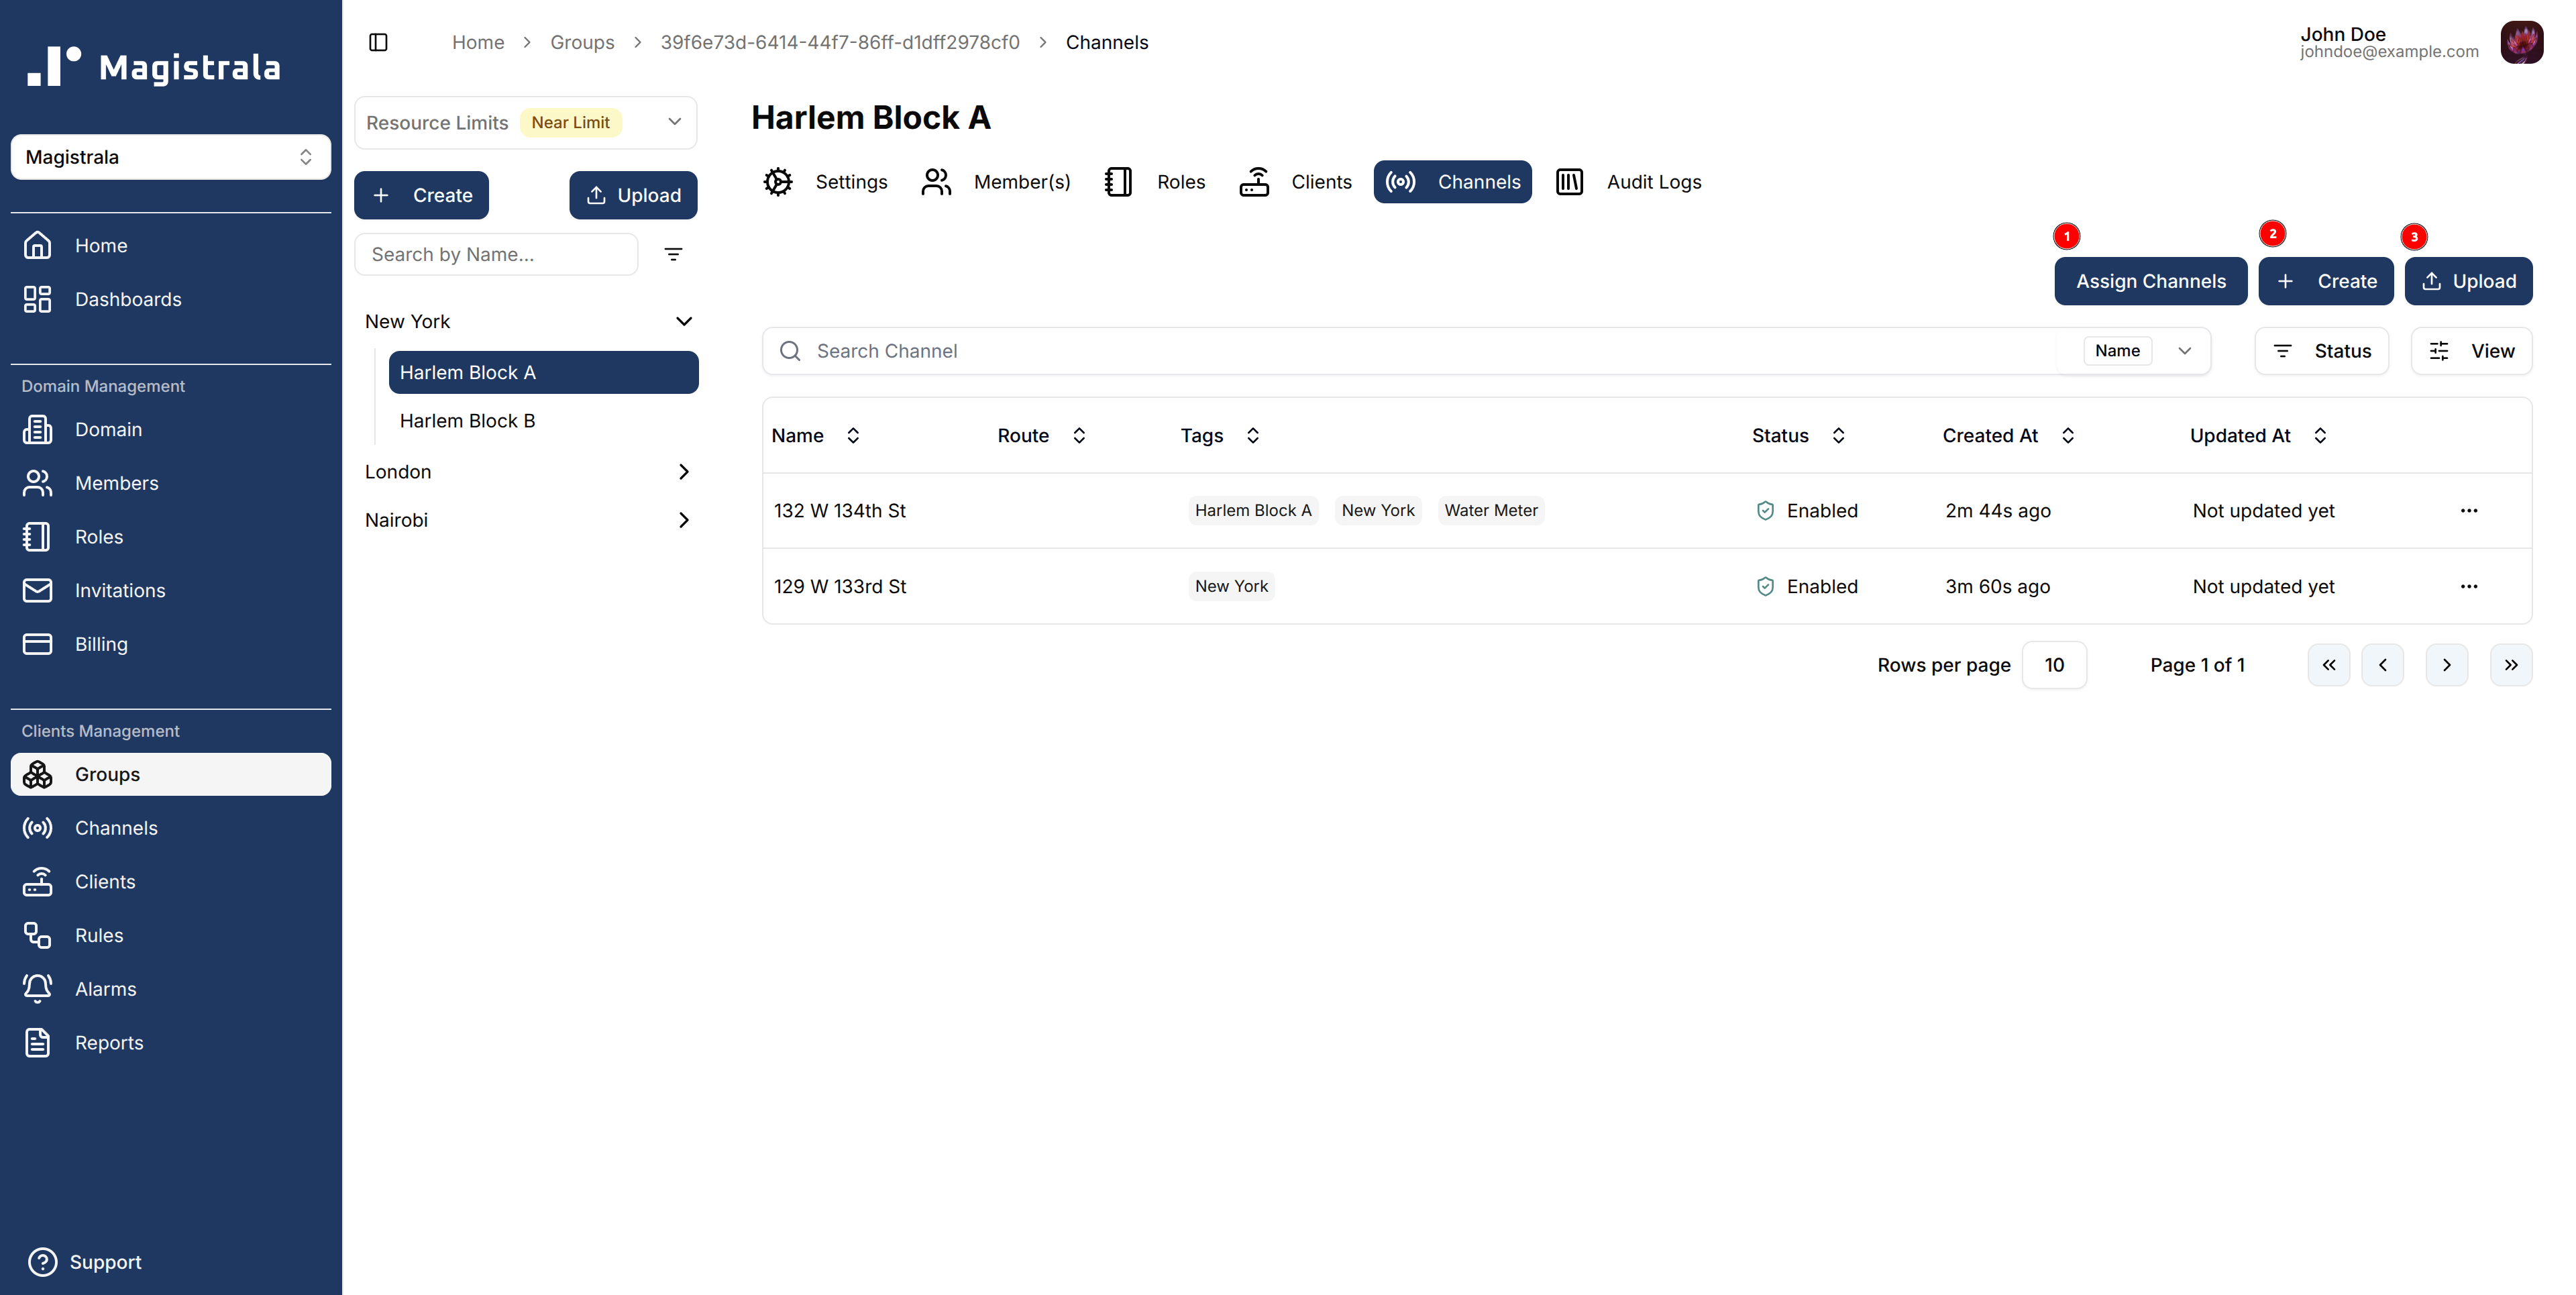
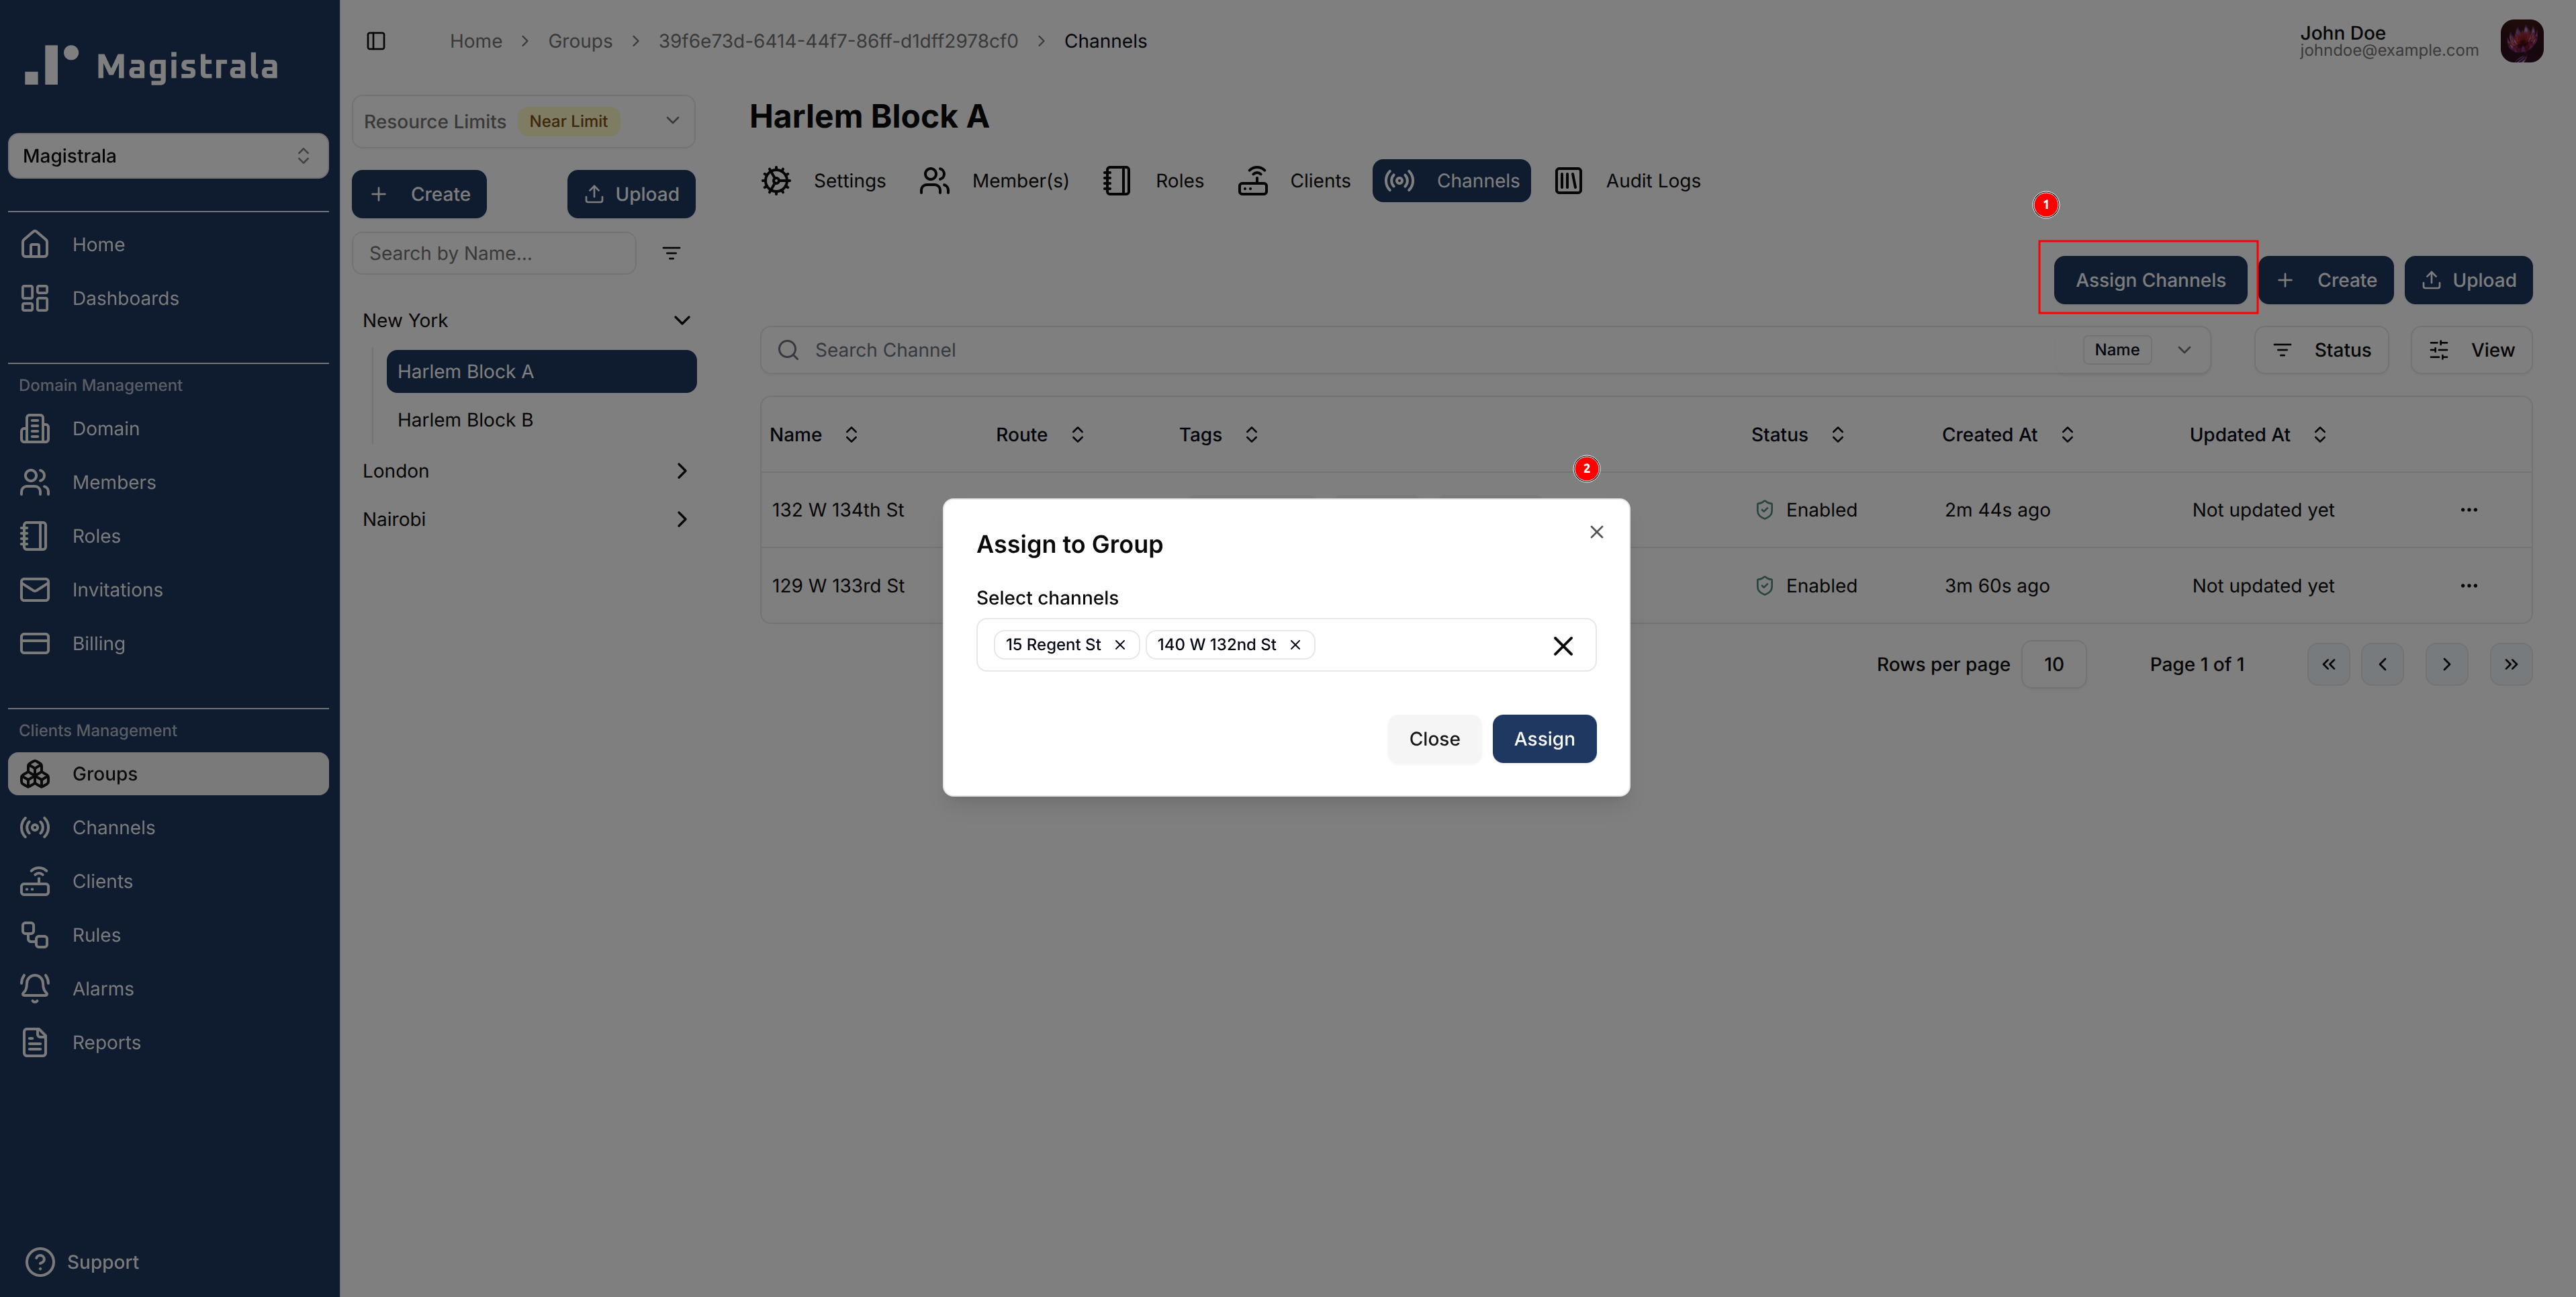
To assign channels to a group, click on the Assign Channels button. A dialog will open where you can select multiple channels to attach to the group.
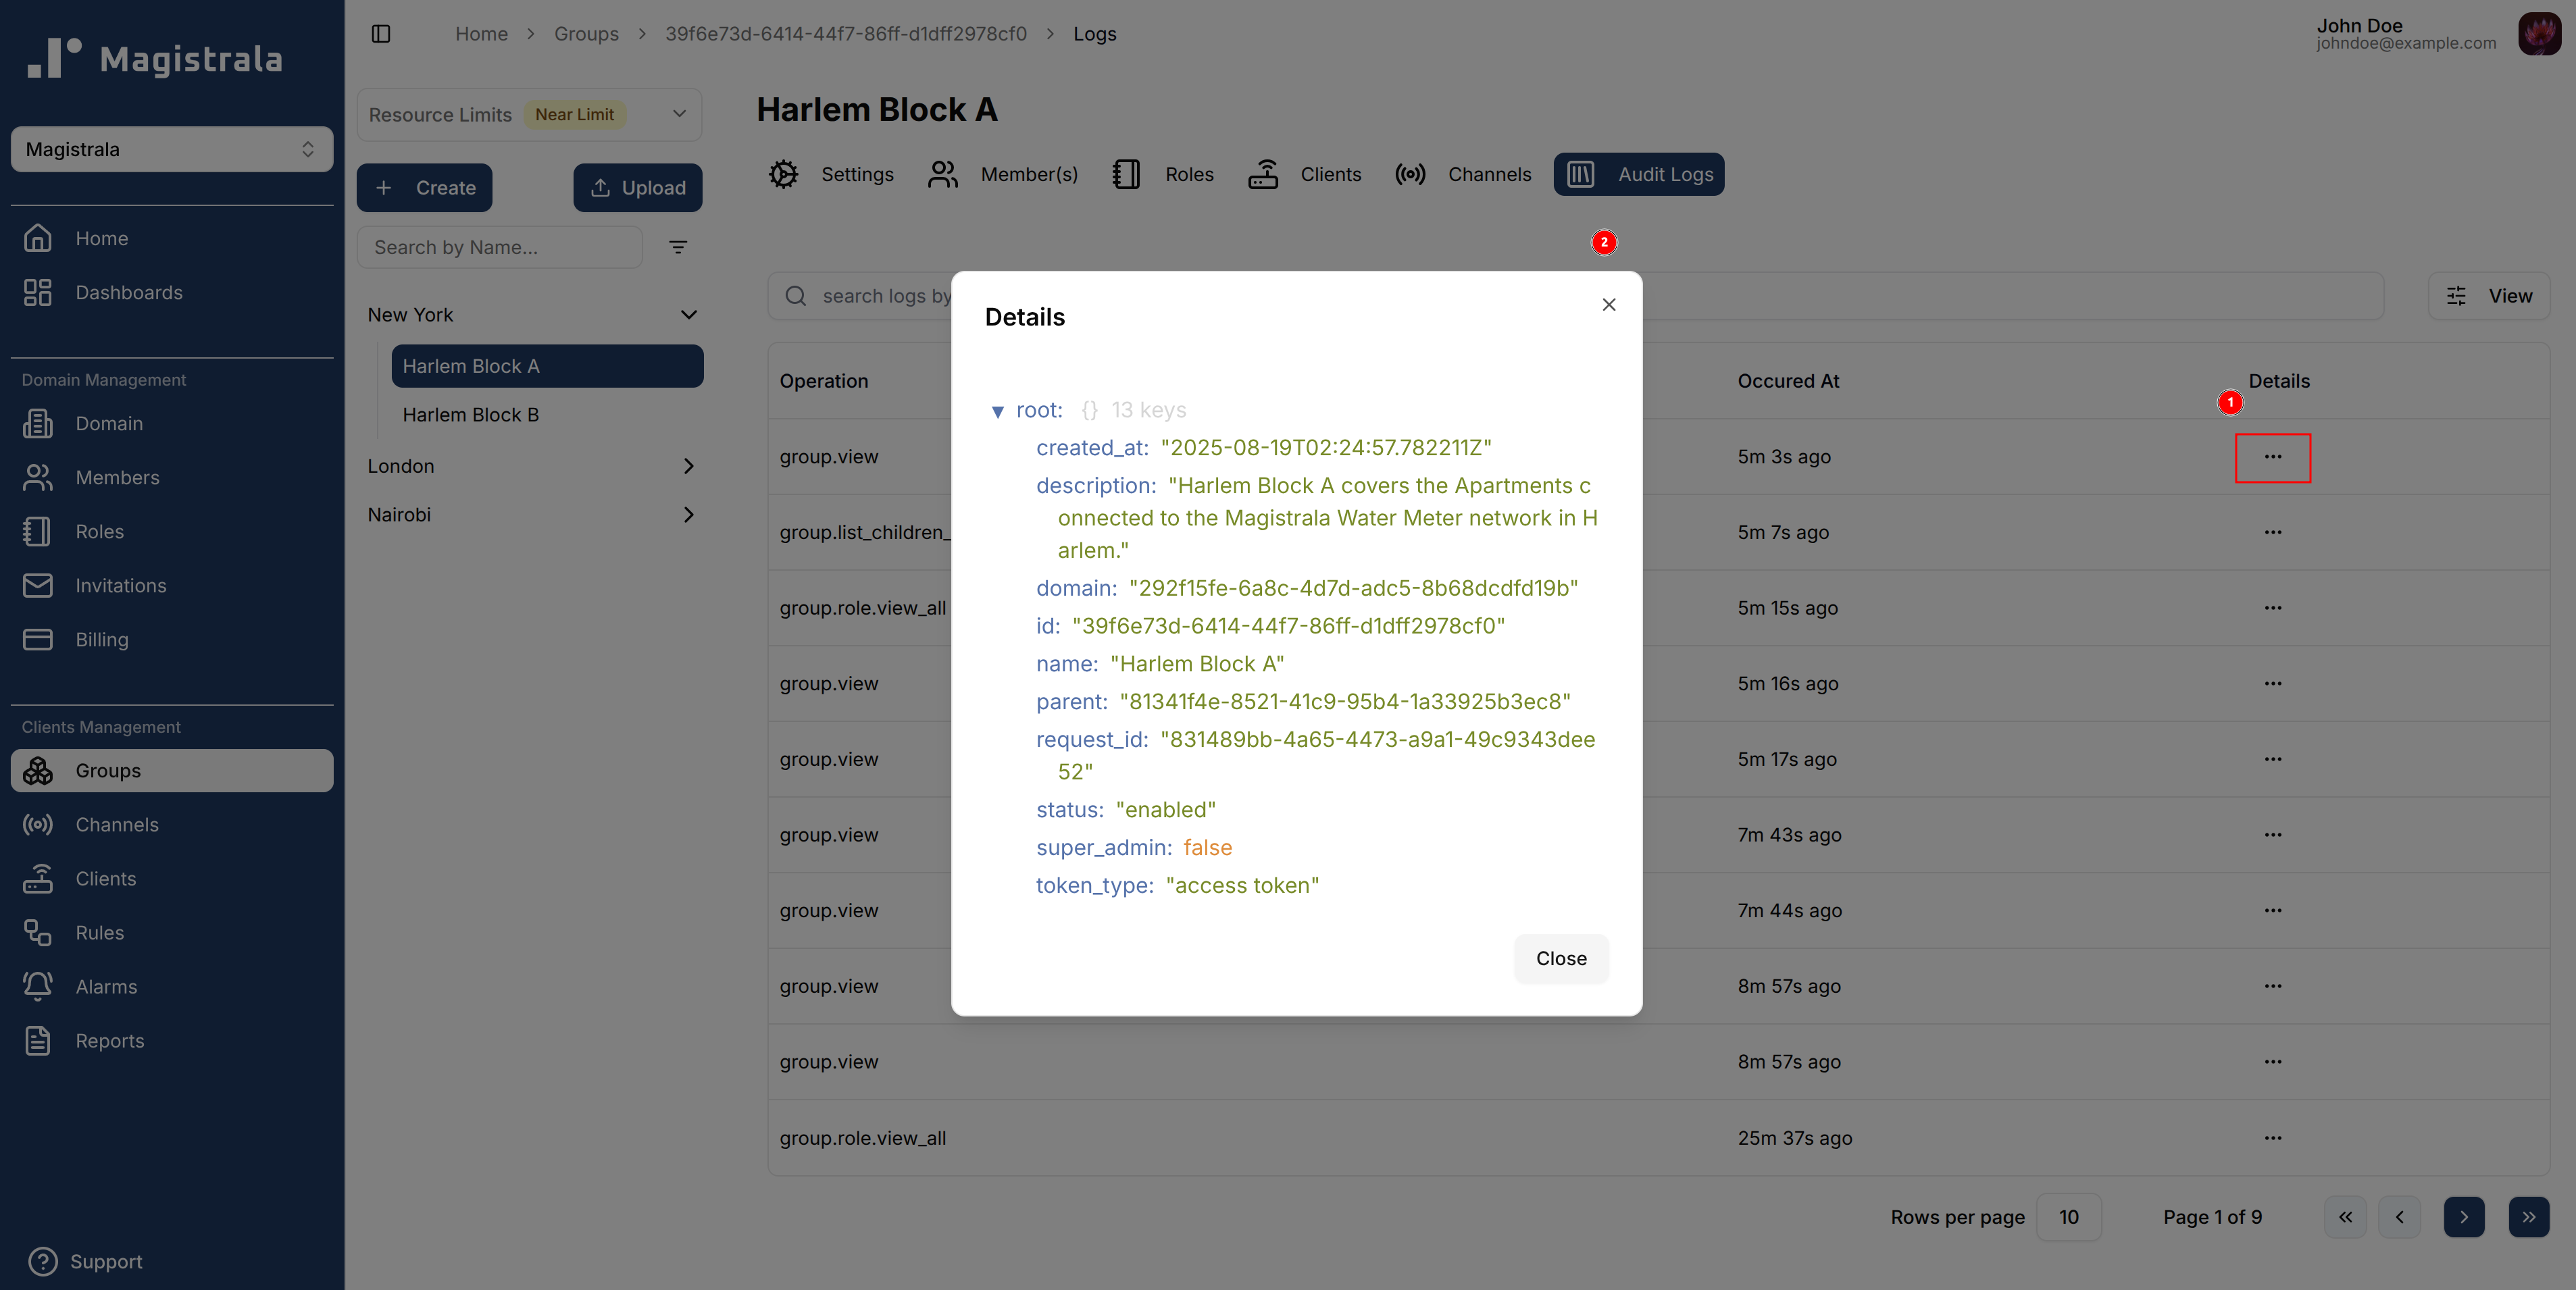
Audit Logs
Audit logs track all group-related events, including creation, updates, disabling and role changes.
Each log entry displays the operation type, a timestamp, and optional details for deeper inspection.
You can search logs by operation type using the search input above the log table.
The most recent operations—such as group.view, group.create and group.assign—are displayed at the top.

Clicking on the Details button at the end of each row opens a modal displaying structured details about the selected operation.
These details may include:
created_at: Timestamp of group creationupdated_at: Timestamp of the last updateid: Unique group IDname: Full group name, e.g.,"Harlem Block A"parent: UUID of the parent group, if applicablestatus: Whether the group is"enabled"or"disabled"super_admin: Indicates if the group is flagged as a super admindomain: Associated domain UUIDrequest_id: Unique request UUID for tracinguser_id: UUID of the user who performed the actionupdated_by: UUID of the user who last updated the grouptoken_type: The type of token used for the action (e.g.,"access token")
This enables users to trace changes, audit hierarchy, and verify authorization events efficiently.
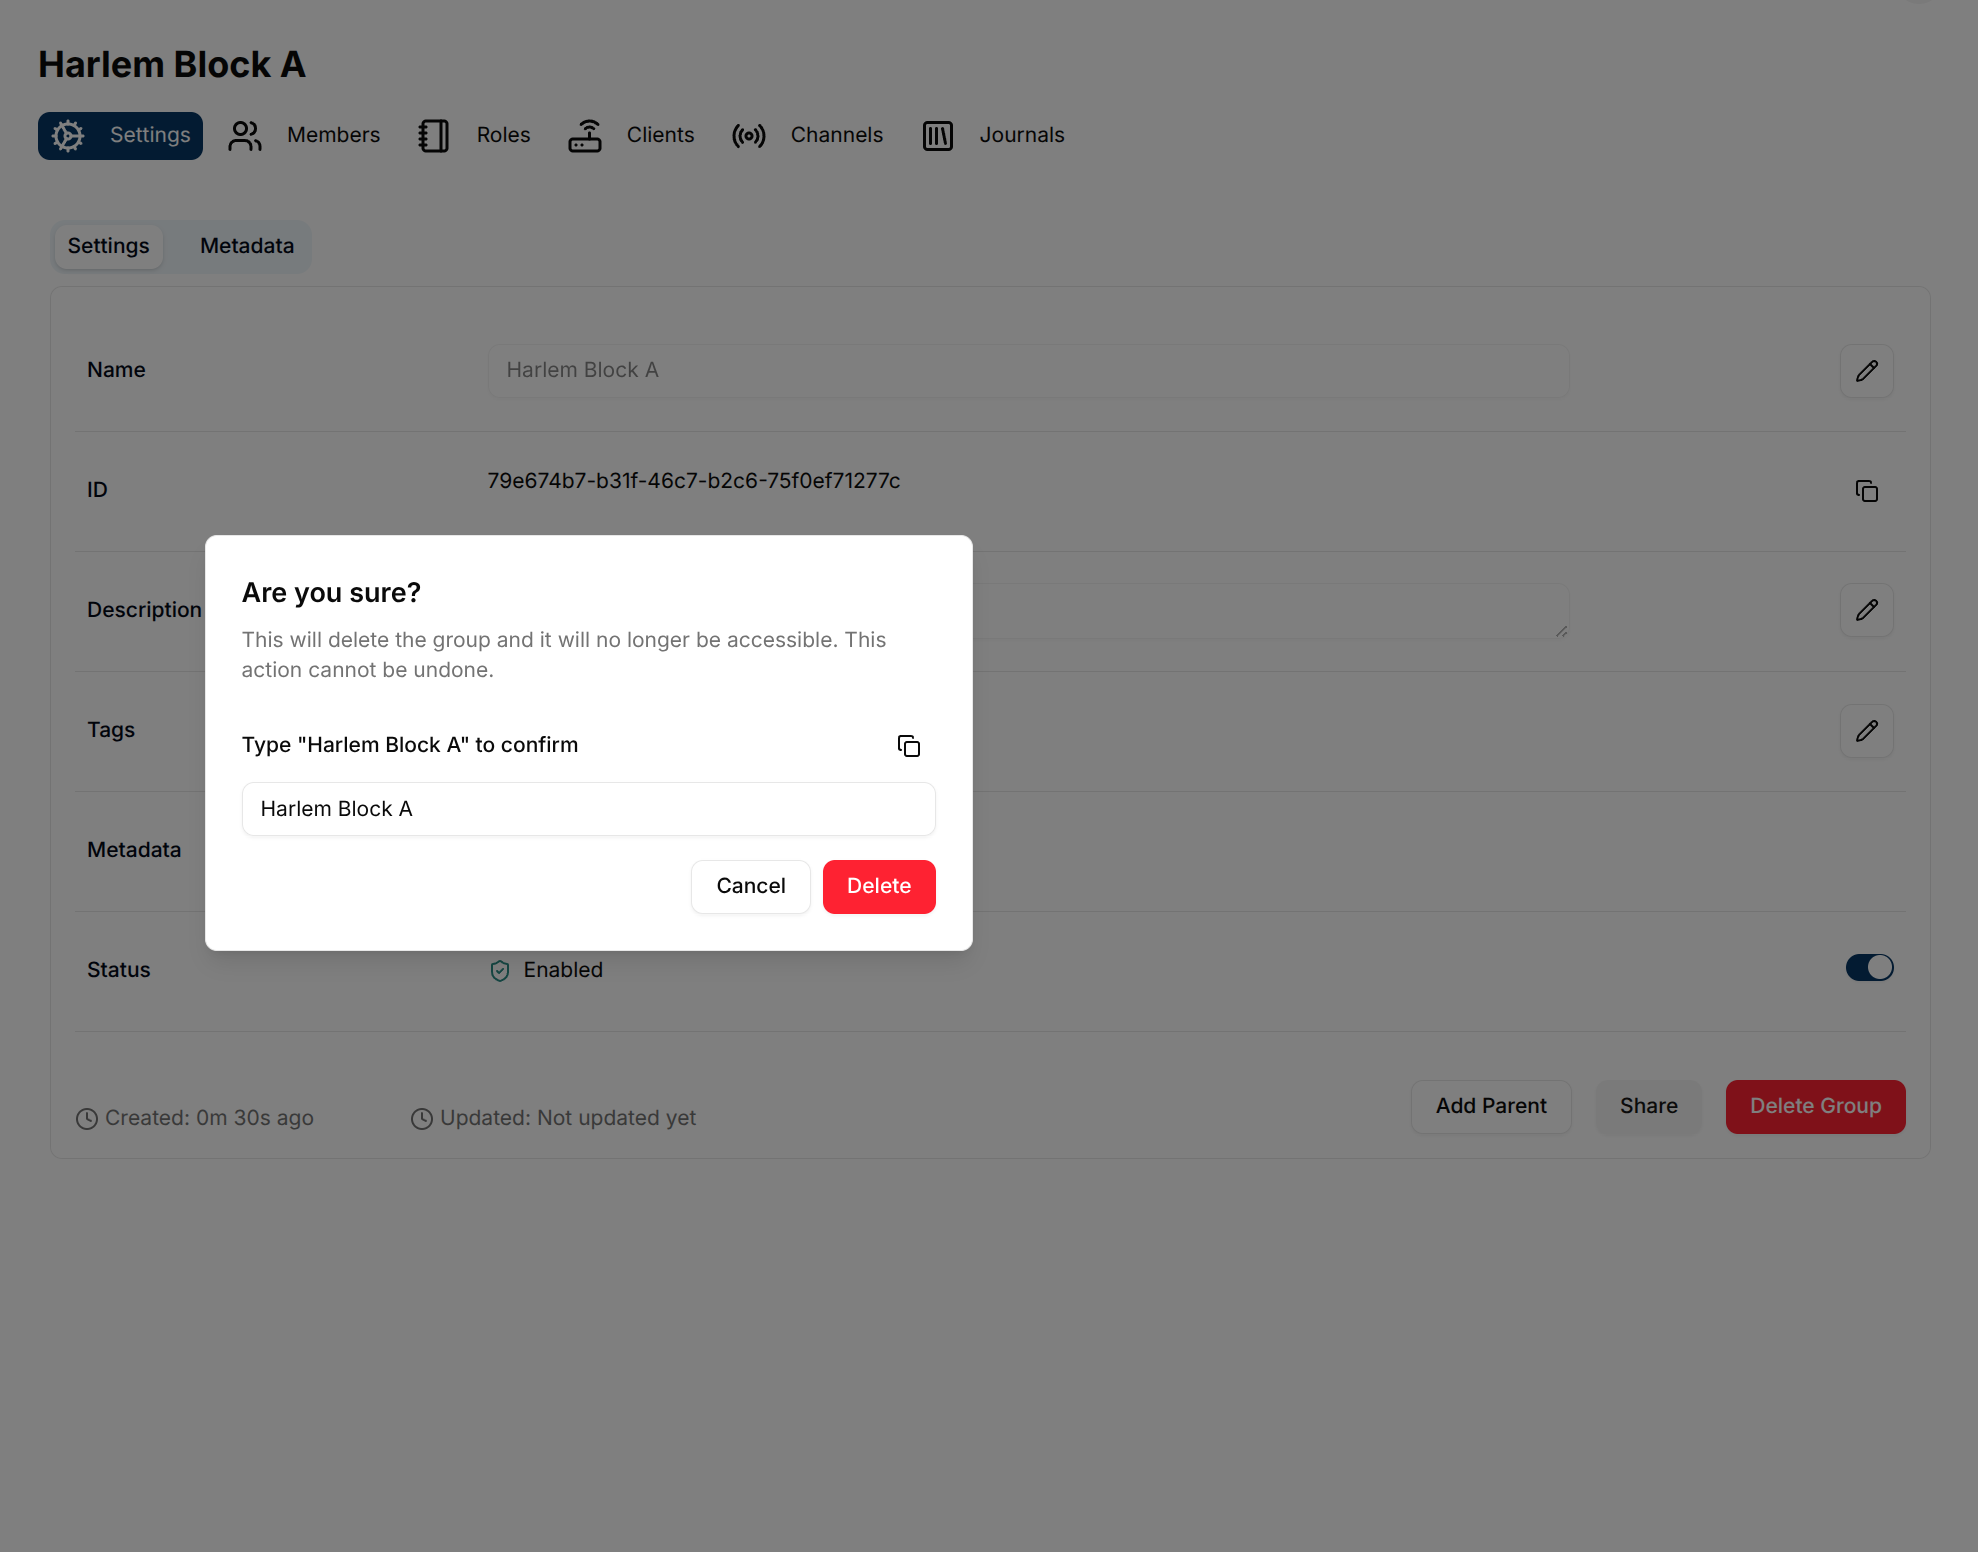
Delete a Group
To permanently delete a group, click the Delete Group button. A confirmation dialog appears asking you to type the group’s name — use the copy button to copy it, paste it into the input field, then click Delete to finalize.